If you frequently receive queries in languages you/your team members don't understand, you can utilize the Google Translate integration in Chatwoot. When enabled, you can instantly translate incoming messages using the right-click menu. This way, you can easily communicate with customers in their native language, even if you don't speak it yourself.
How to enable Google Translate in Chatwoot?#
Step 1. Go to Settings -> Applications -> Google Translate. Click the corresponding "Configure" button.
![]()
Step 2. You'll see the Google Translate app page. Click the "Connect" button.
![]()
Step 3. Enter your Google Cloud Project ID and Project Key File. If you need help obtaining these values, refer to this doc from Google.
![]()
Once you have entered the values, click the "Create" button.
Now, your Google Translate integration is complete.
How to change the translation language?#
Your messages get translated into your site language. To select your site language, visit the "Account Settings" page.
Step 1. Go to Settings -> Account Settings -> Site Language. Open the dropdown and select your preferred language.
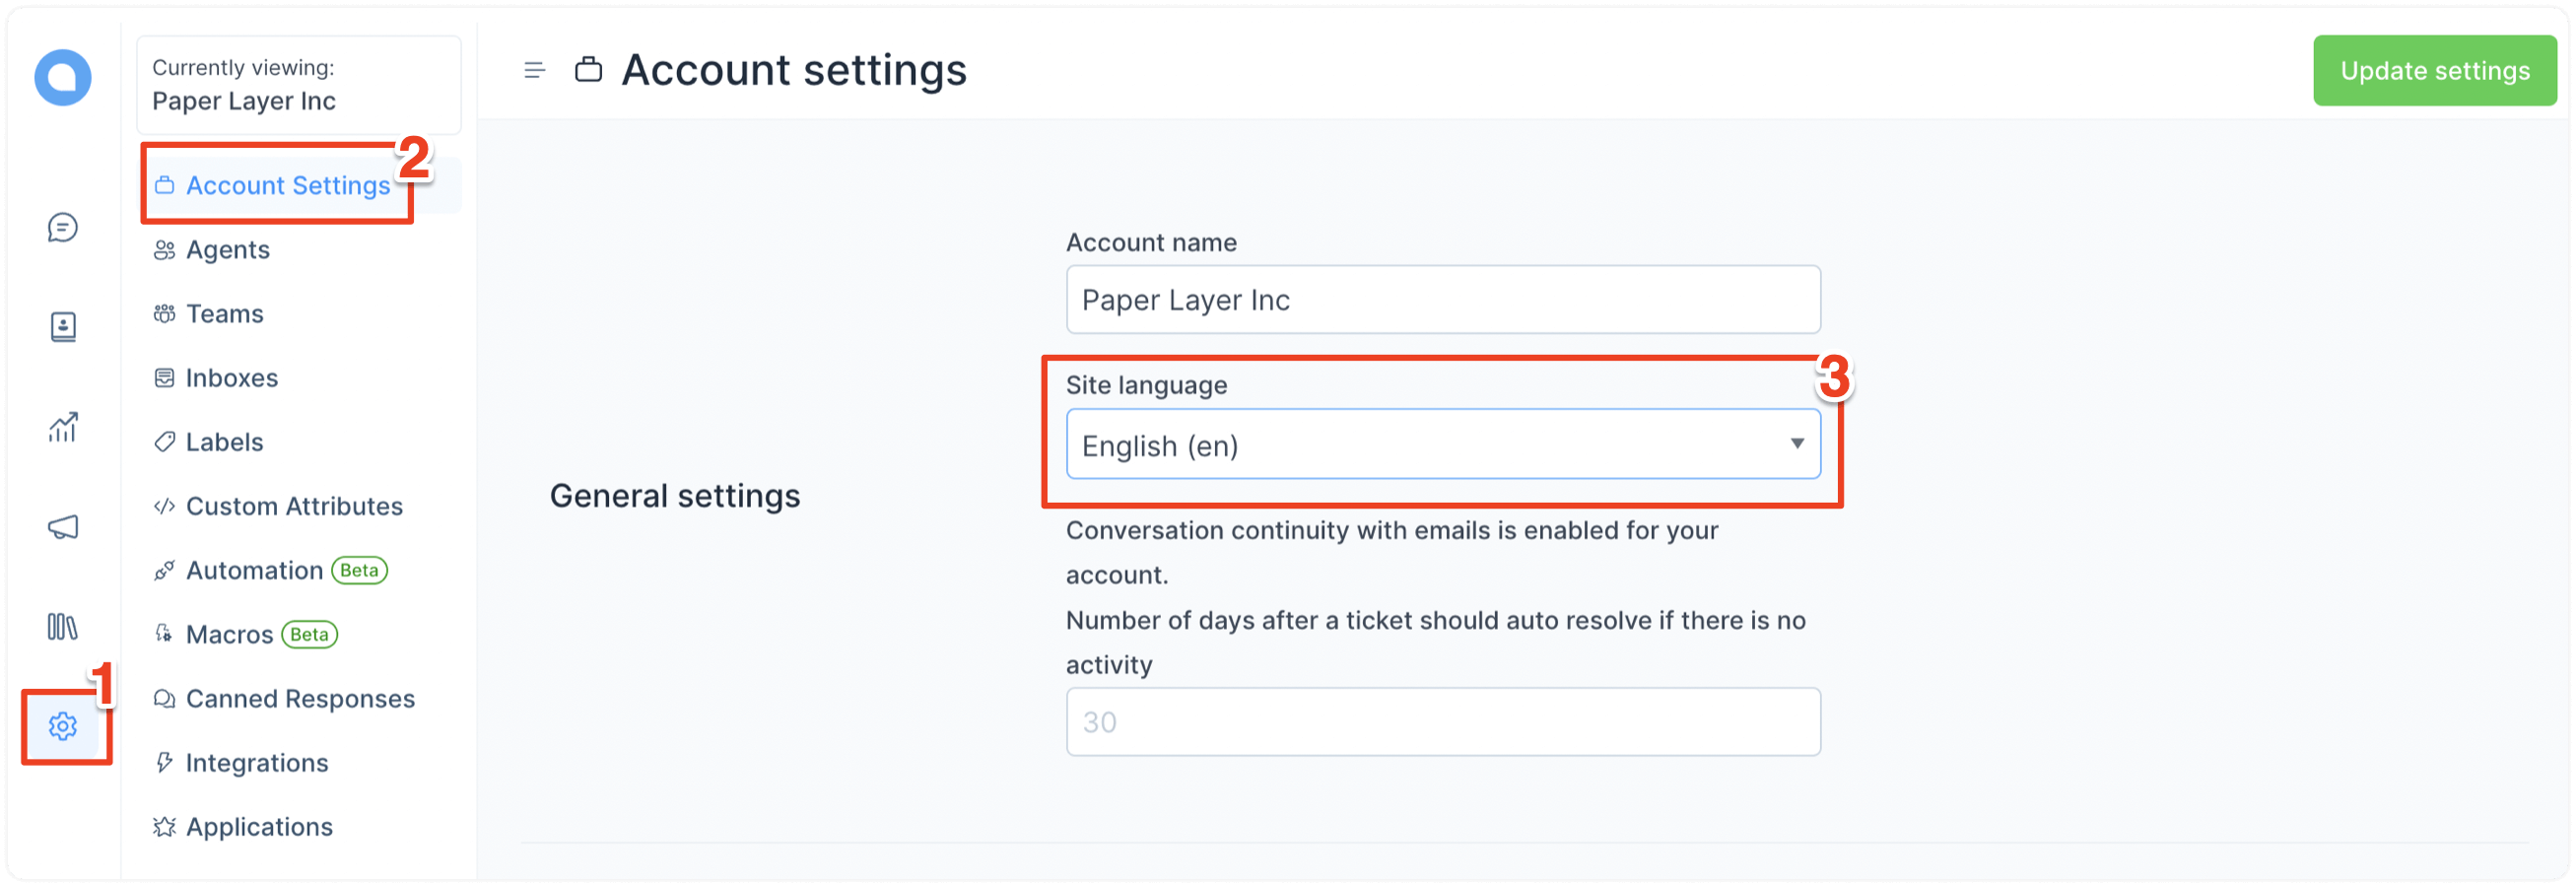
Step 2. Click the "Update Settings" button on the top-right corner of the page. This will translate your entire dashboard to the selected language.
Note: Agents can select their individual preferred languages too.
How to translate incoming messages?#
Whenever you receive a message in a language you need help with, click the 3 dots beside the message to open the menu and select "Translate".
![]()
Find the translated content inline.
![]()
How to create a service account in Google Cloud Console?#
To create a service account for the Google Translate API, start by signing in to the Google Cloud Console and selecting or creating a new project. Once your project is ready, enable the Cloud Translation API by navigating to “APIs & Services” > “Library” and searching for “Cloud Translation API.” Click “Enable” to activate it for your project. Enabling billing is also necessary if you haven’t done so already.
![]()
Next, go to “IAM & Admin” > “Service Accounts” and click “Create Service Account.” Provide a name (e.g., translate-api-user) and continue to assign the “Cloud Translation API User” role.

After creating the service account, navigate to the “Keys” section, click “Add Key,” and select “Create New Key” in JSON format. Download and securely store this JSON file.

Use the contents of the file you received above in the Google Cloud Project Key file input field in Chatwoot.