To manage your customer support/ticketing email from Chatwoot, you can create an Email inbox in Chatwoot. This is a complete guide to getting your Email channel up and running.
This document is divided into three parts:
-
Creating an Email inbox
-
Settings for Gmail users
-
Creating a Microsoft Email inbox
Feel free to jump to any section. Let's roll.
How to create an Email inbox in Chatwoot?
Step 1. Open your Chatwoot dashboard. Go to Settings → Inboxes → Add Inbox.

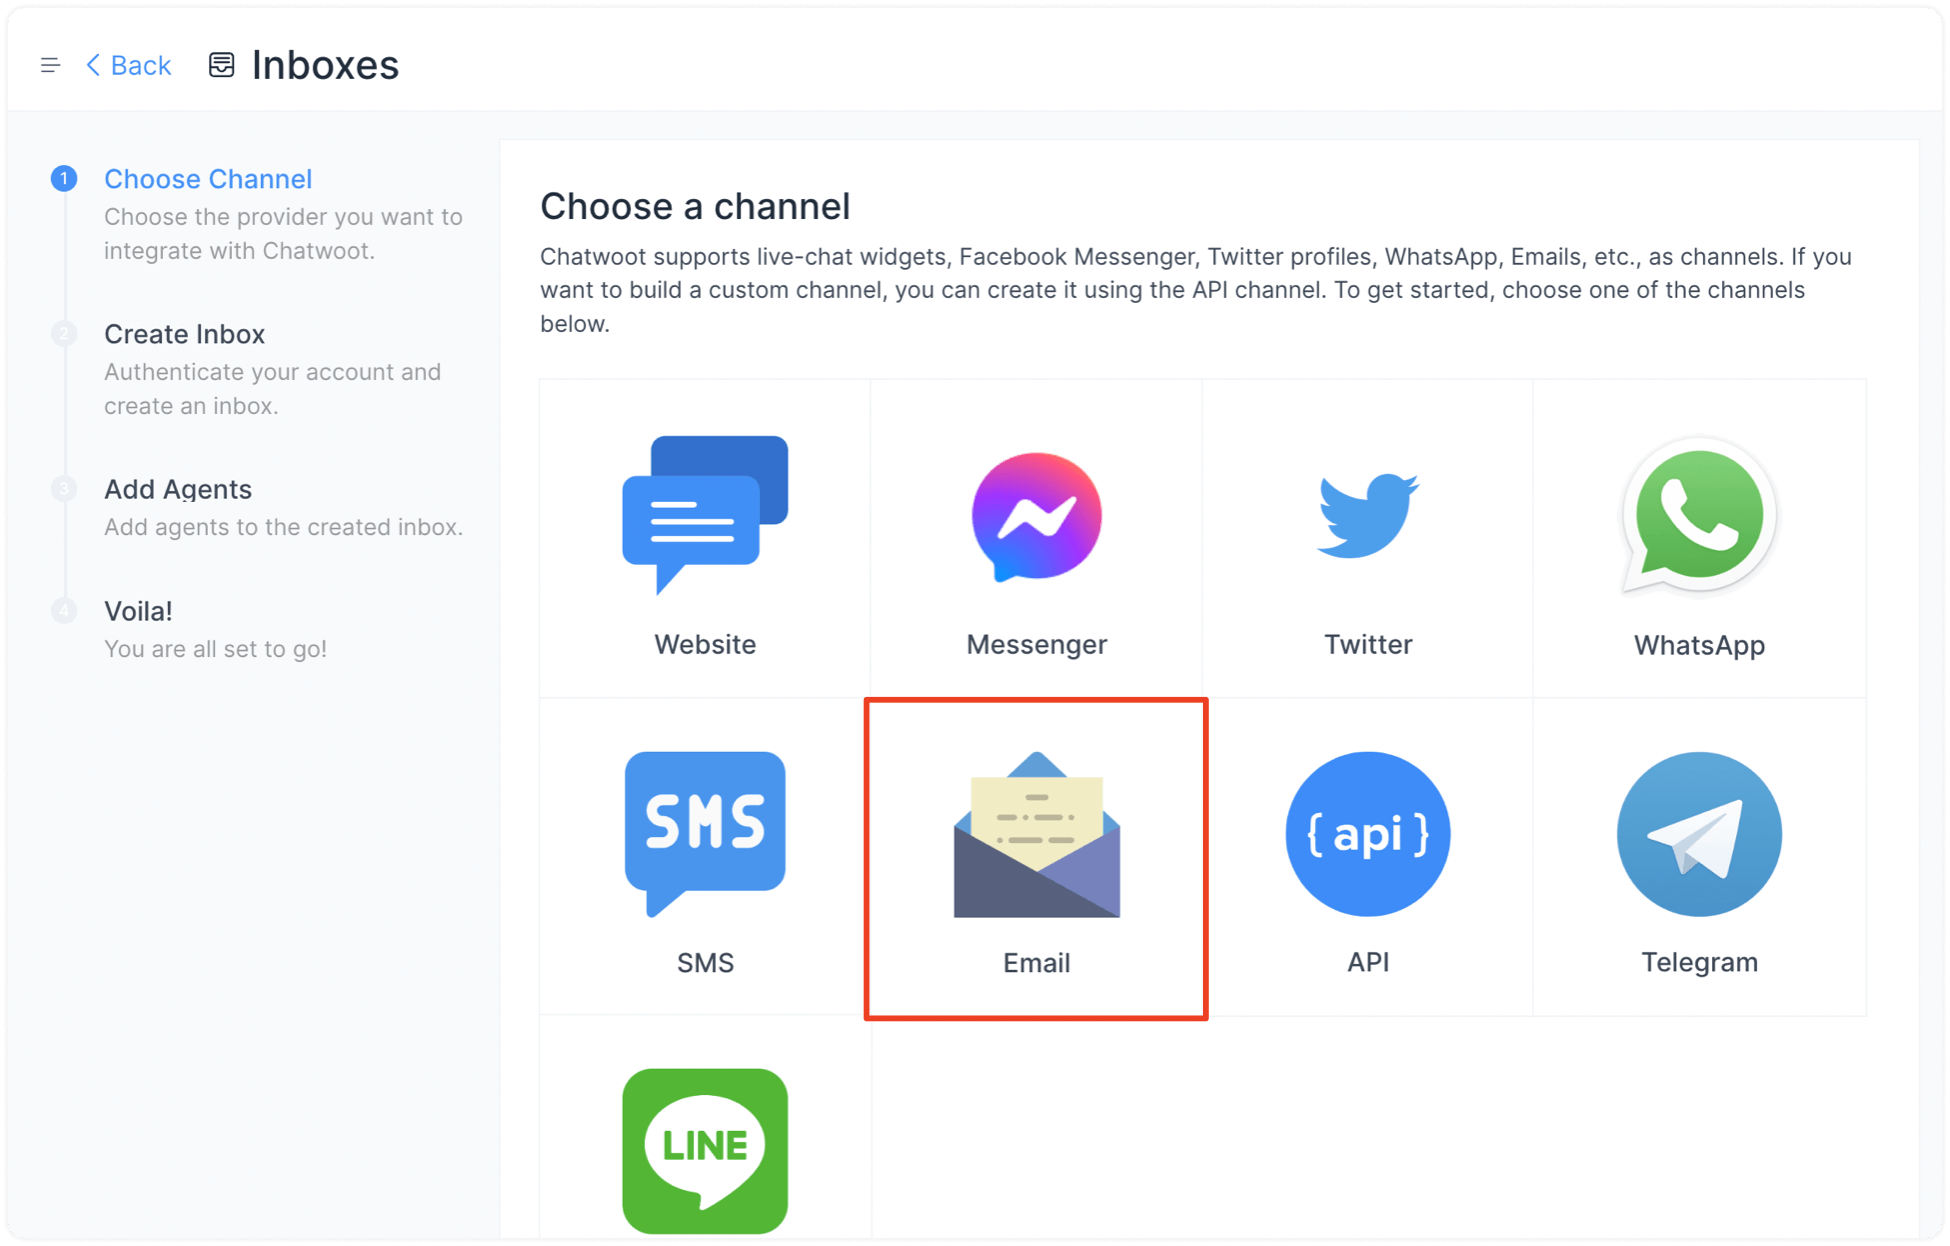
Step 2. Click on the "Email" icon.
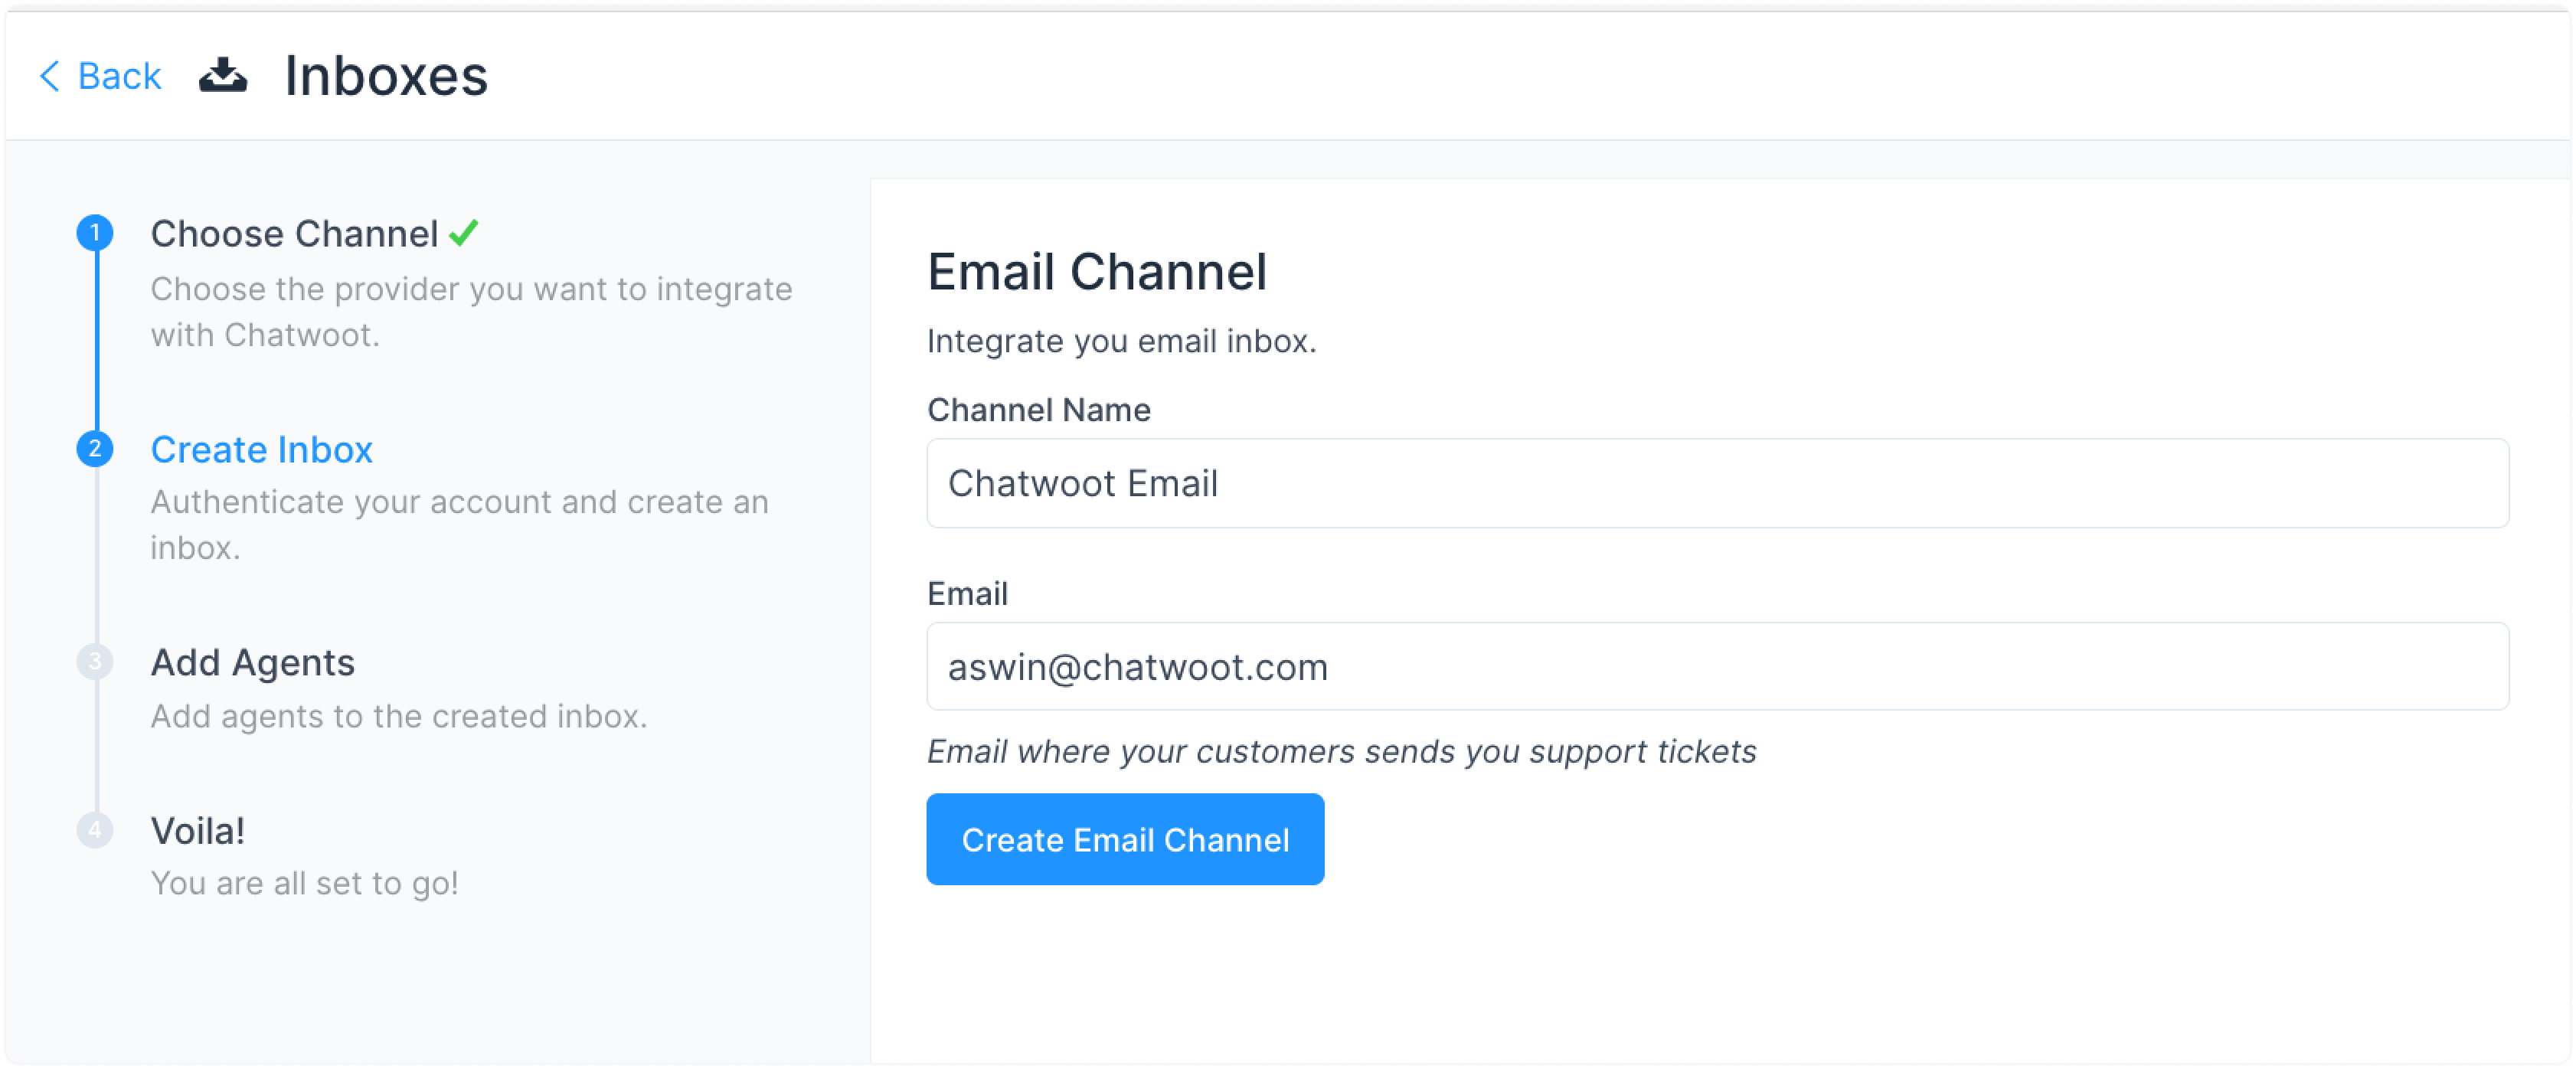
Step 3. Enter the channel name (how you’d like to address this channel), and your support email, and click the "Create Email Channel" button.
P.S. You will also see an option to select Microsoft as an Email provider. If you use an Outlook/Microsoft email, scroll to the "How to create a Microsoft Email channel?" section (last section) instead.
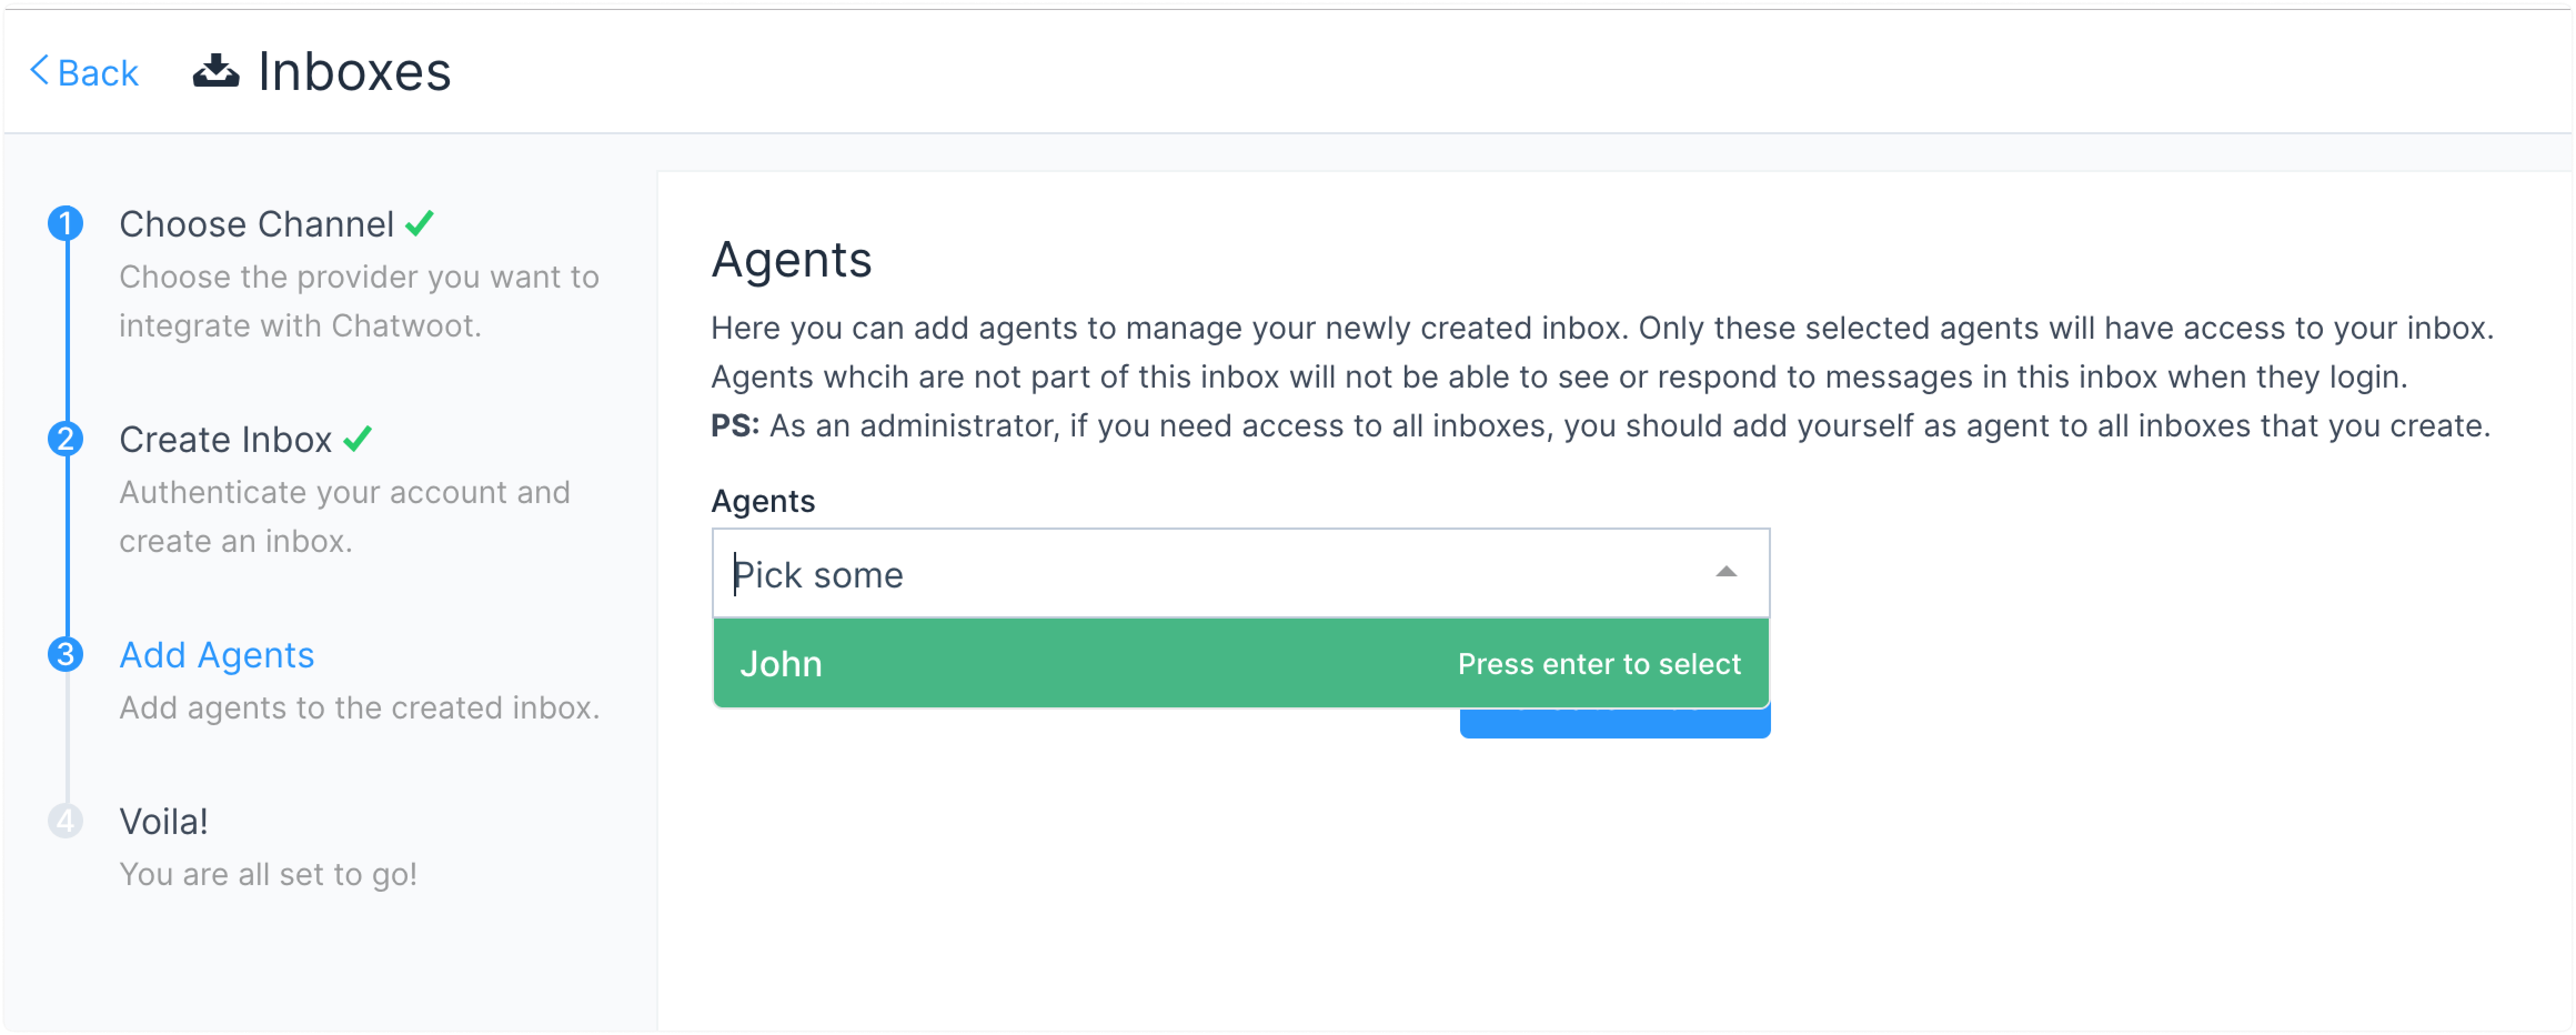
Step 4. "Add agents" to your email inbox.
You have successfully created an Email inbox.
Step 5. Configure your email settings. Go to Settings → Inboxes → Email Inbox settings → Configuration tab.
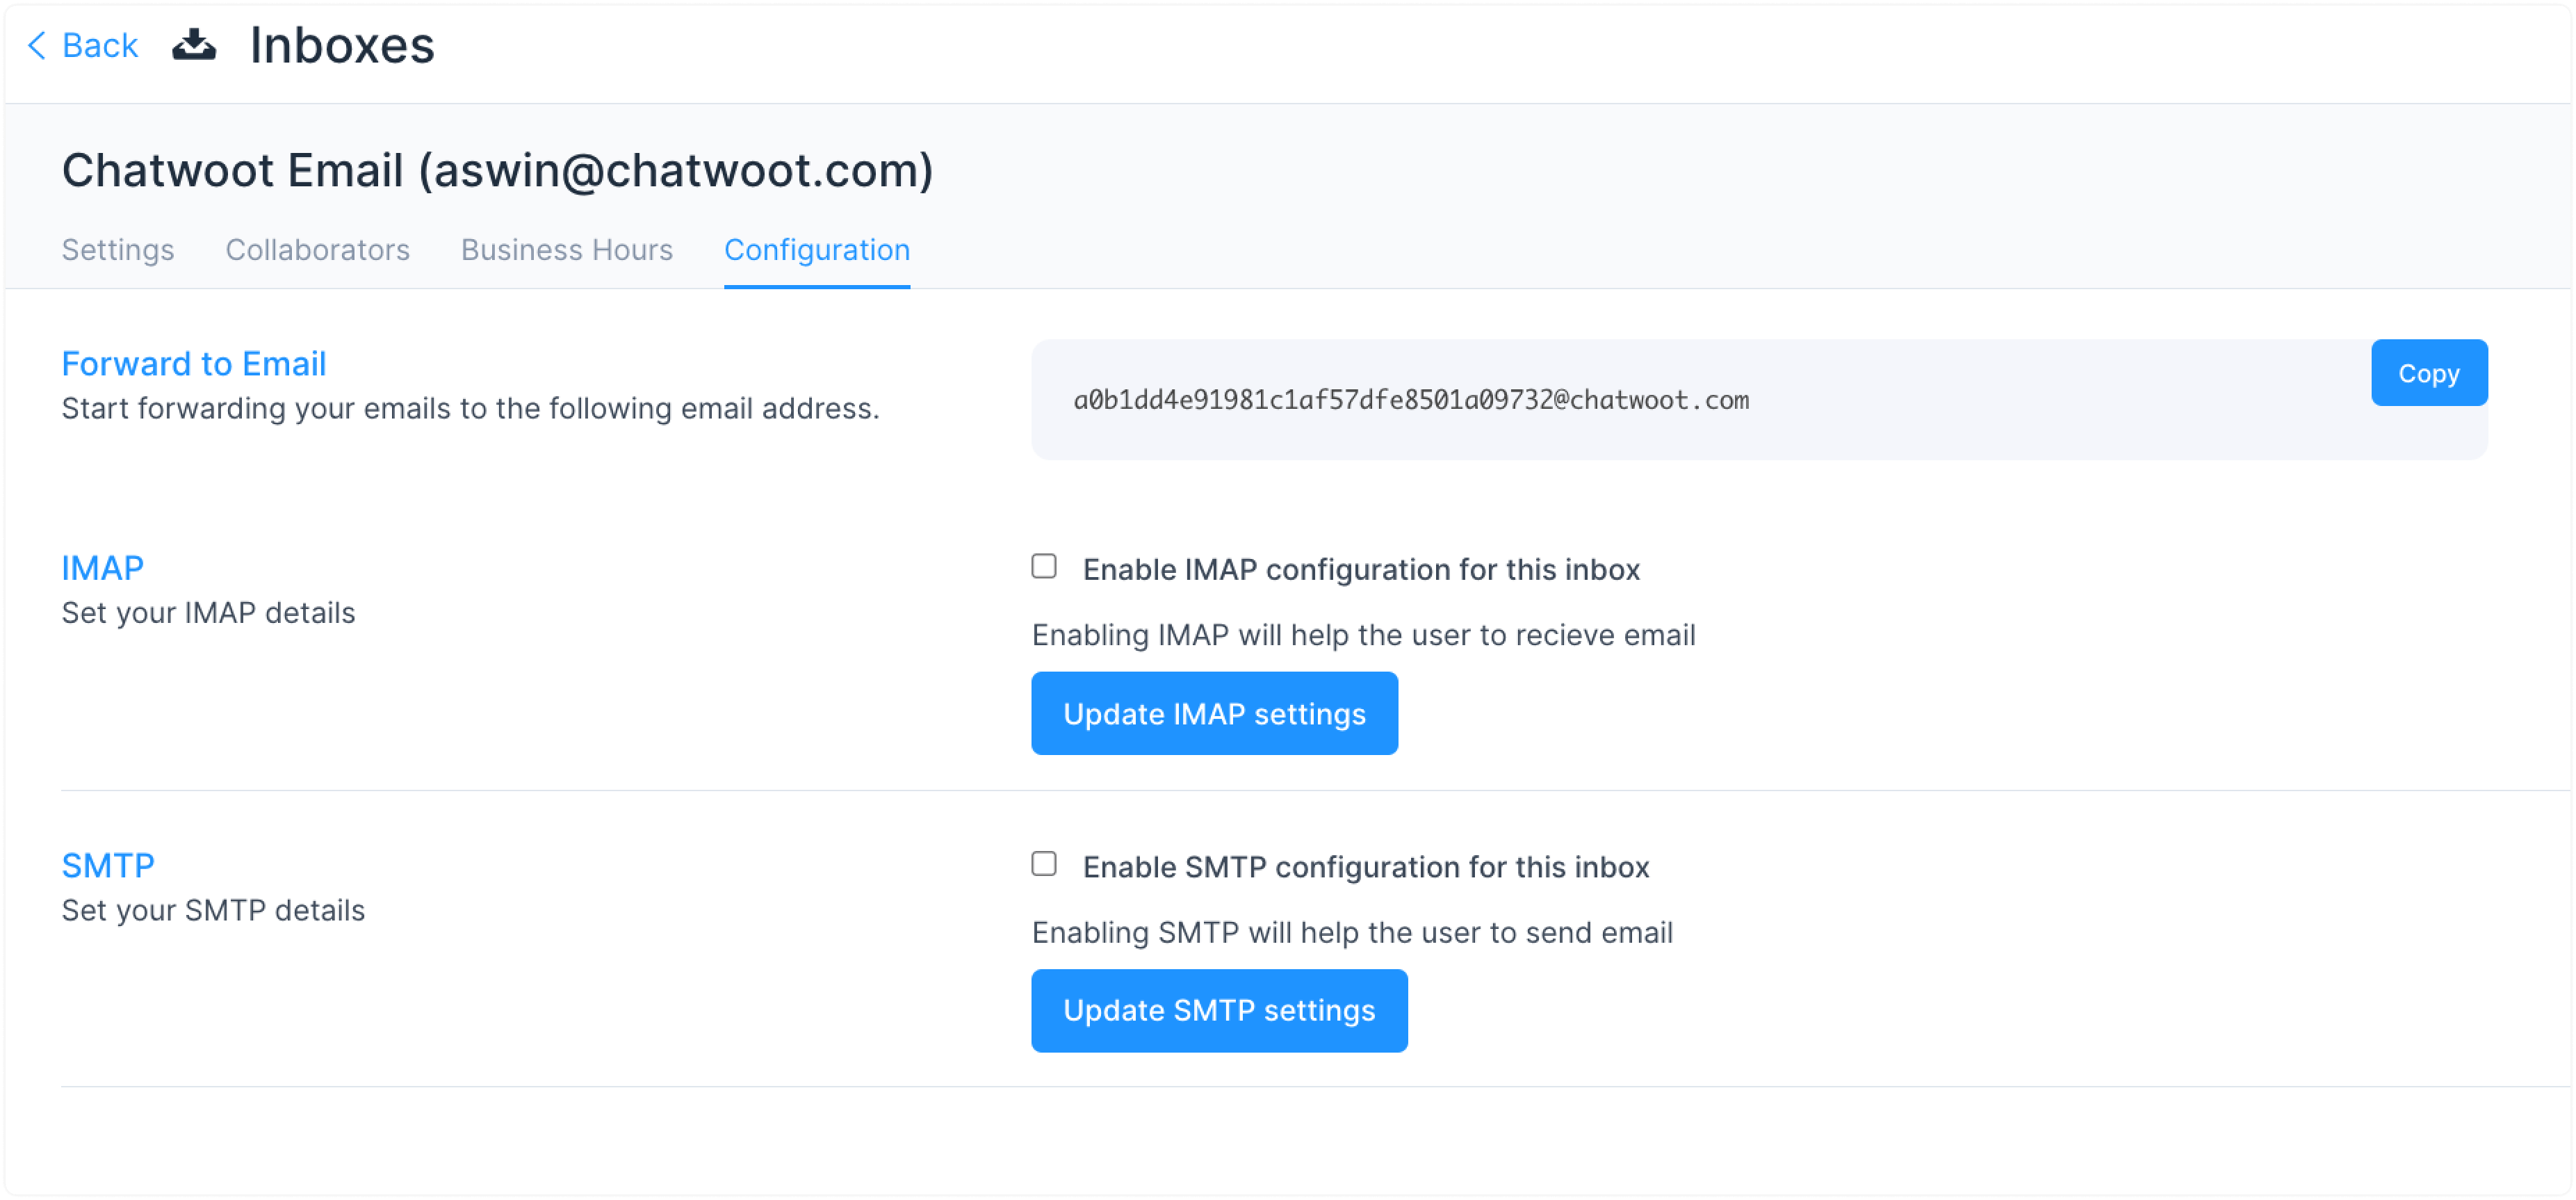
You will see three main settings here:
-
Forward to Email
-
Configure IMAP
-
Configure SMTP
All three settings are explained in the following sections.
How to forward emails to Chatwoot inbox?
Step 1. Copy the "Forward to email address" from the Configuration tab under inbox Settings.
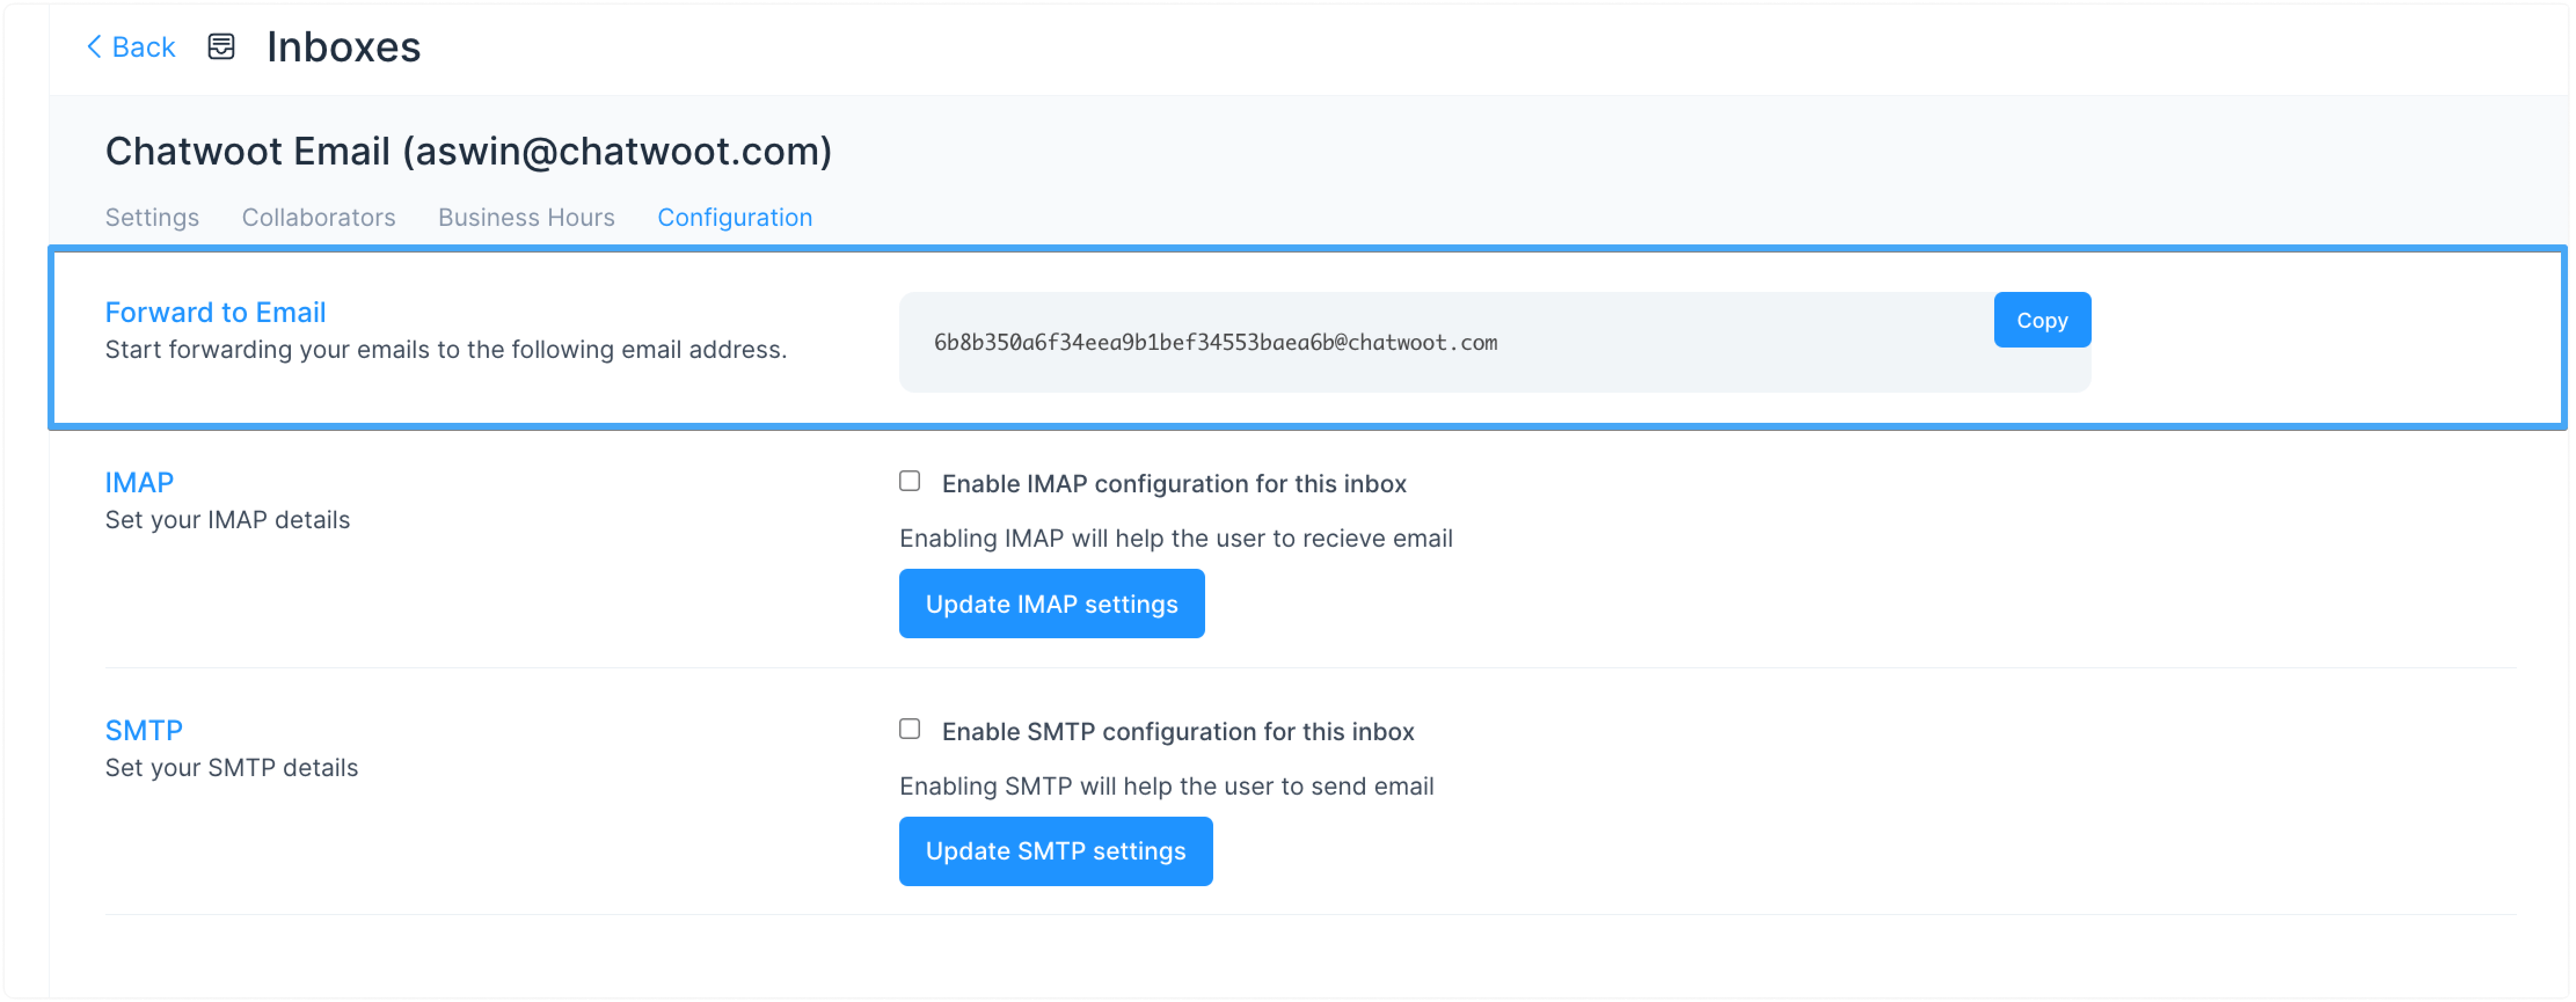
Step 2. Configure the copied email address as the forwarding email address in the email inbox.
P.S. Check the Gmail section below to learn how to add a forwarding address in Gmail.
Step 3. Send a mail to the forwarding address added inbox and check the Chatwoot email inbox for the new email.
How to configure IMAP for the Email channel?
If you are using Gmail, scroll down to the IMAP section for Gmail below.
Step 1. Go to Settings → Inboxes → Email Inbox settings → Configuration tab.
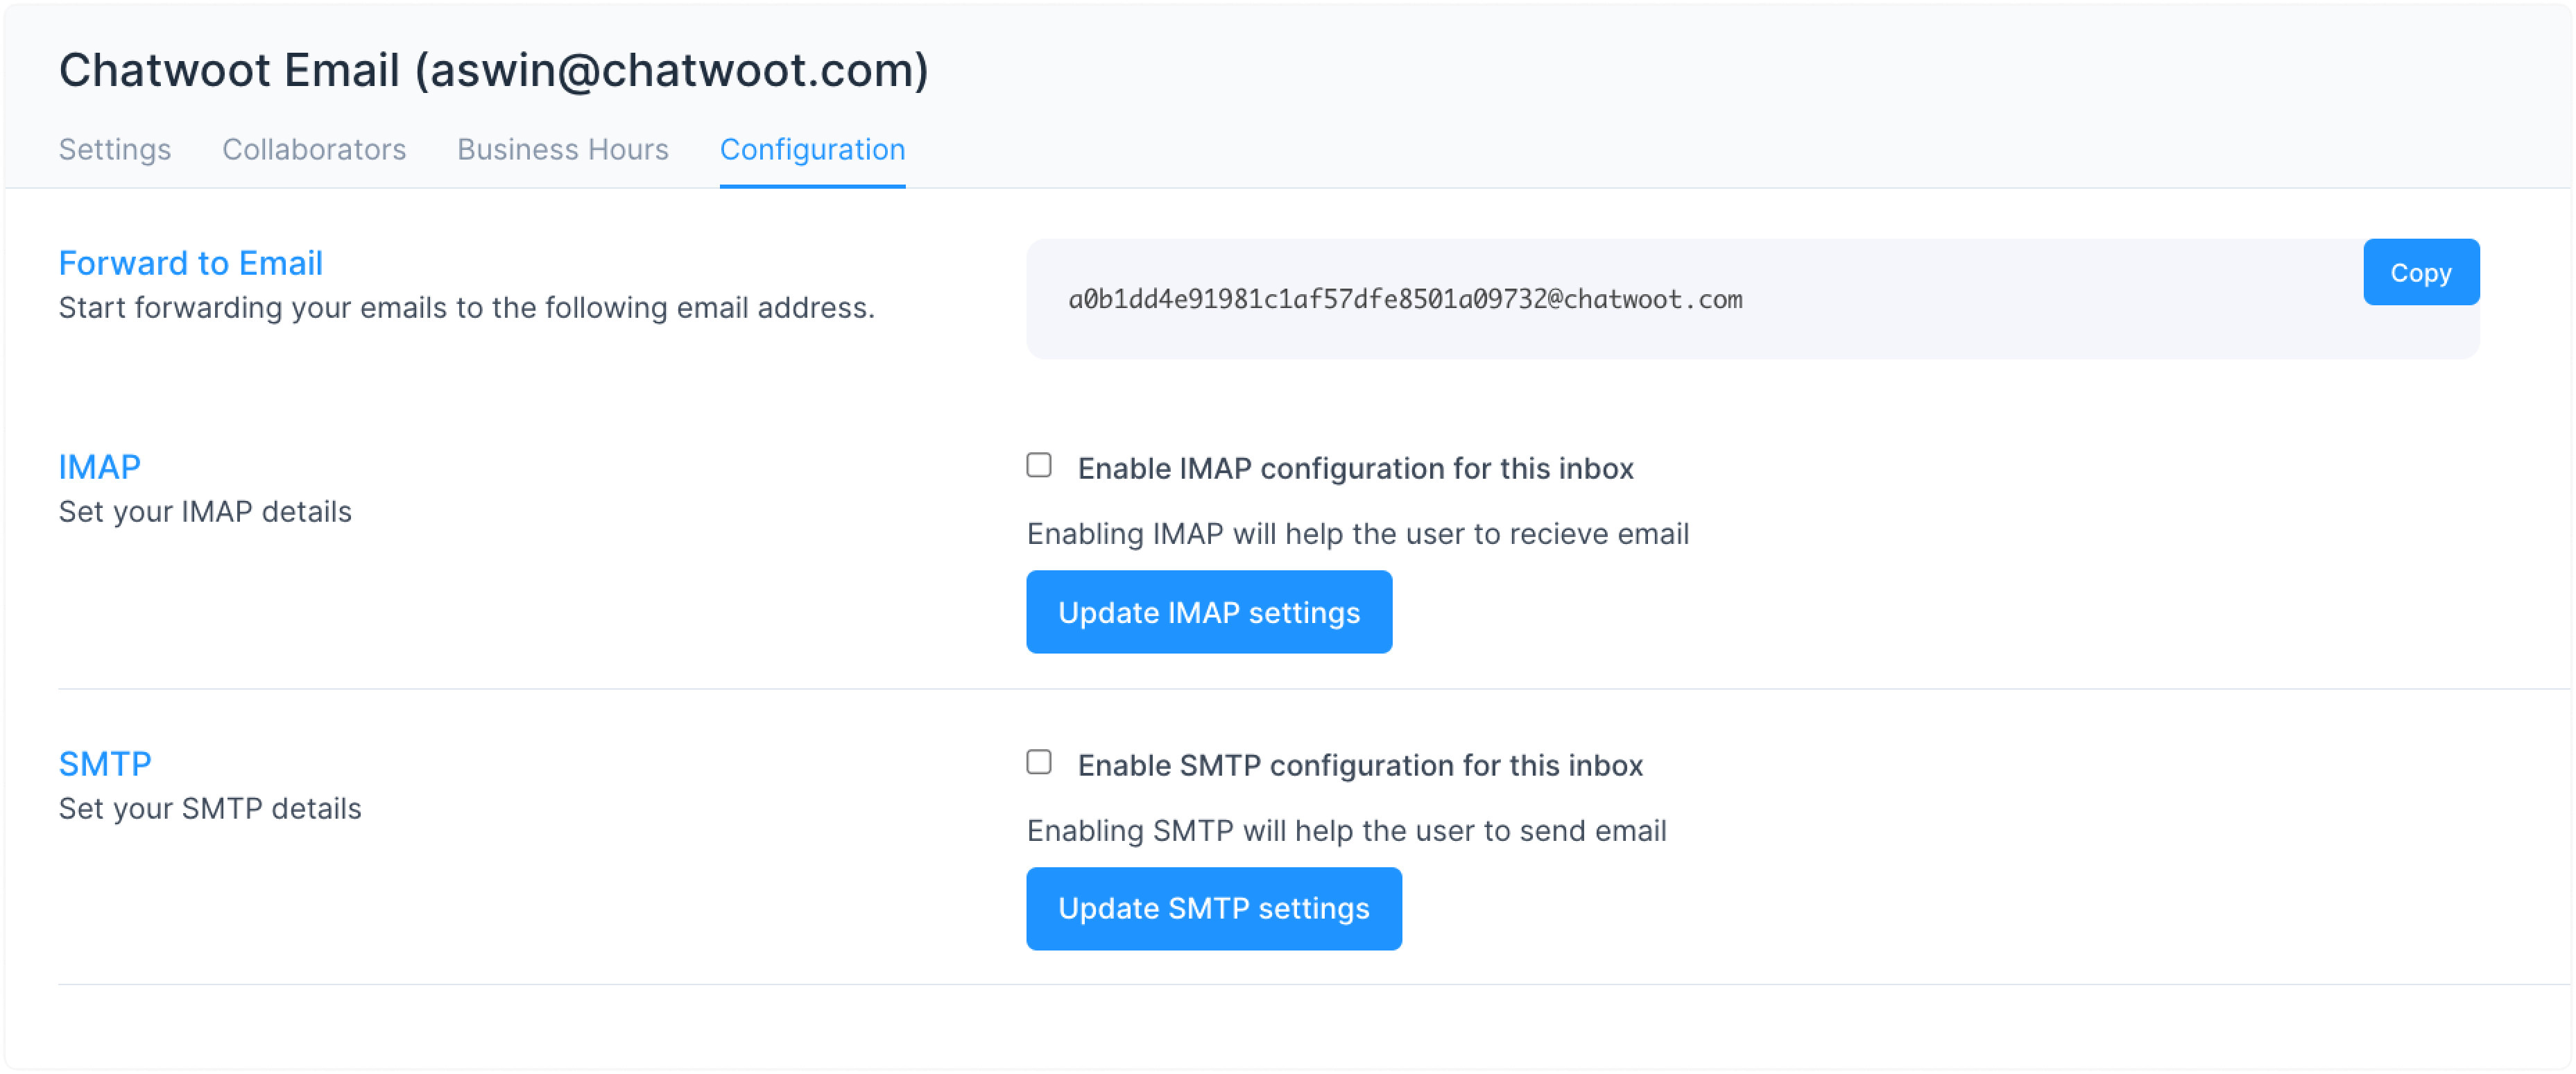
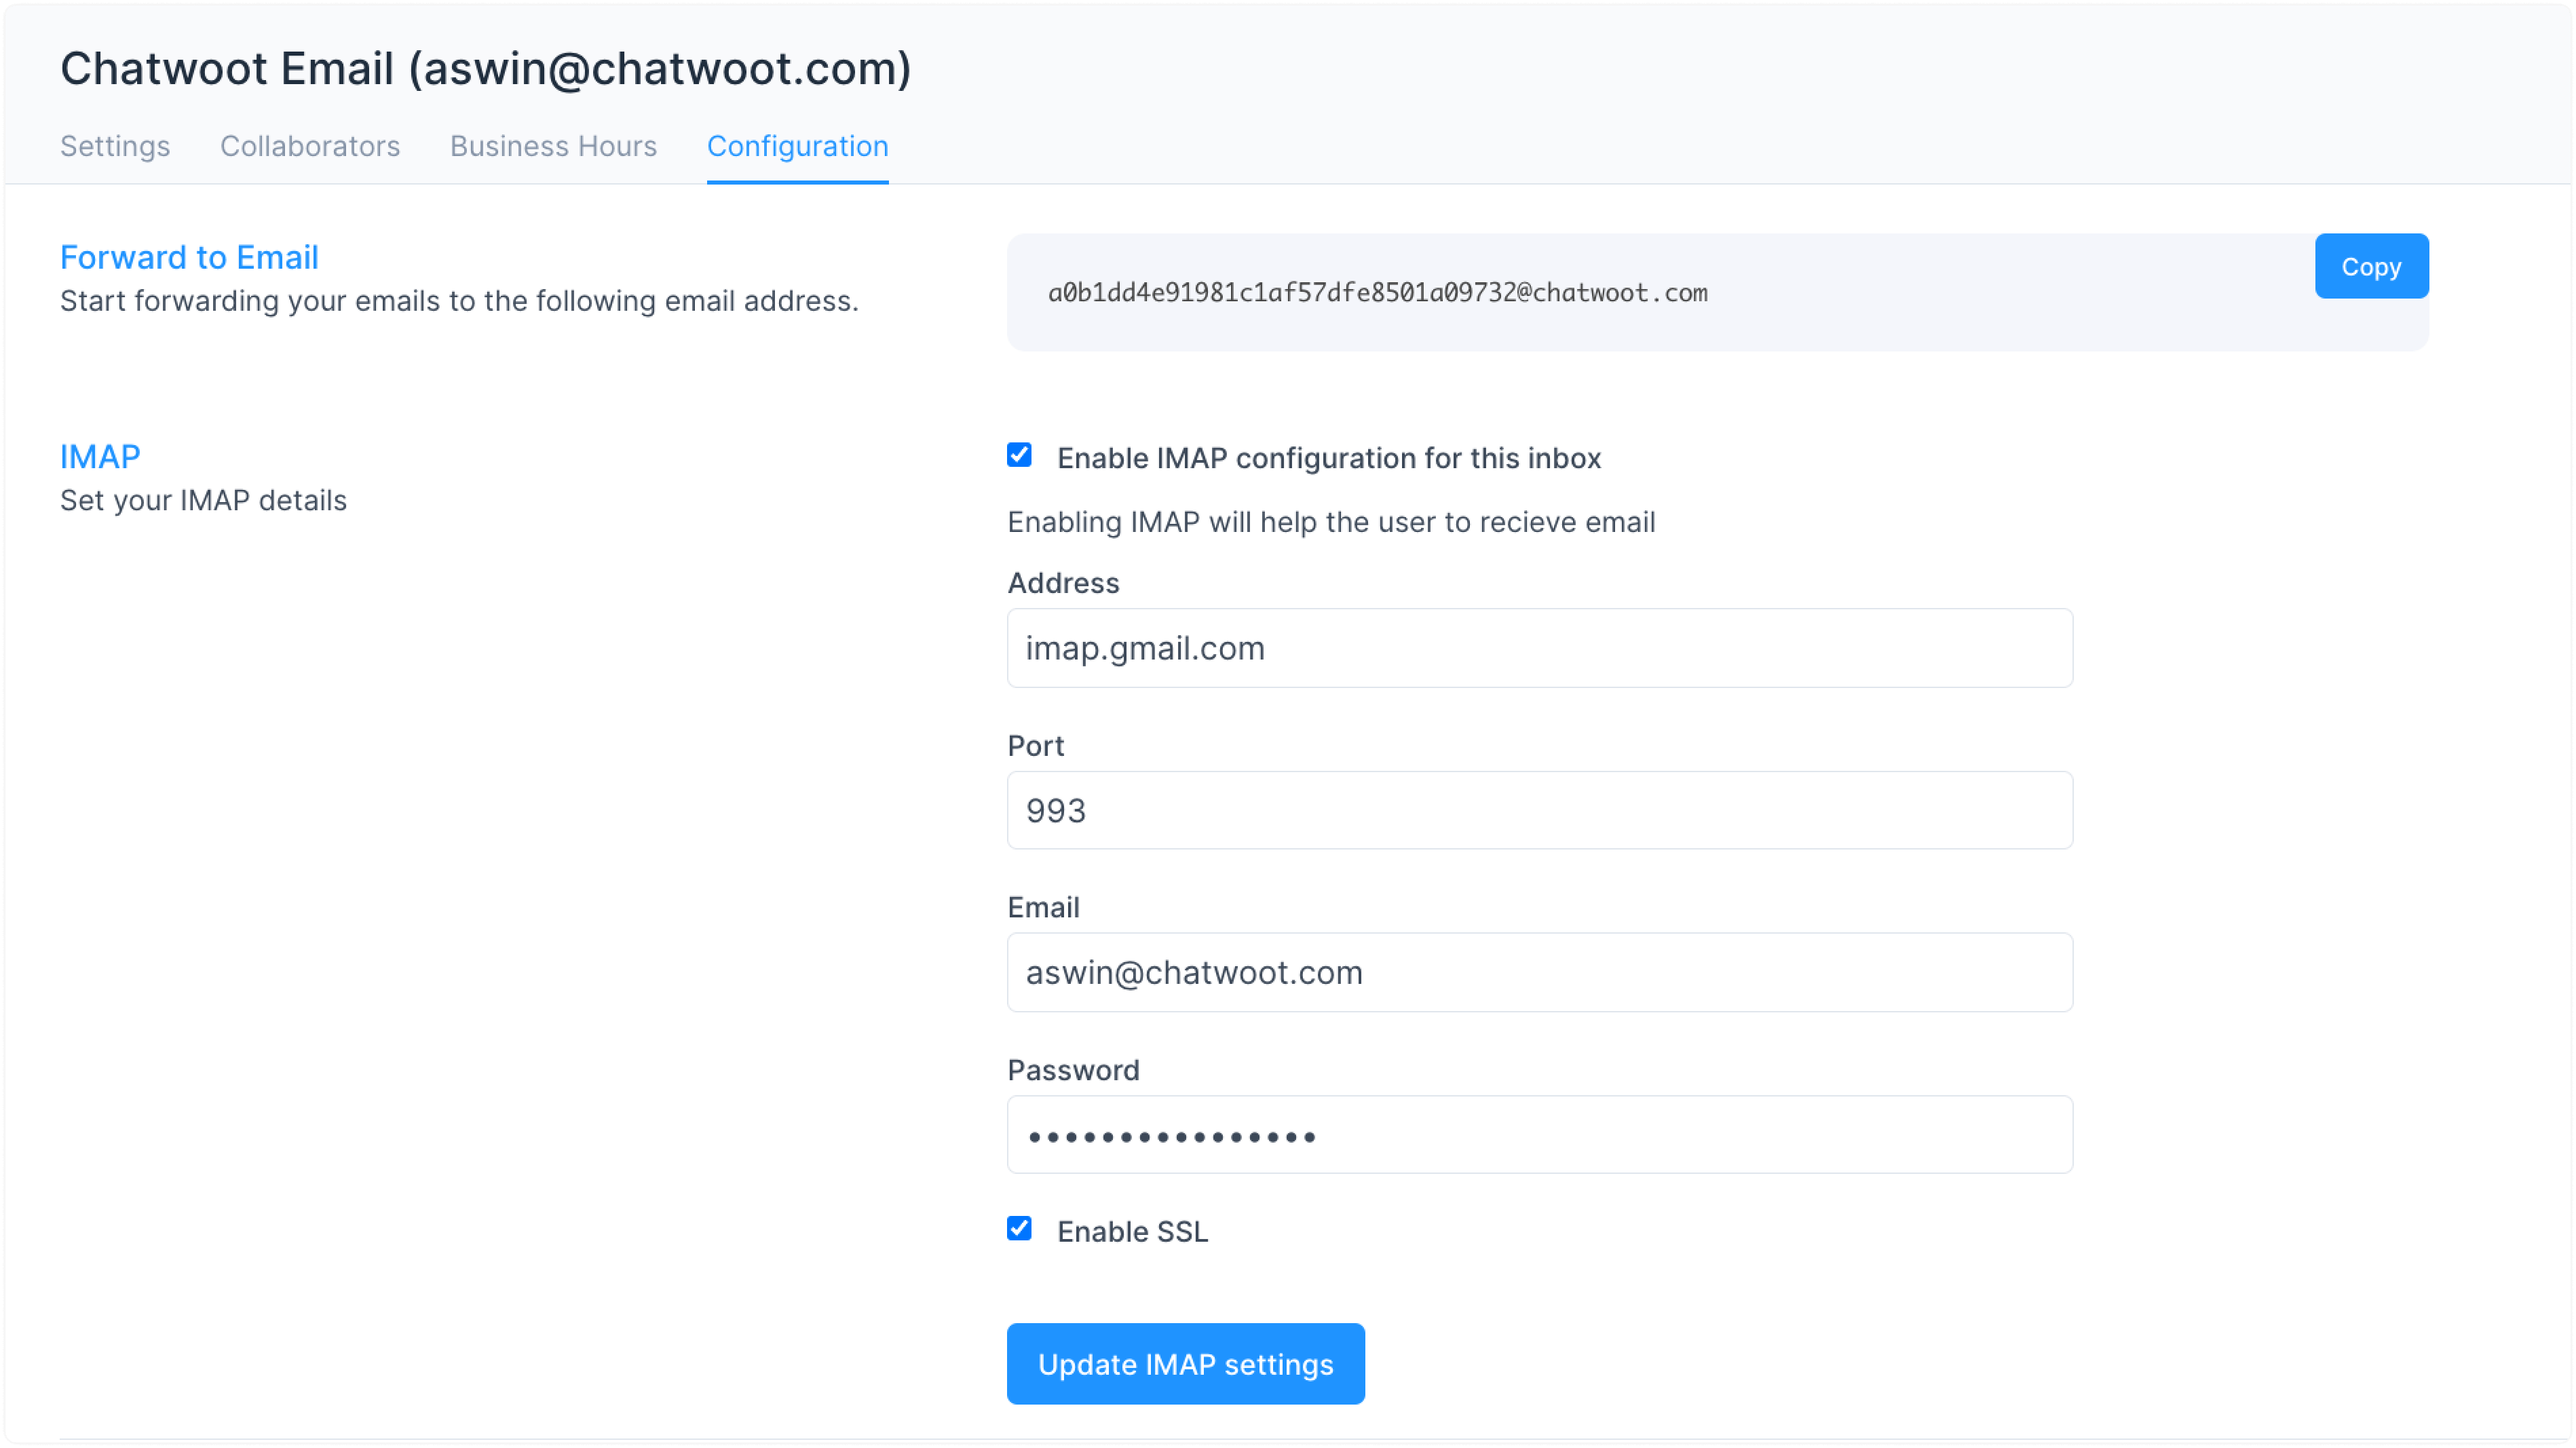
Step 2. Select the checkbox Enable IMAP configuration for this inbox. You’ll be able to see the required fields as follows.
-
Address
-
Port
-
Email
-
Password
P.S. If using a 2FA-enabled Gmail, scroll down to the "How to generate app password for Gmail?" section. If using a regular Gmail account, scroll down to the "How to allow less secure access to Gmail?" section.
Step 3. Test if everything is working fine. Send an email to the IMAP-configured email in Chatwoot. Check Chatwoot inbox for the new email. Open the email conversation in Chatwoot and verify the email details.
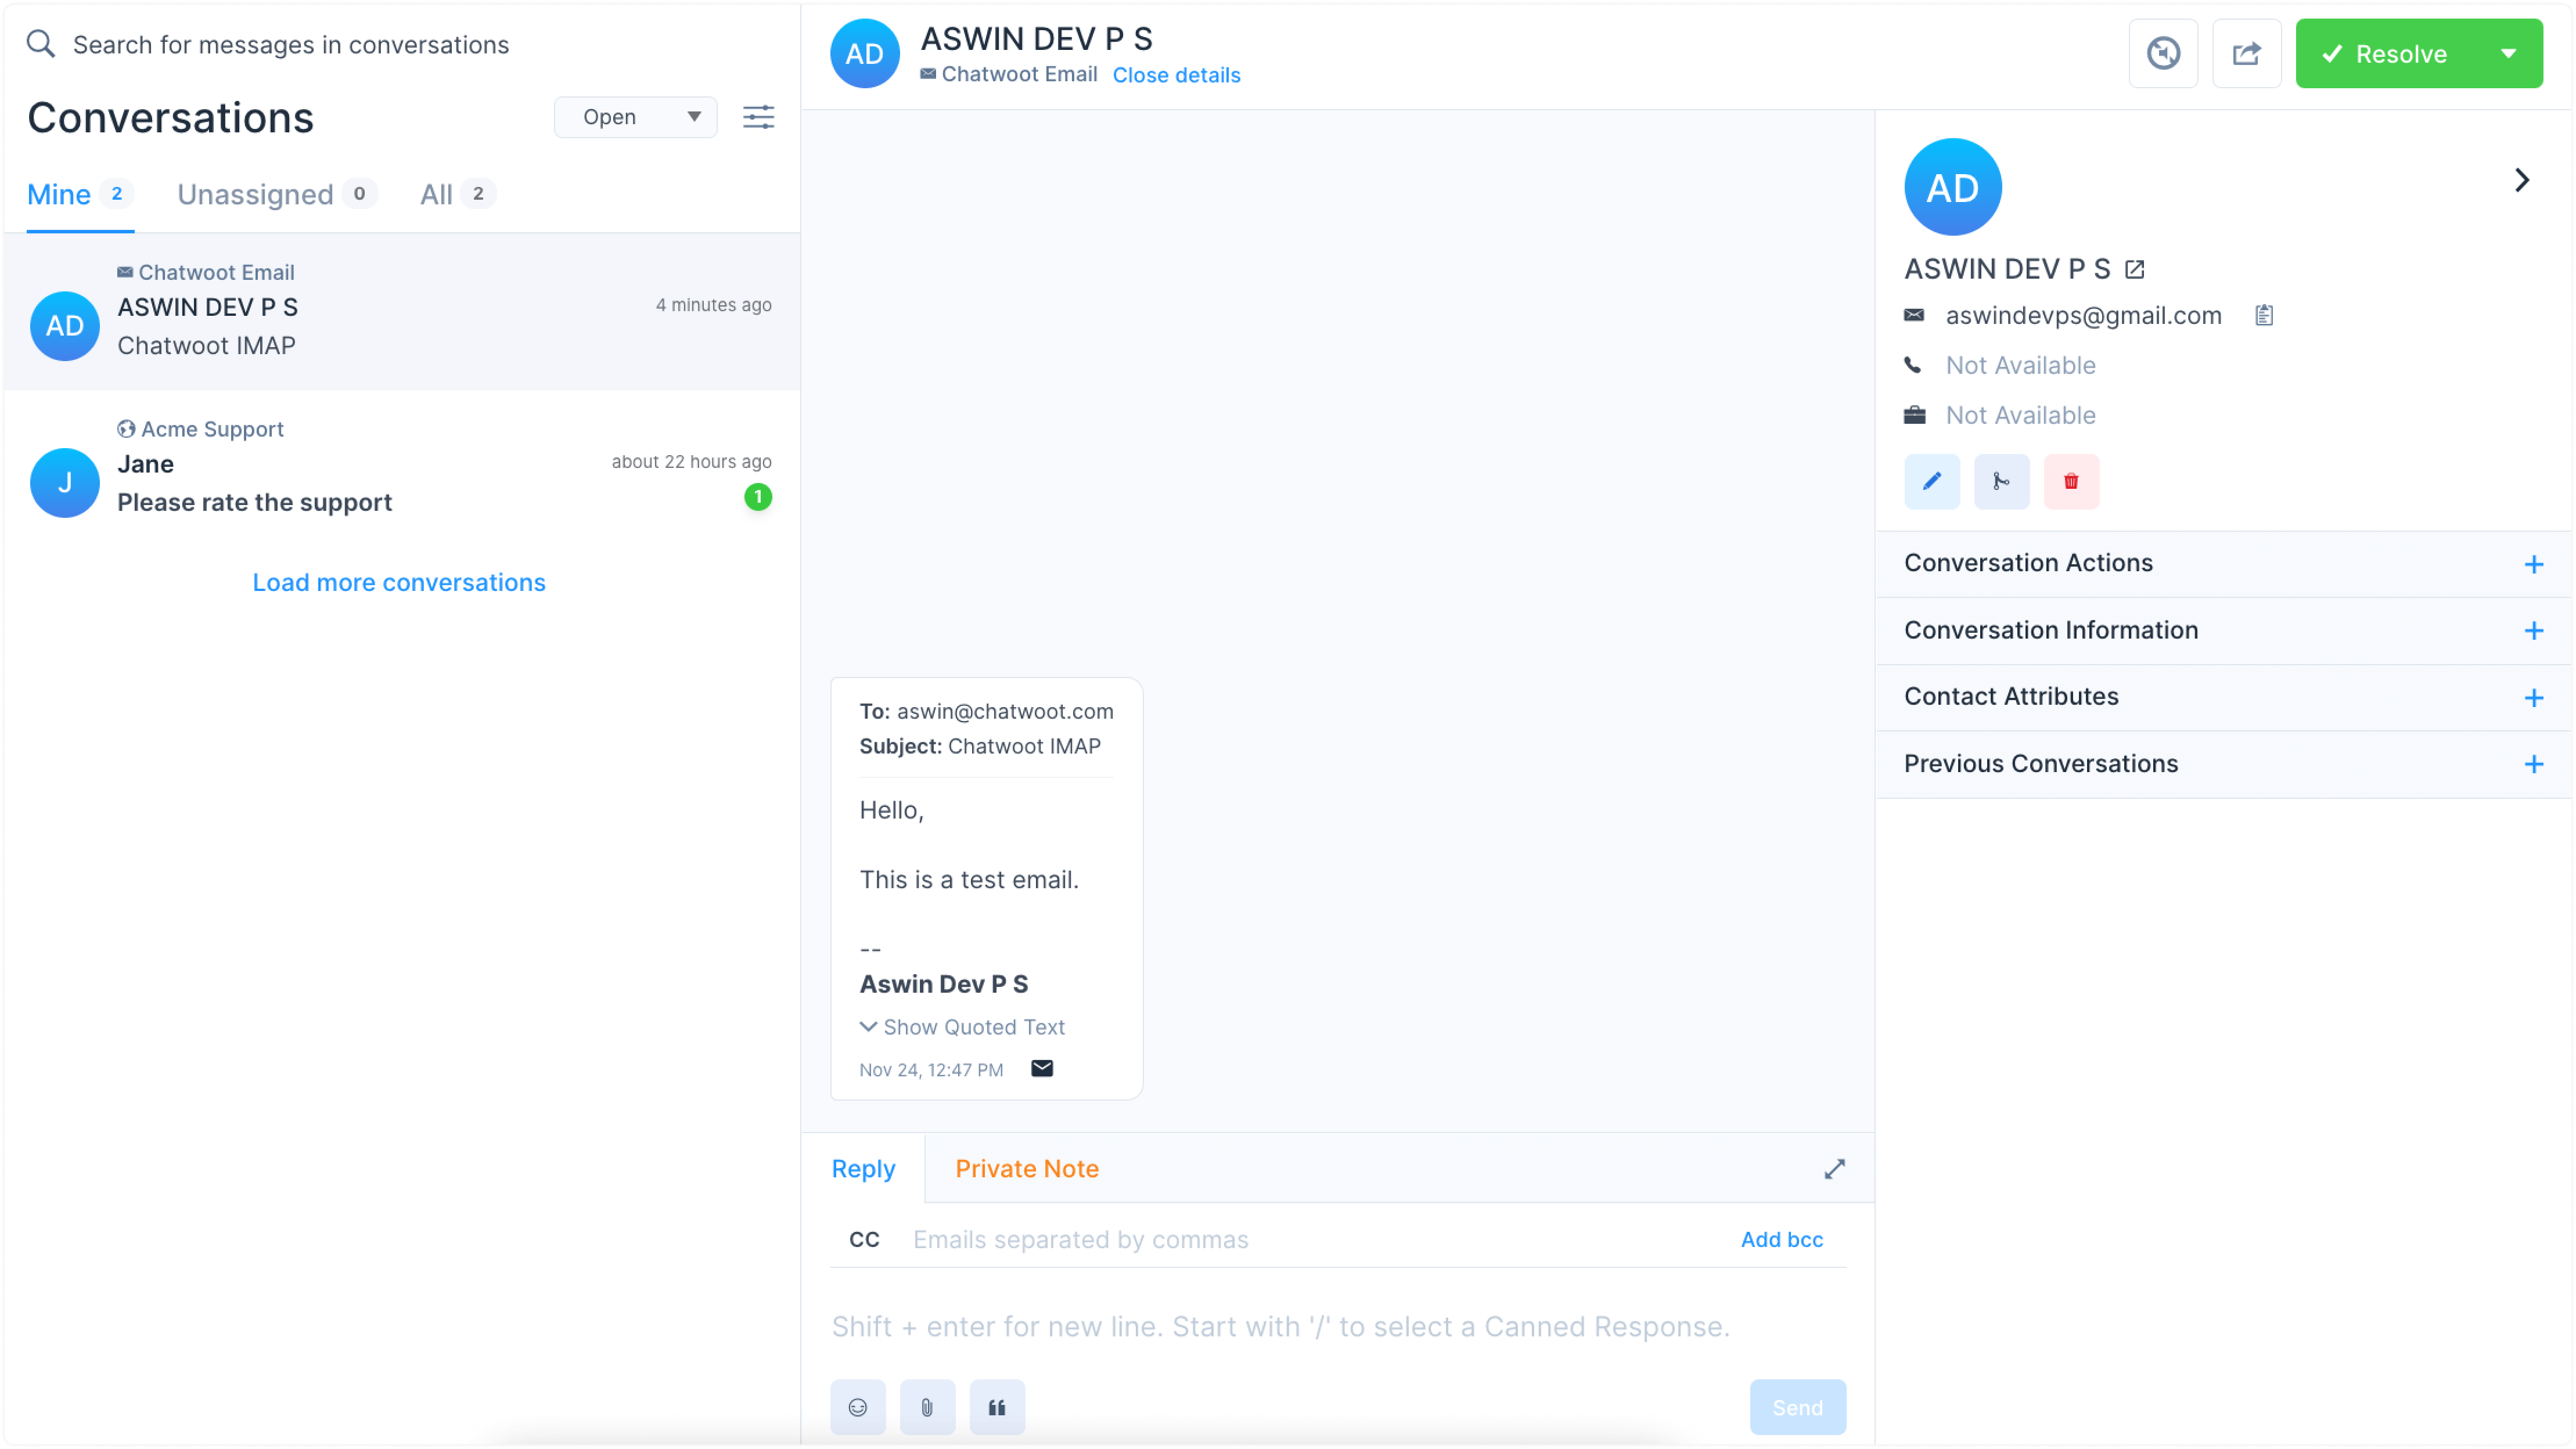
How to configure SMTP for the Email channel?
Step 1. Go to Settings -> Inboxes -> Email Inbox settings page.
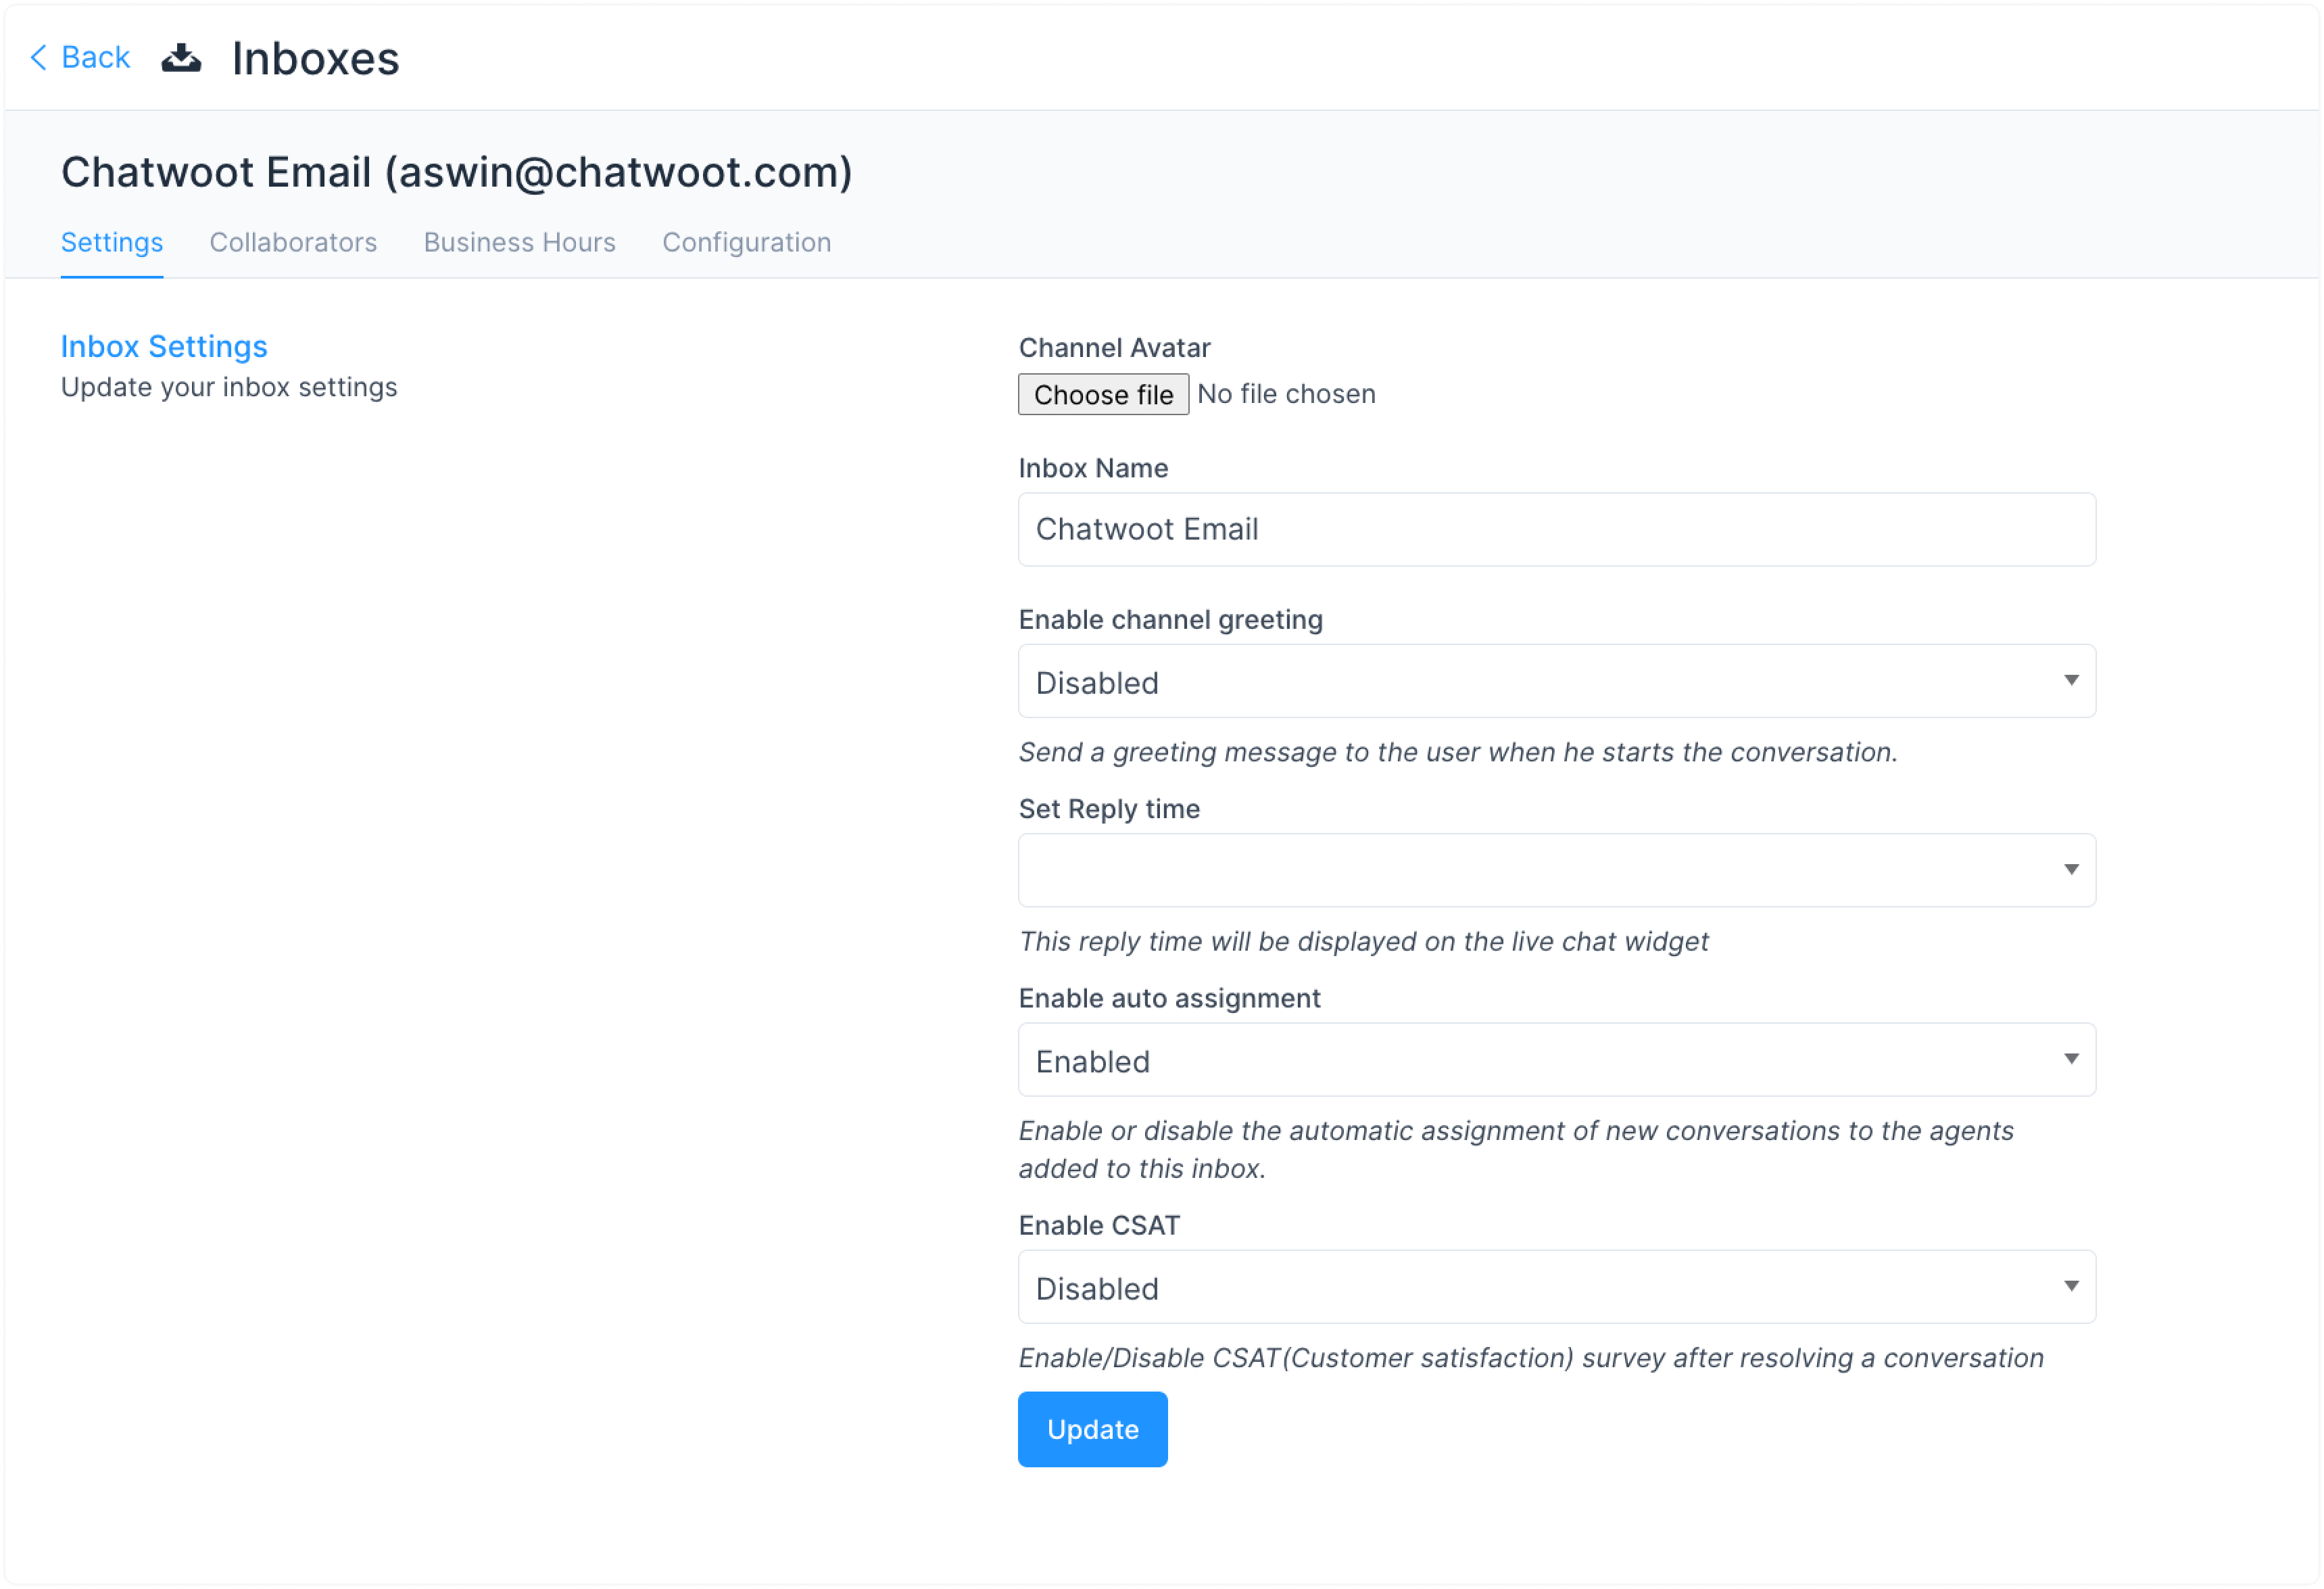
Step 2. Select the "Configuration" tab.

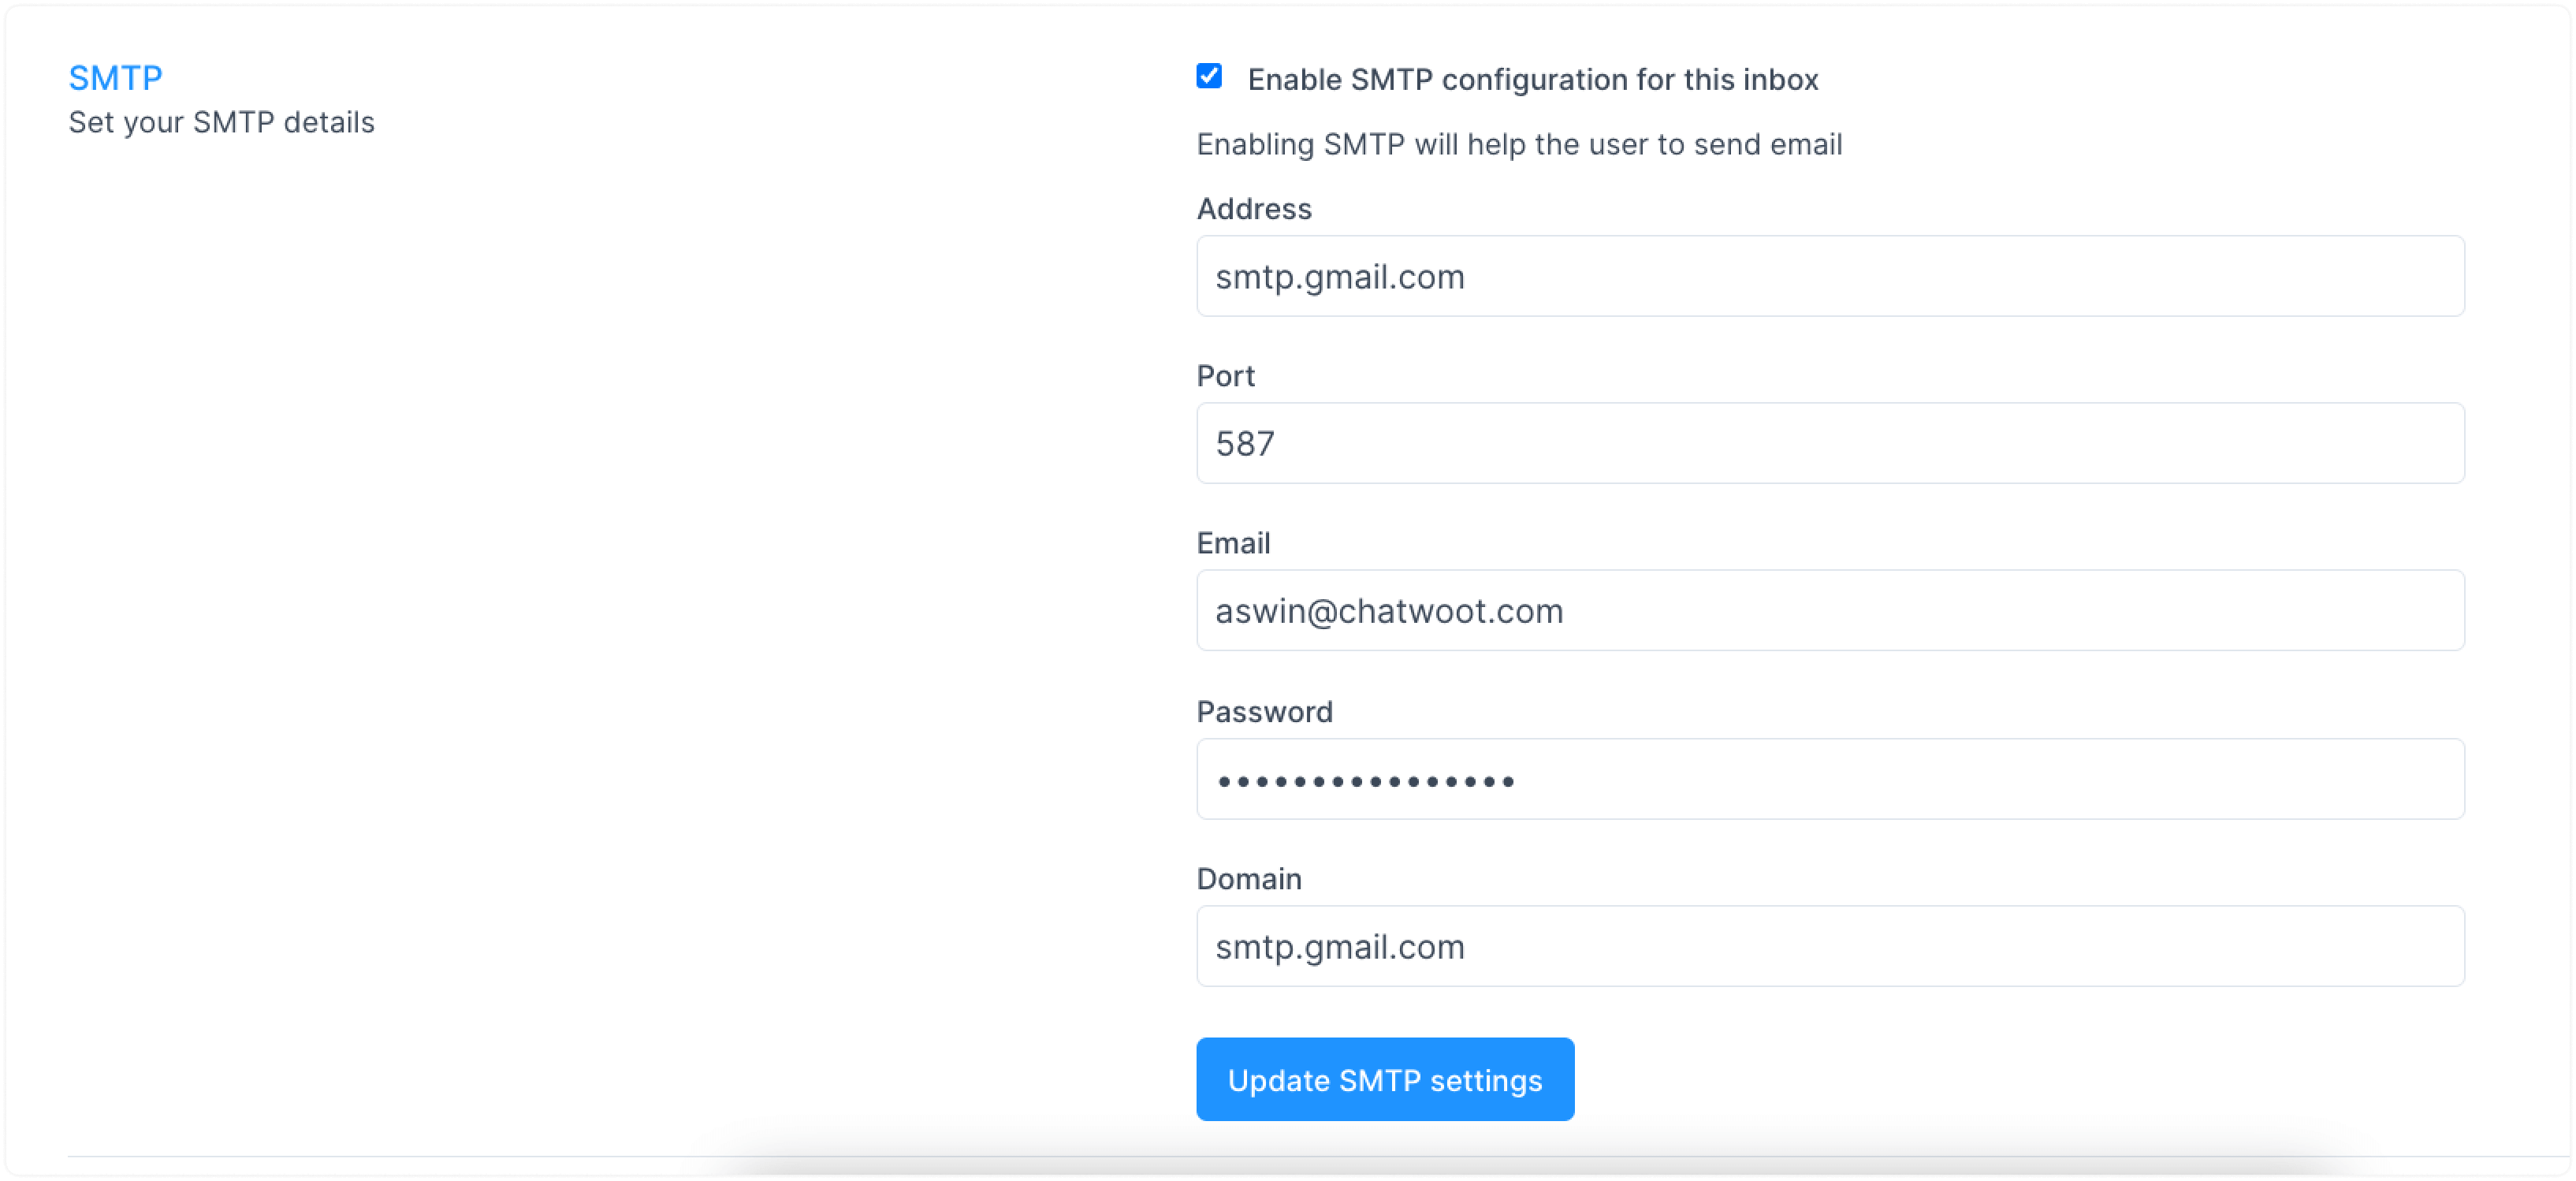
Step 3. To enable SMTP, select the checkbox "Enable SMTP configuration for this inbox".
Fill in the fields below and click the "Update SMTP settings" button.
-
Address
-
Port
-
Email
-
Password
P.S. If using a 2FA-enabled Gmail, scroll down to the "How to generate app password for Gmail?" section. If using a regular Gmail account, scroll down to the "How to allow less secure access to Gmail?" section.
-
Domain
Step 4. Open an existing email Conversation in Chatwoot.
Step 5. Type a reply message for the conversation and click the "Send" button. Verify that mail has been delivered.
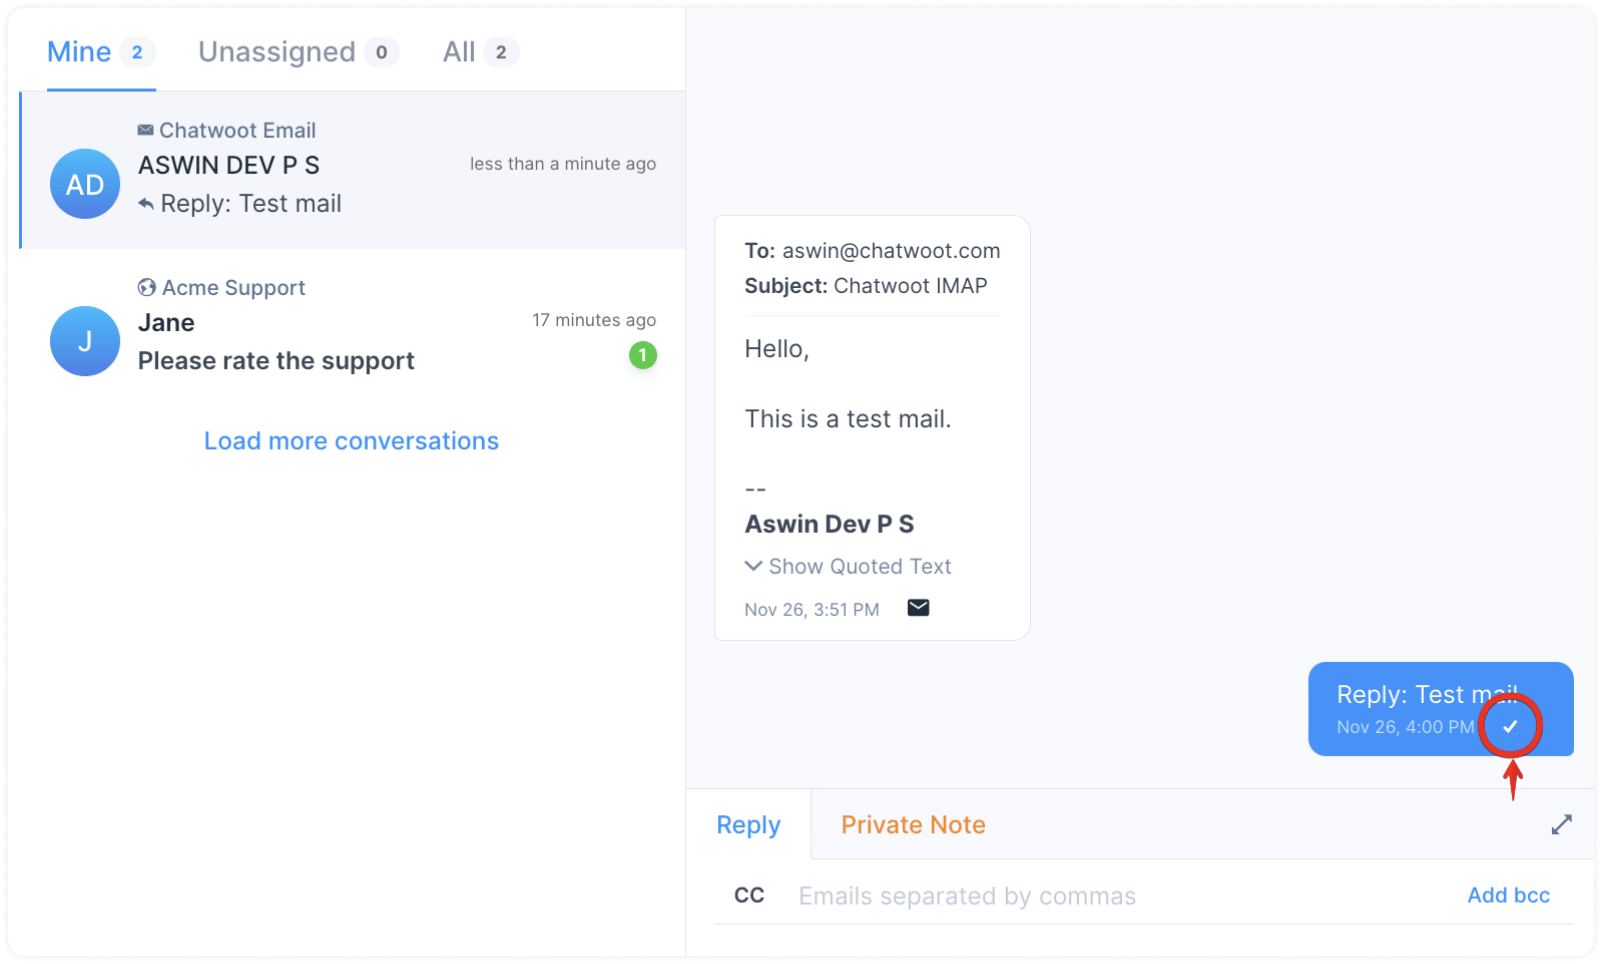
You can also check the recipient inbox for the delivered email.
Settings for Gmail users
How to enable IMAP for Gmail inbox?
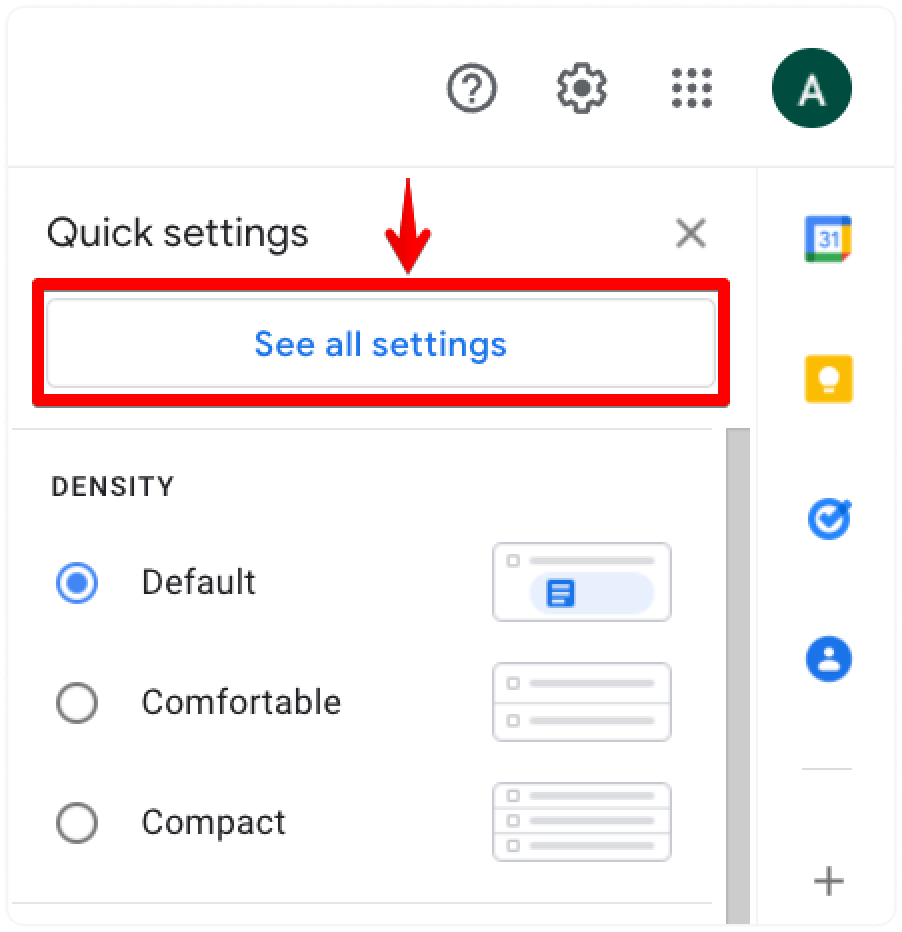
Step 1. Open your Gmail inbox and click the Settings icon in the top right corner. Click the "See all settings" button.
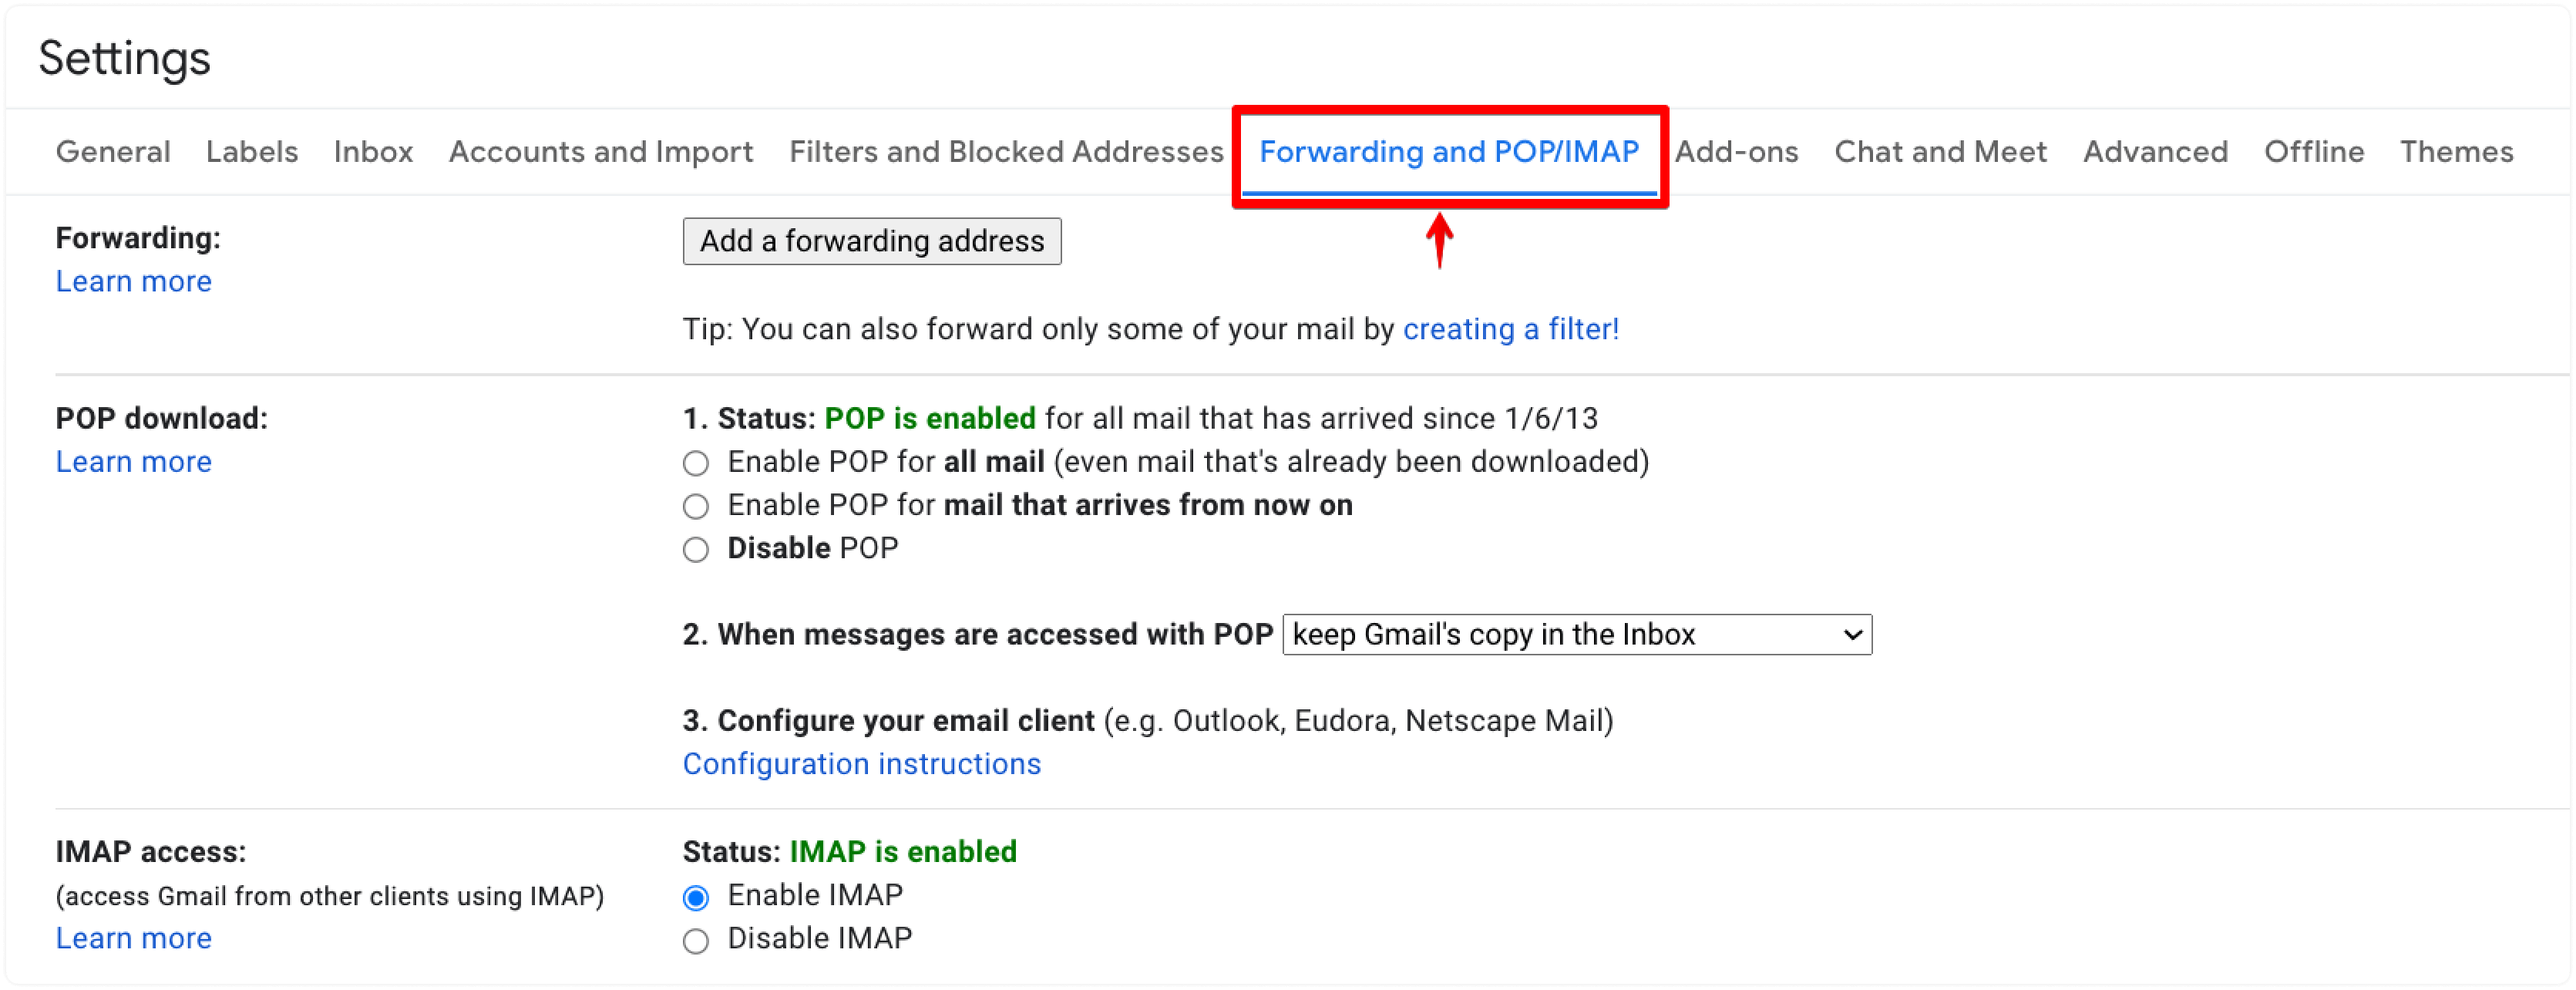
Step 2. Select the "Forwarding and POP/IMAP" tab on the Settings page.
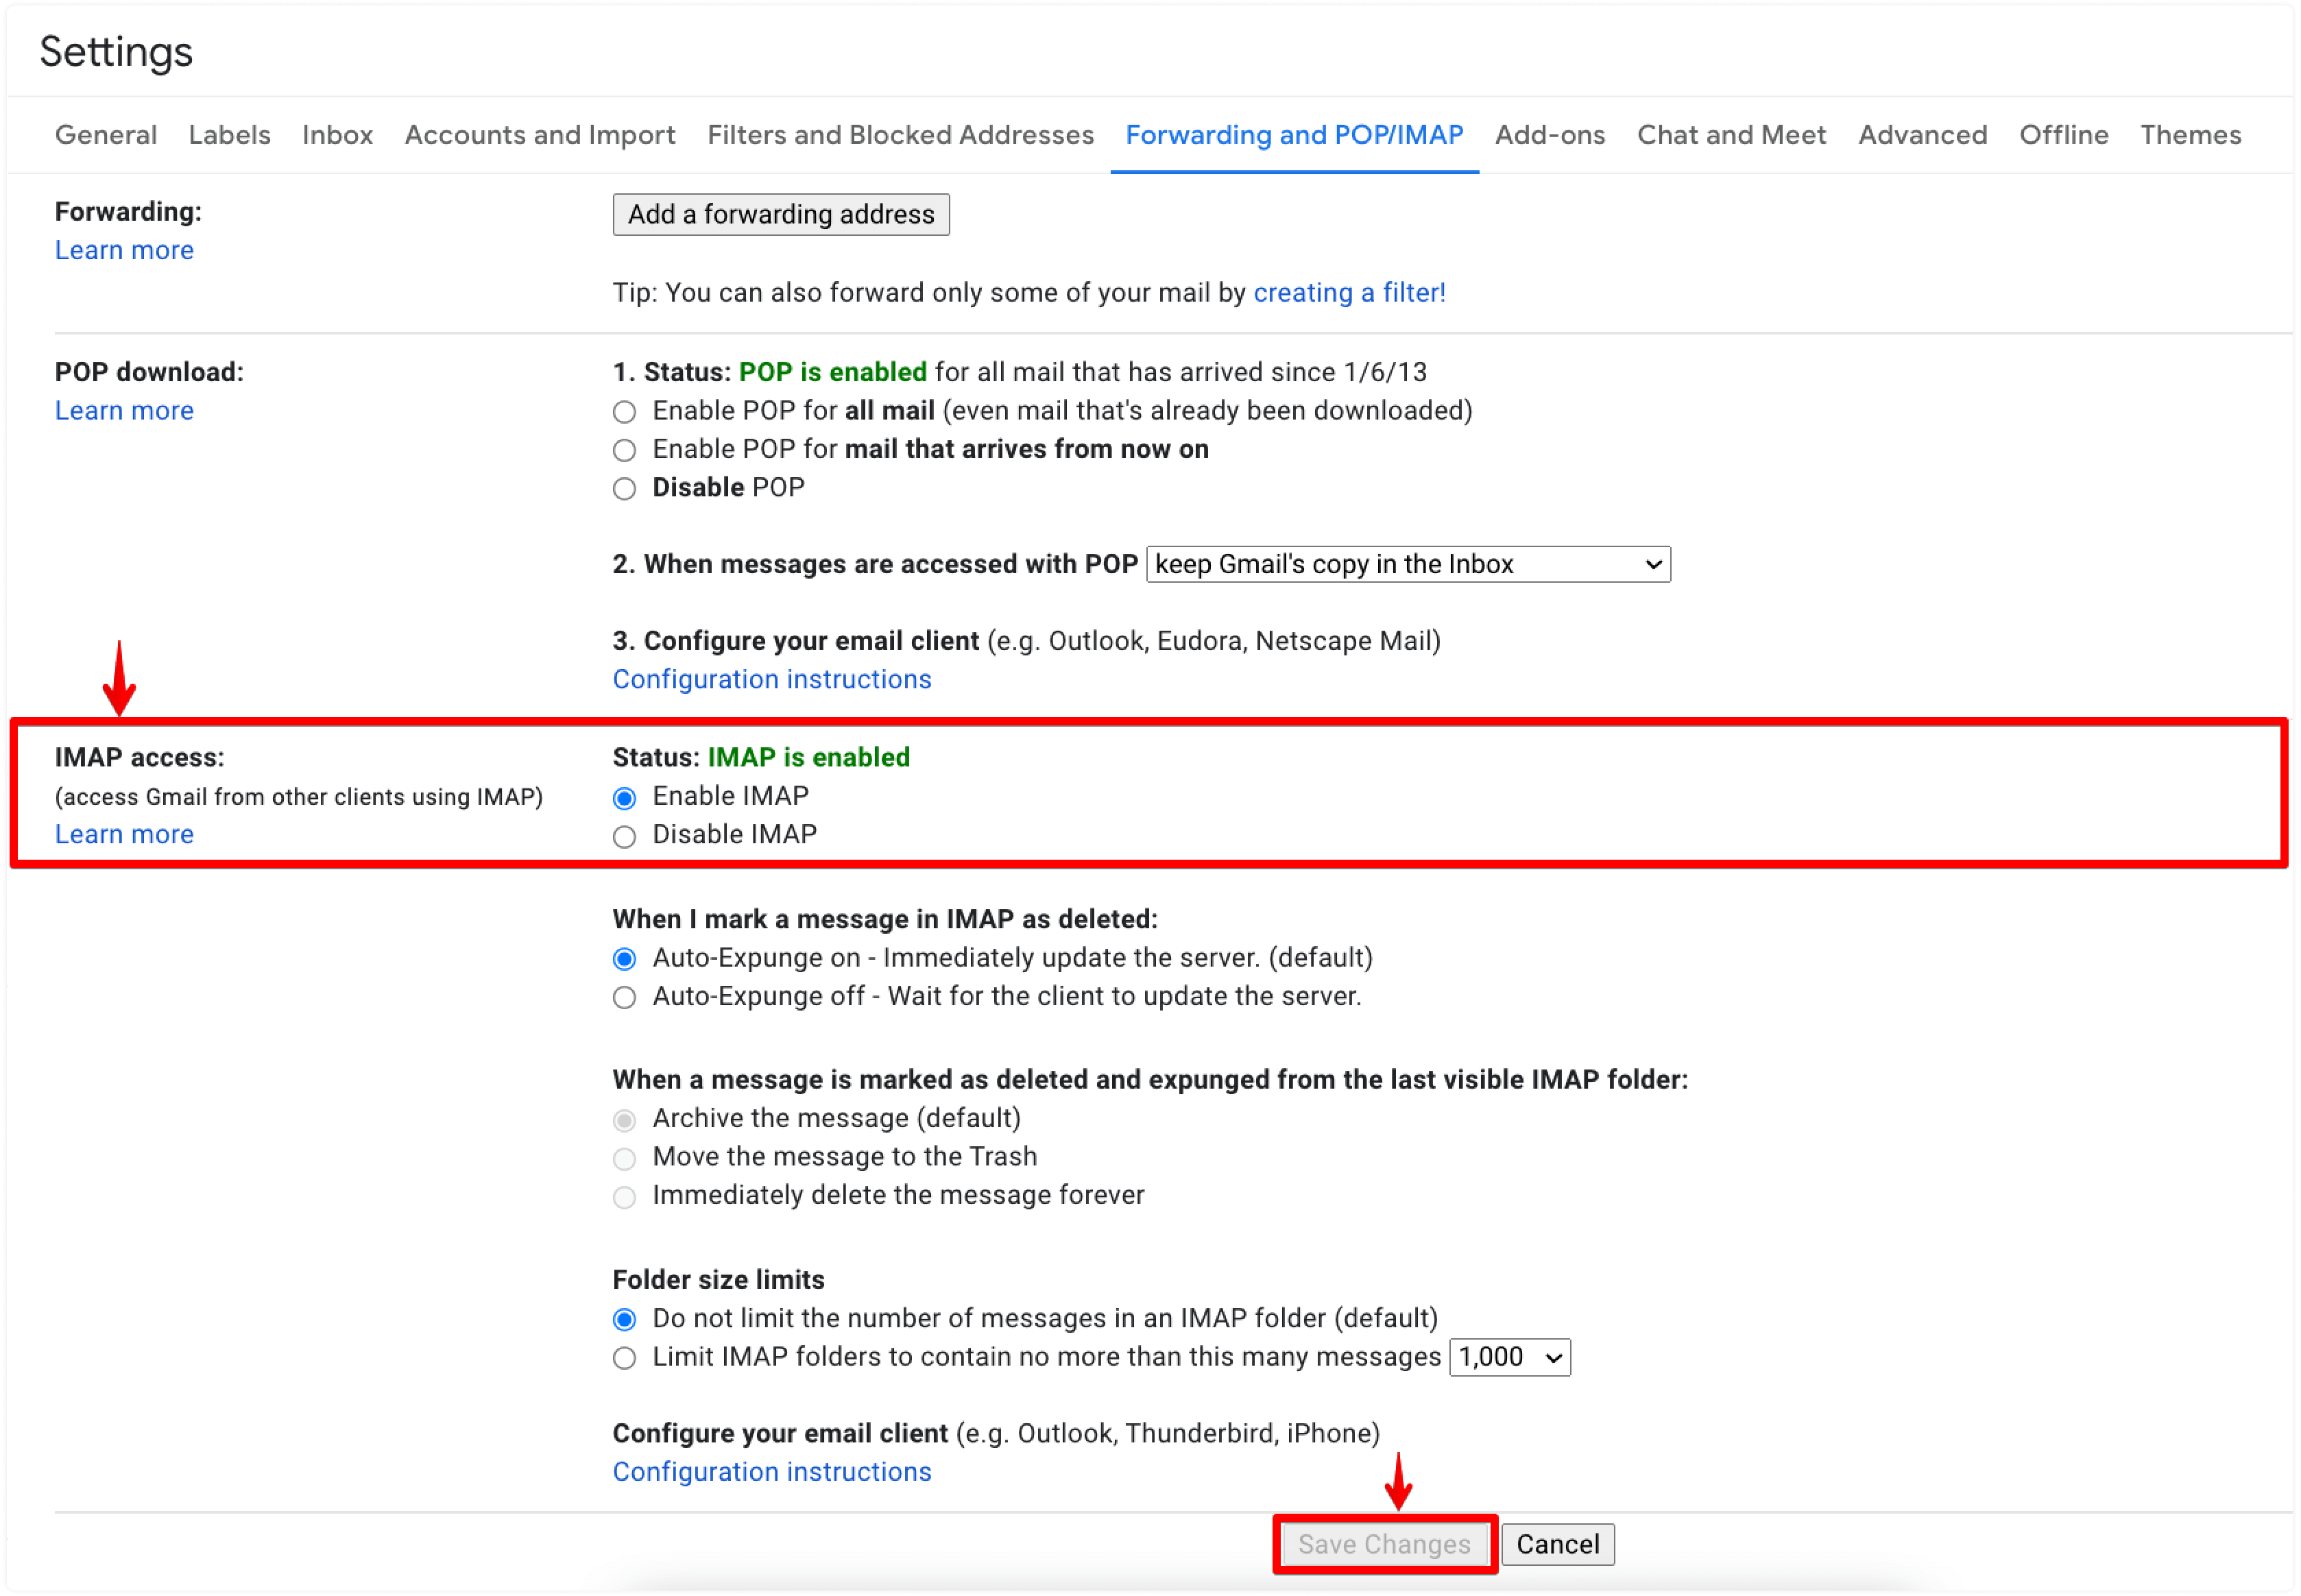
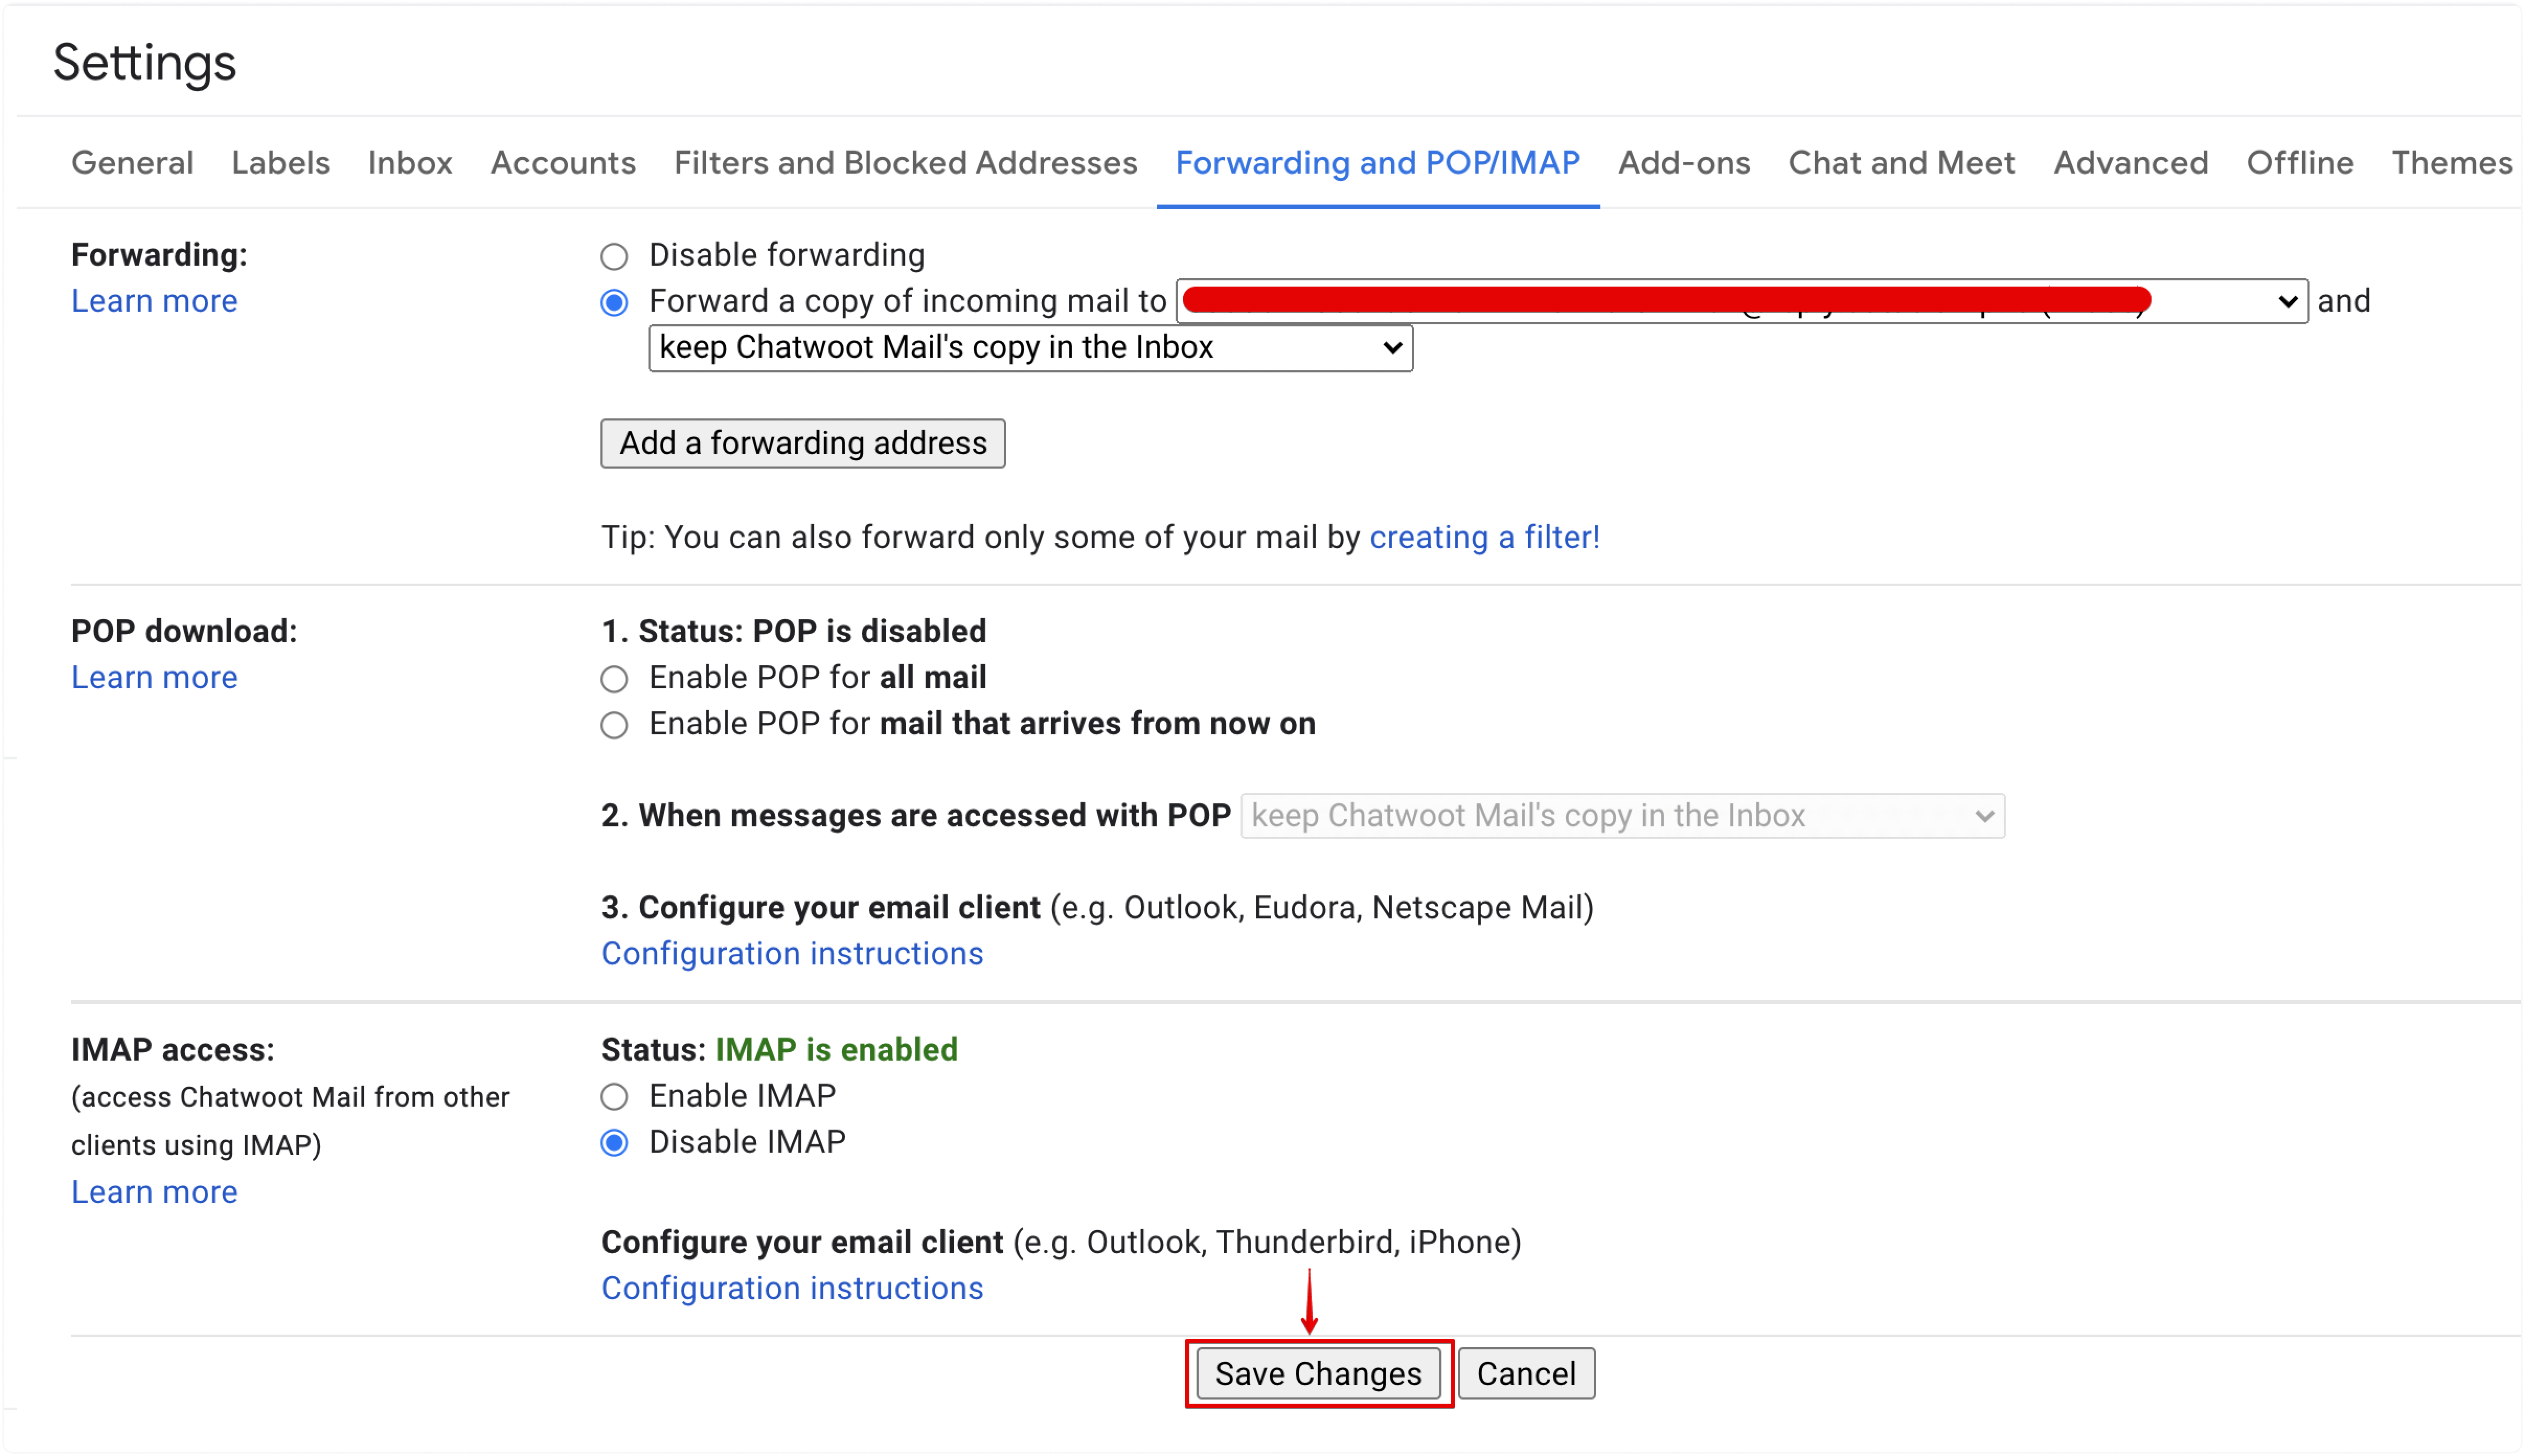
Step 3. Choose the "Enable IMAP" option under the IMAP access section and click the "Save Changes" button.
How to allow less secure access to Gmail?
Note: This option is unavailable for Gmail accounts with enabled 2-step verification or those managed by an organization.
Step 1. Go to Google Account Security.

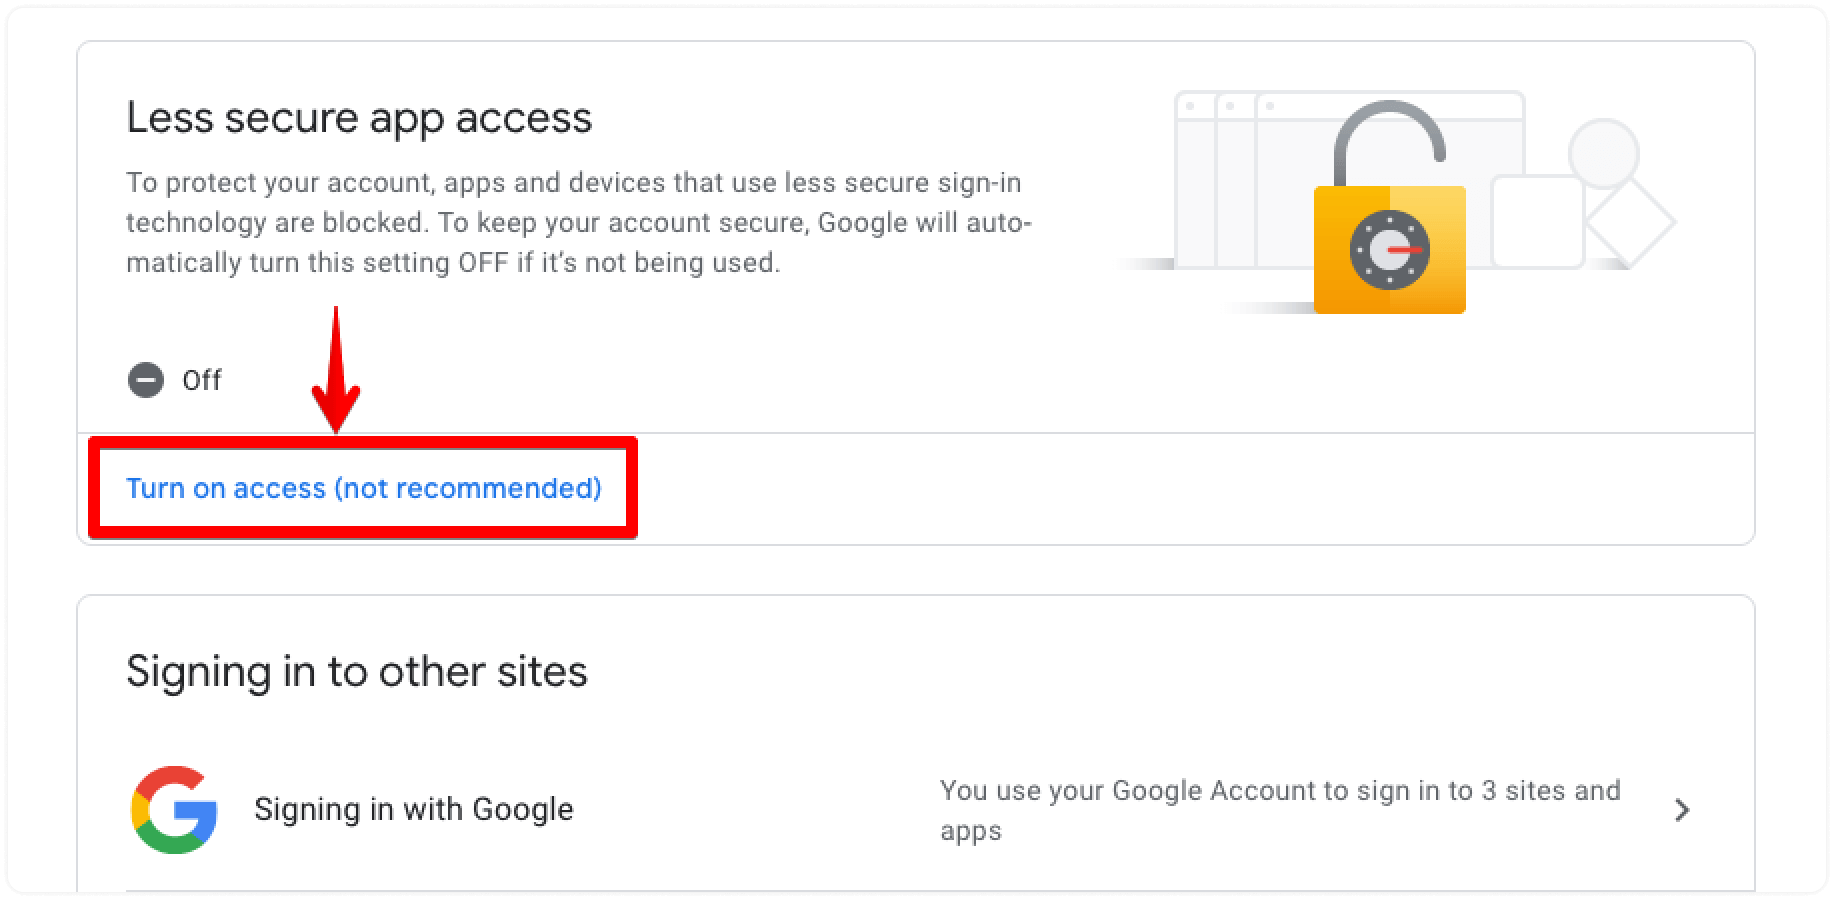
Step 2. Click on "Turn on access" under the "Less secure app access" section on the Security page.
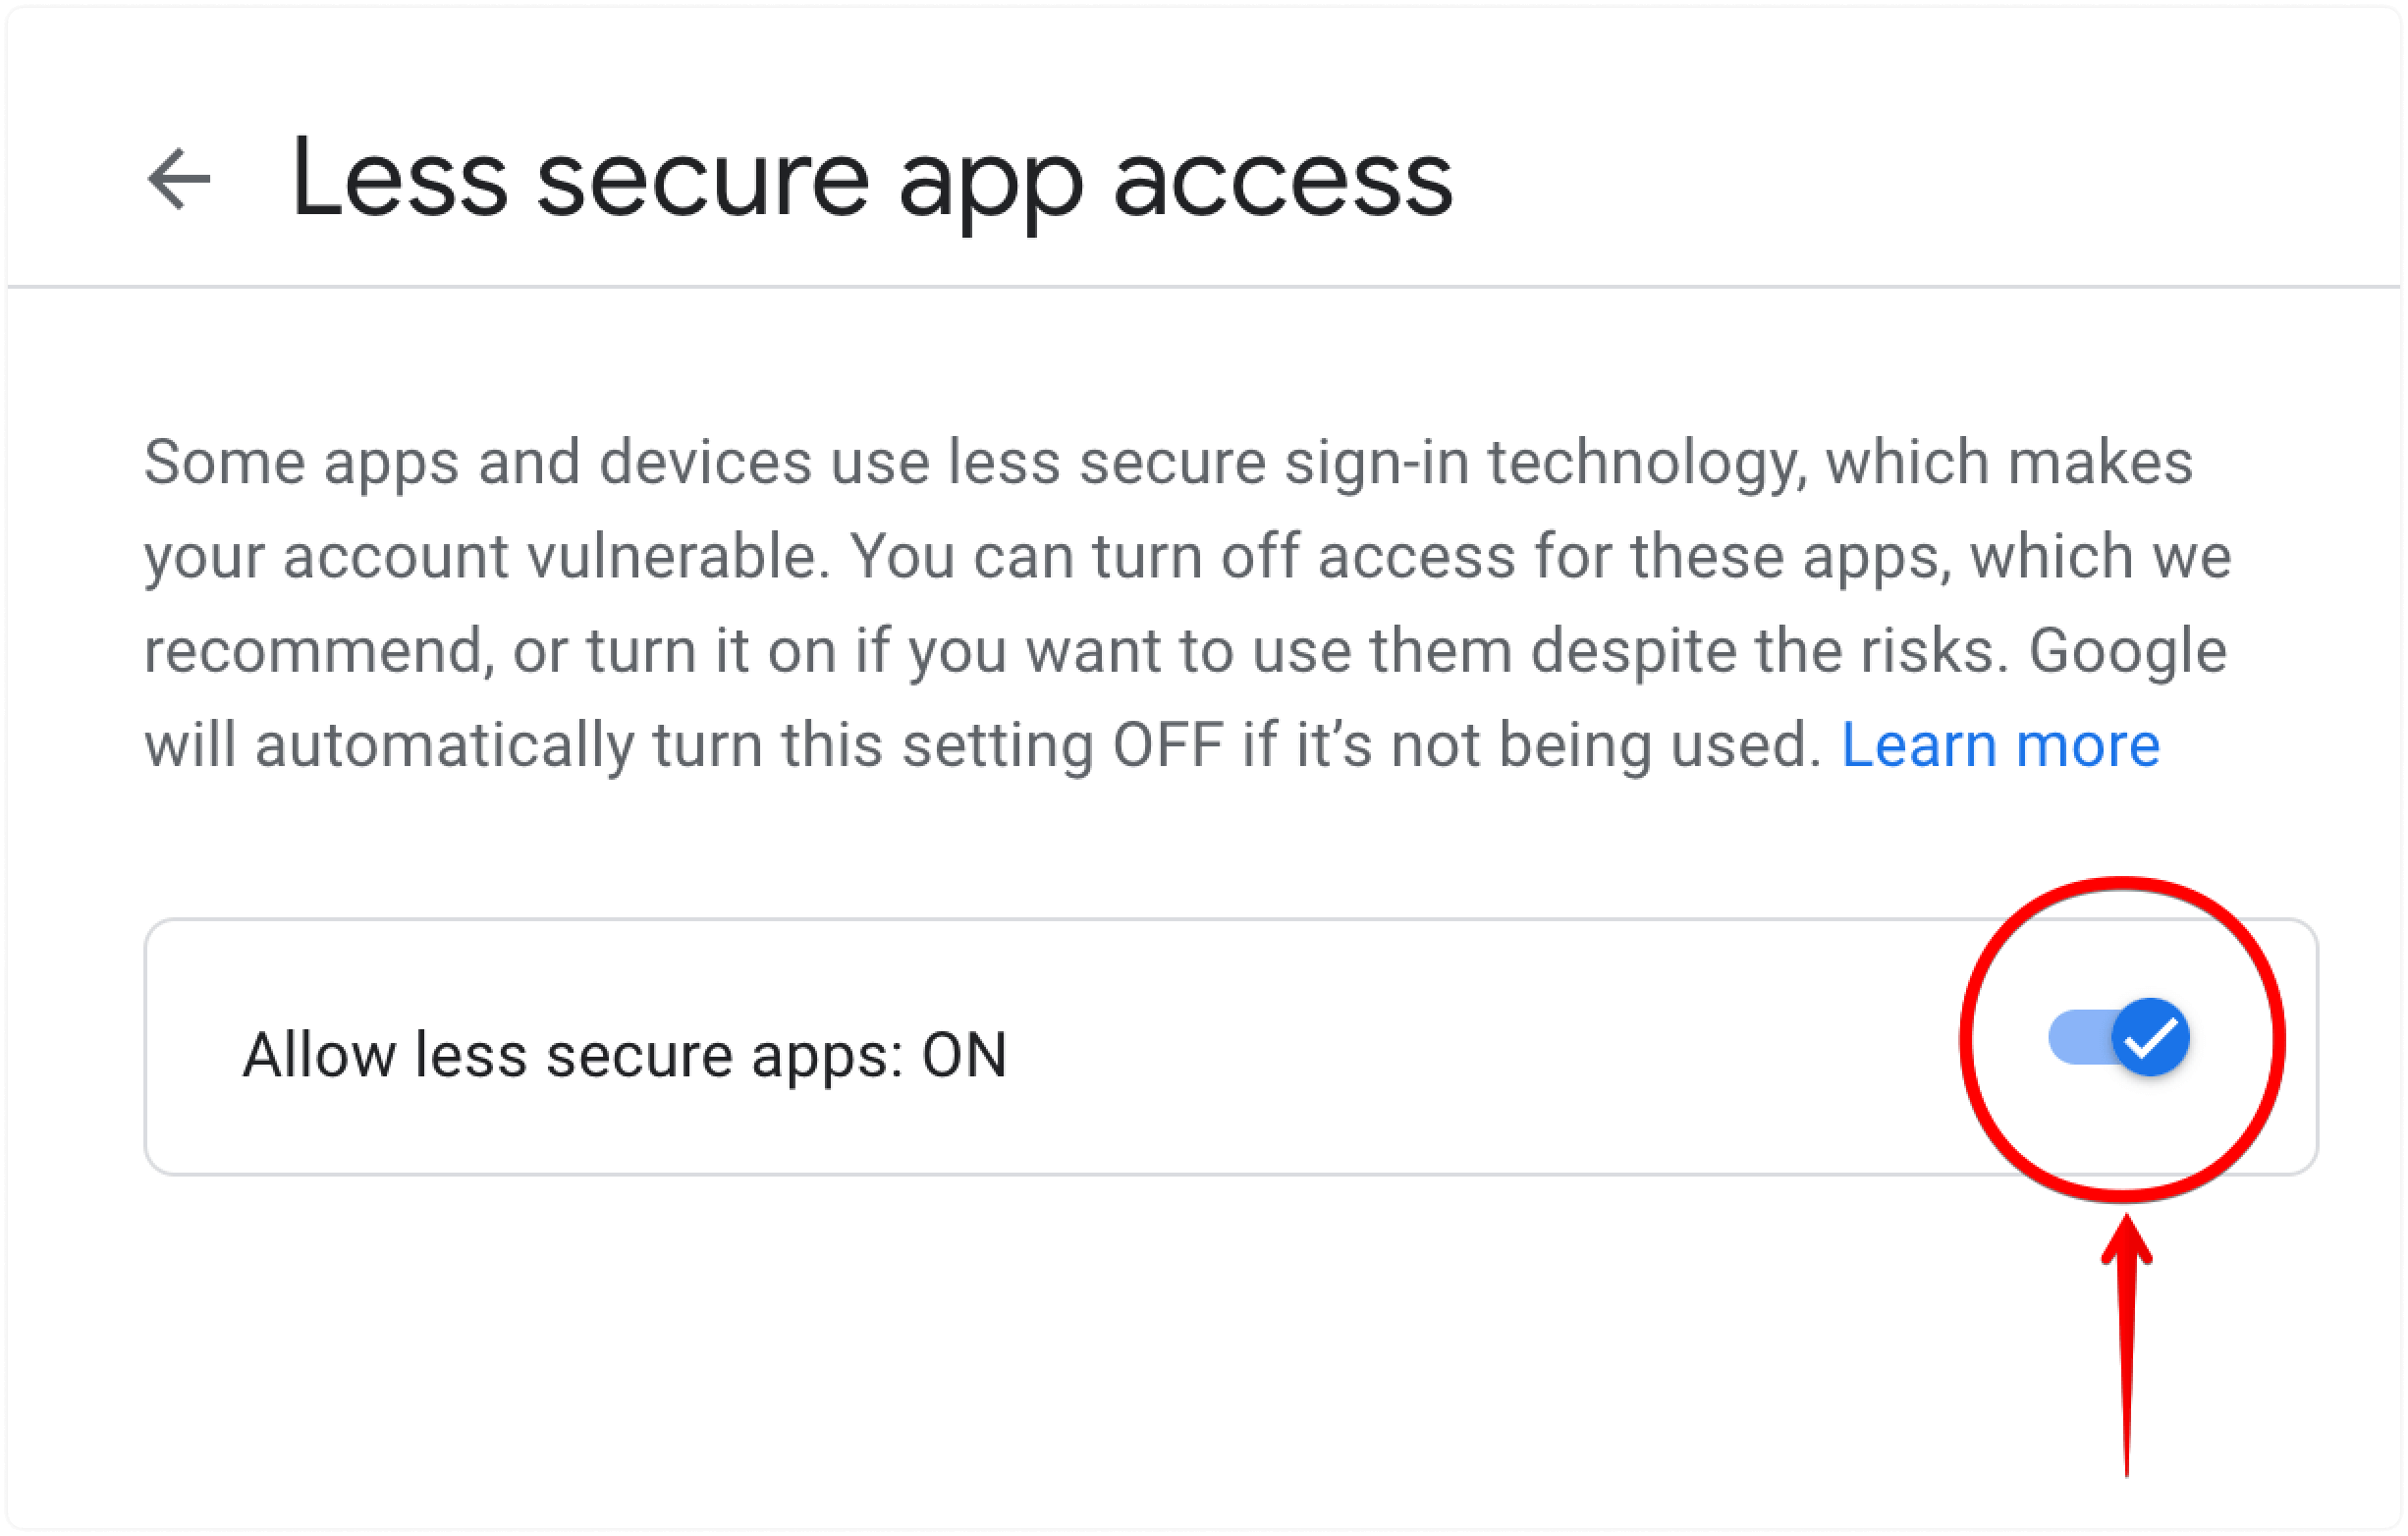
Step 3. Toggle "Allow less secure apps" to "ON". Now you can use your Gmail account password to configure IMAP/SMTP.
How to generate app password for Gmail?
Note: This option is for Gmail accounts with enabled 2-step verification or those managed by an organization.
Step 1. Go to Google Account Security.

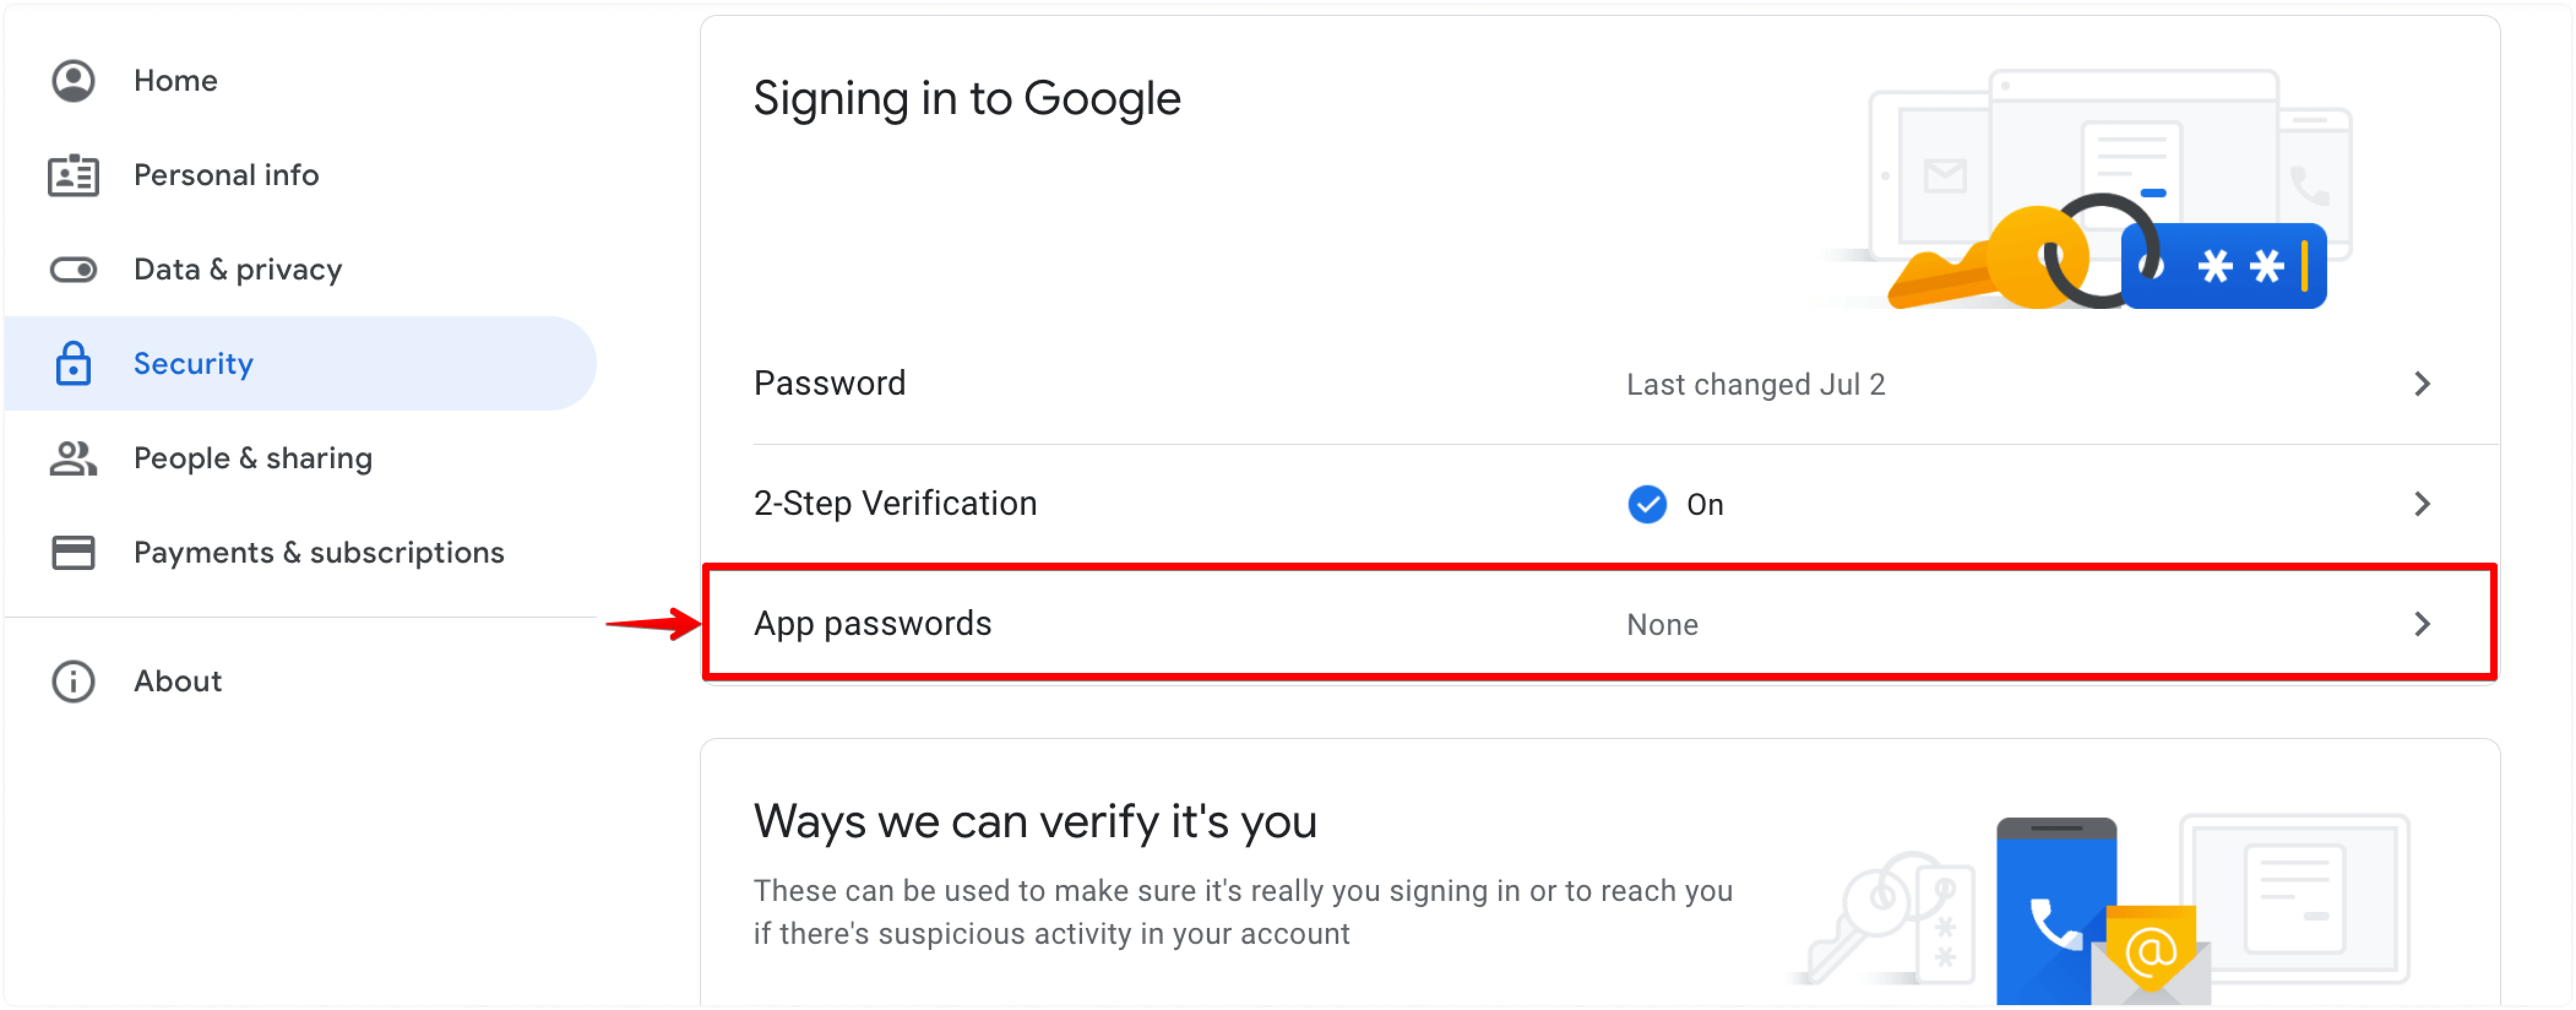
Step 2. Click "App passwords" under the "Signing in to Google" section on the Security page.
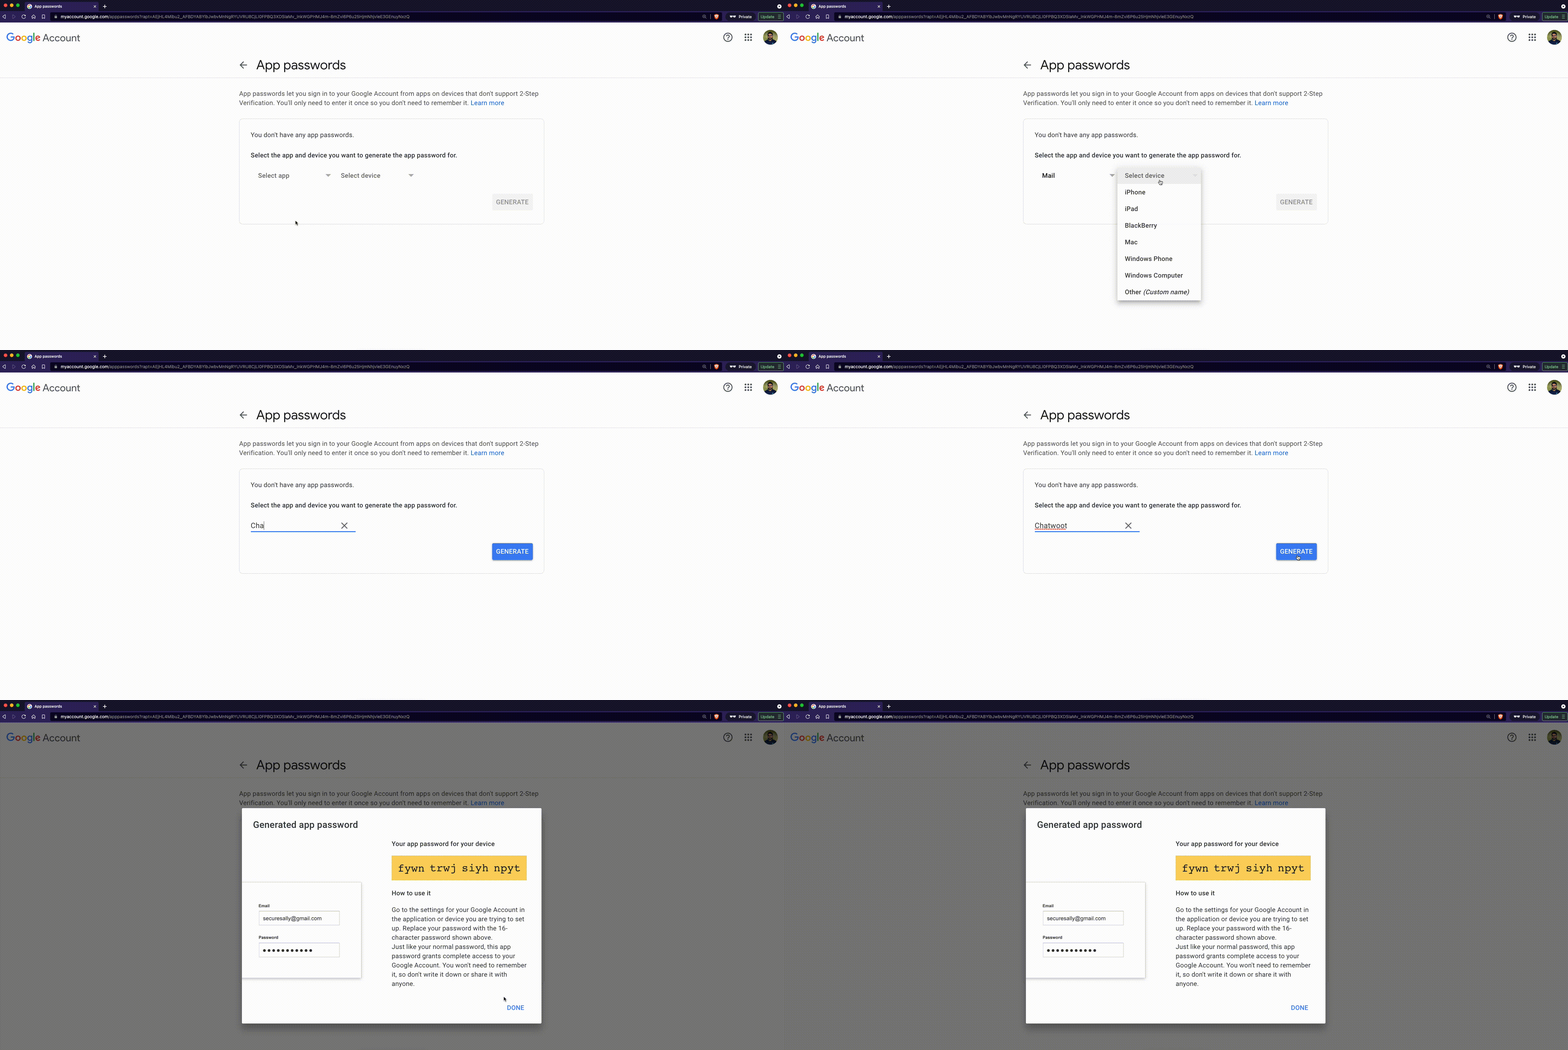
Step 3. Select the Mail app, select a device, and click "GENERATE". Use the generated password to configure IMAP/SMTP.
How to add a forwarding address for Gmail?
Step 1. Open your Gmail inbox and click the Settings icon in the top right corner. Click the "See all settings" button.

Step 2. Select the "Forwarding and POP/IMAP" tab on the Settings page.
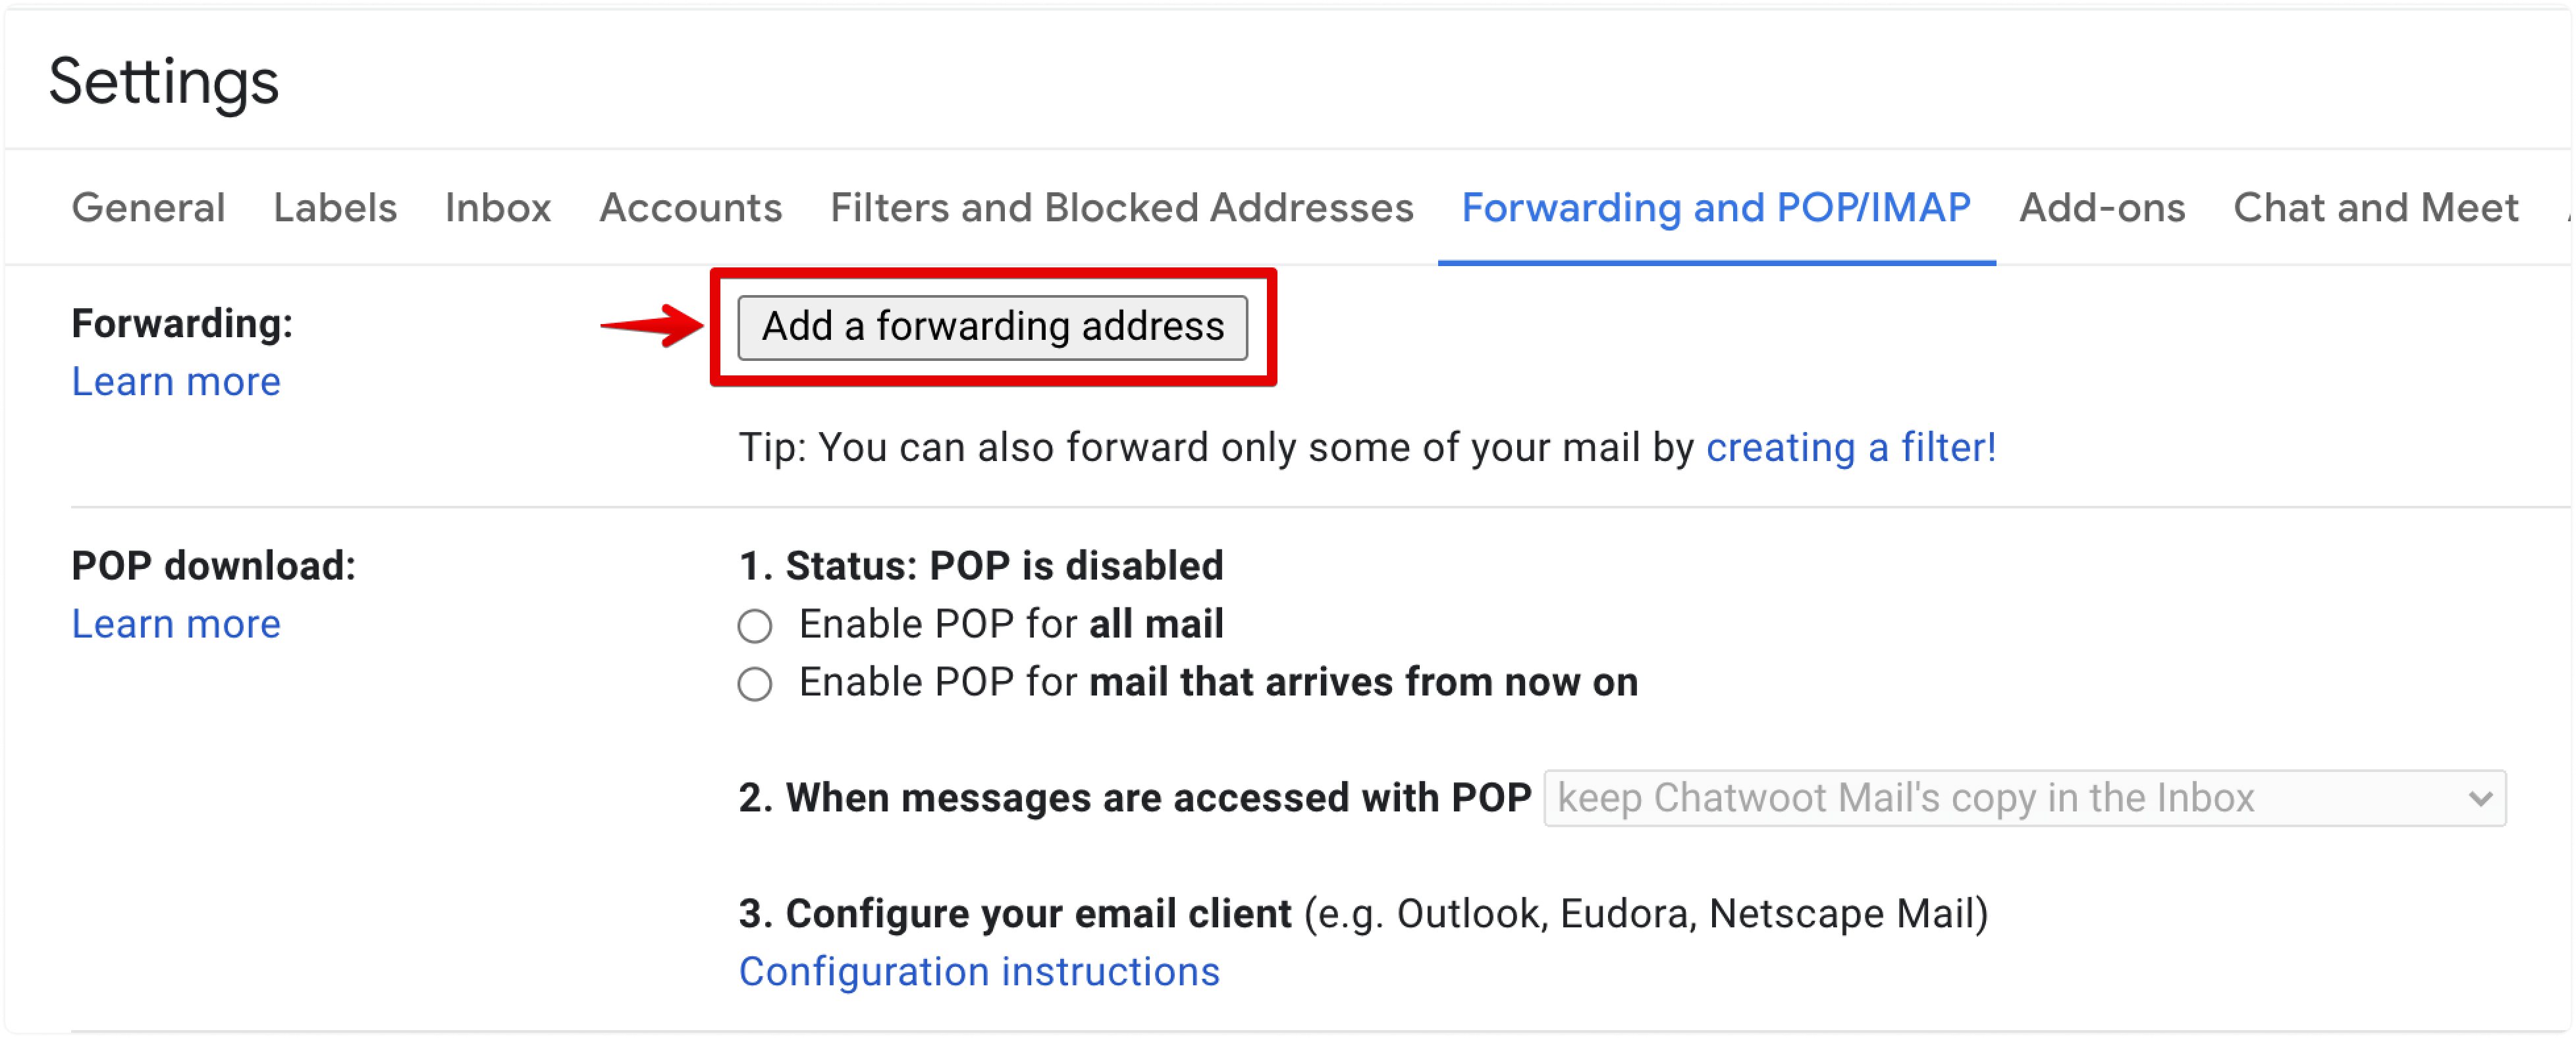
Step 3. Click the "Add a forwarding address" button. It will ask for the forwarding email address. Enter the one from Chatwoot and click the "Next" button.
Step 4. Confirm the forwarding address in the browser popup. The email inbox will send a verification code to the forwarding email address.
Step 5. Copy the verification code from the Chatwoot email inbox.
Step 6. Paste the verification code and click the "Verify" button.

Step 7. Select the "Forward a copy of incoming mail" option. Choose the required action from the second dropdown and click the "Save Changes" button.
How to create a Microsoft Email channel?
Step 1. Open your Chatwoot dashboard. Go to Settings → Inboxes → Add Inbox.

Step 2. Click on the "Email" icon.

Step 3. Click on the "Microsoft" icon.
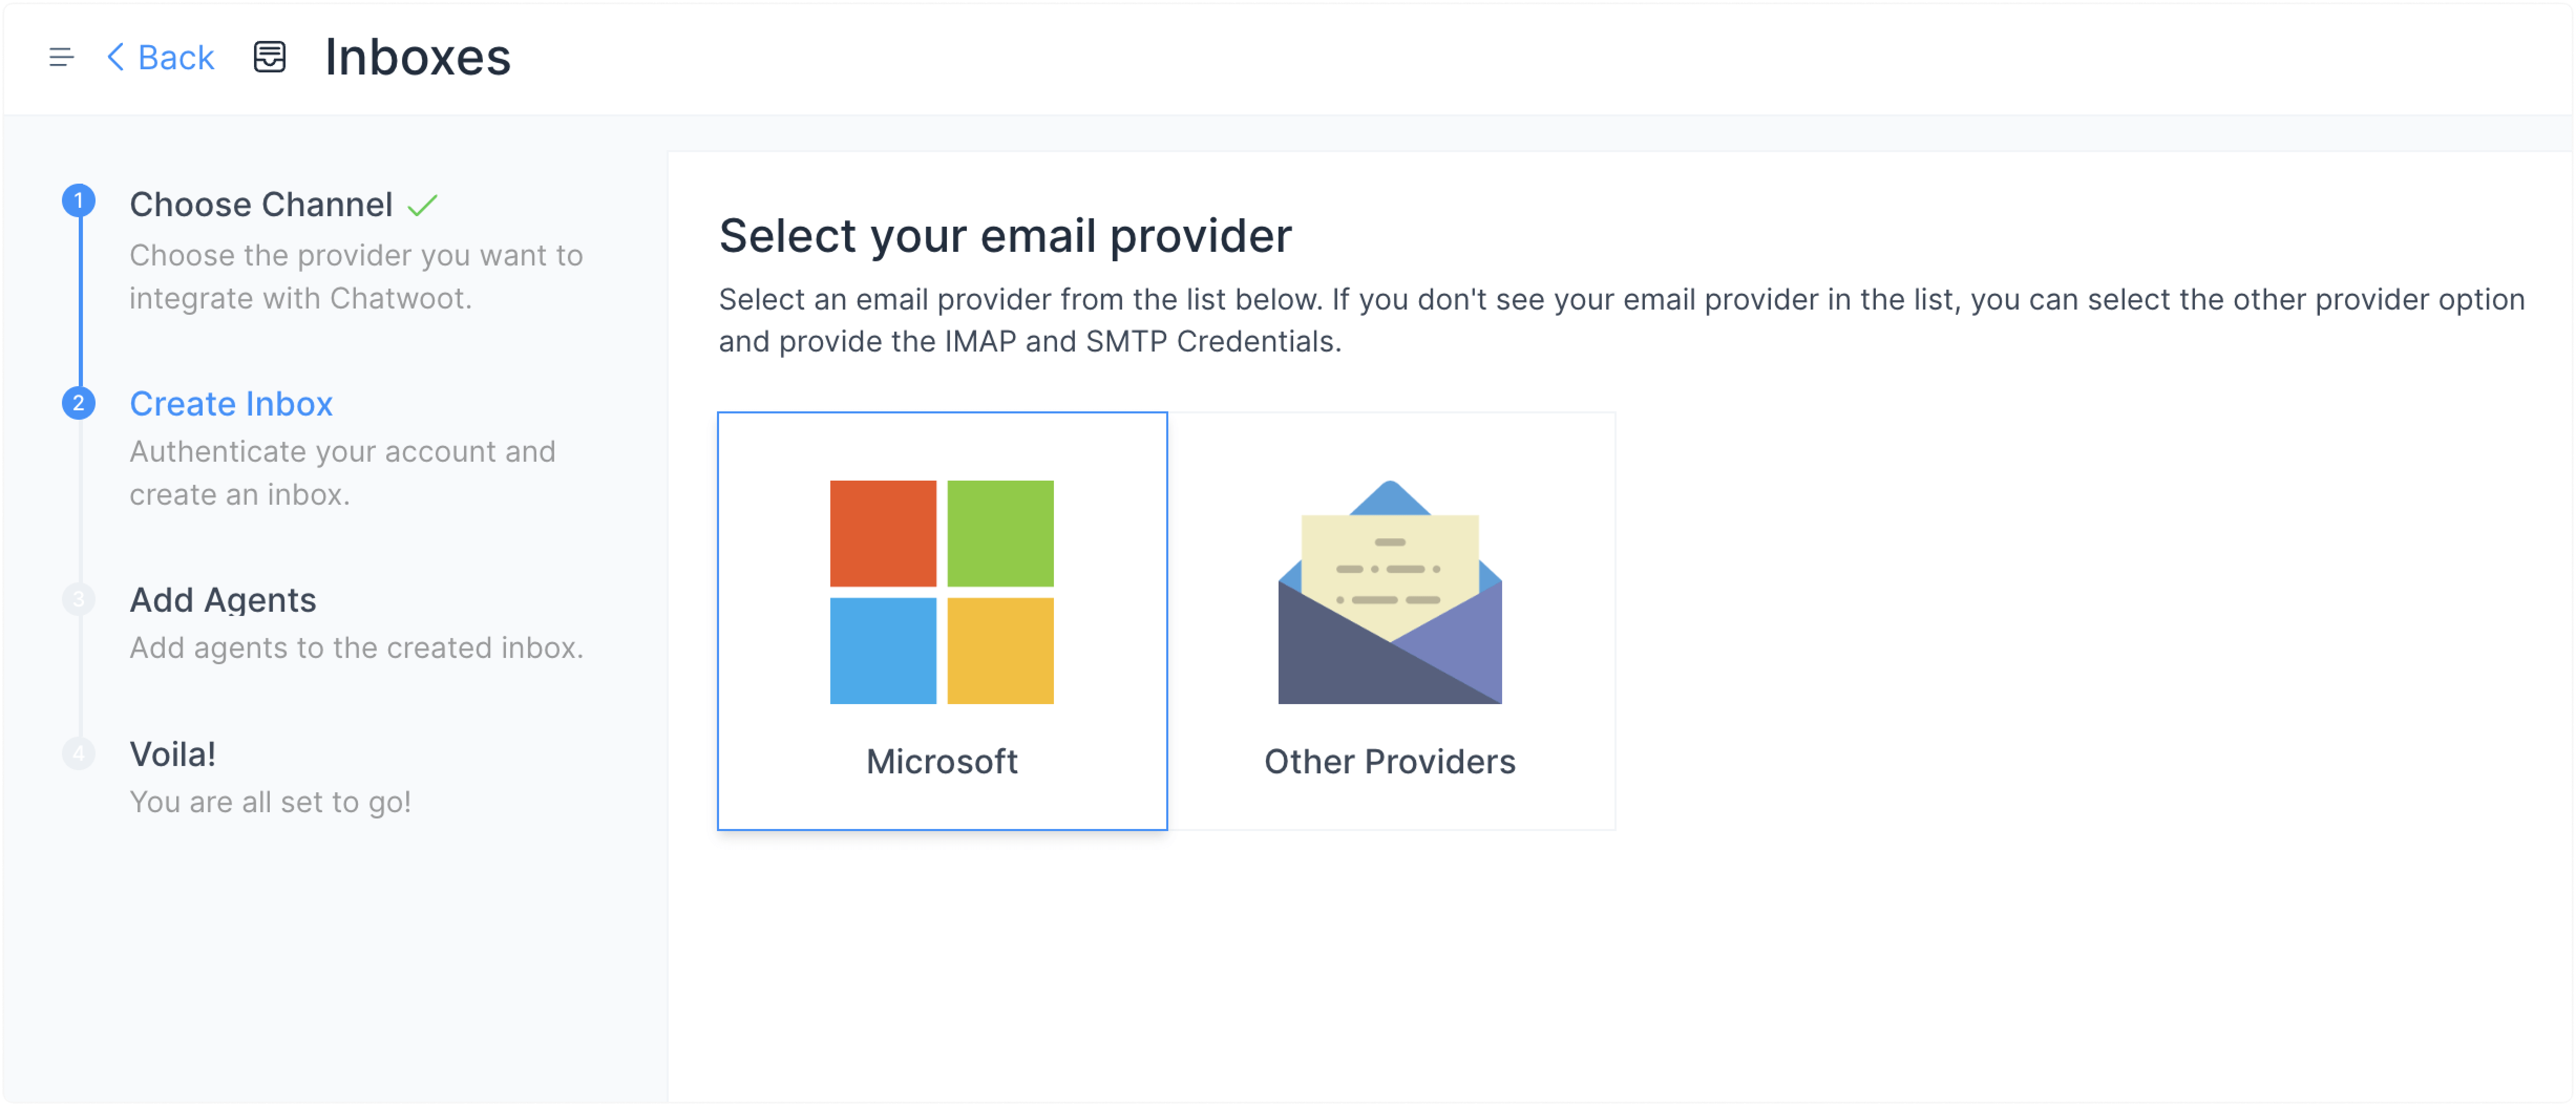
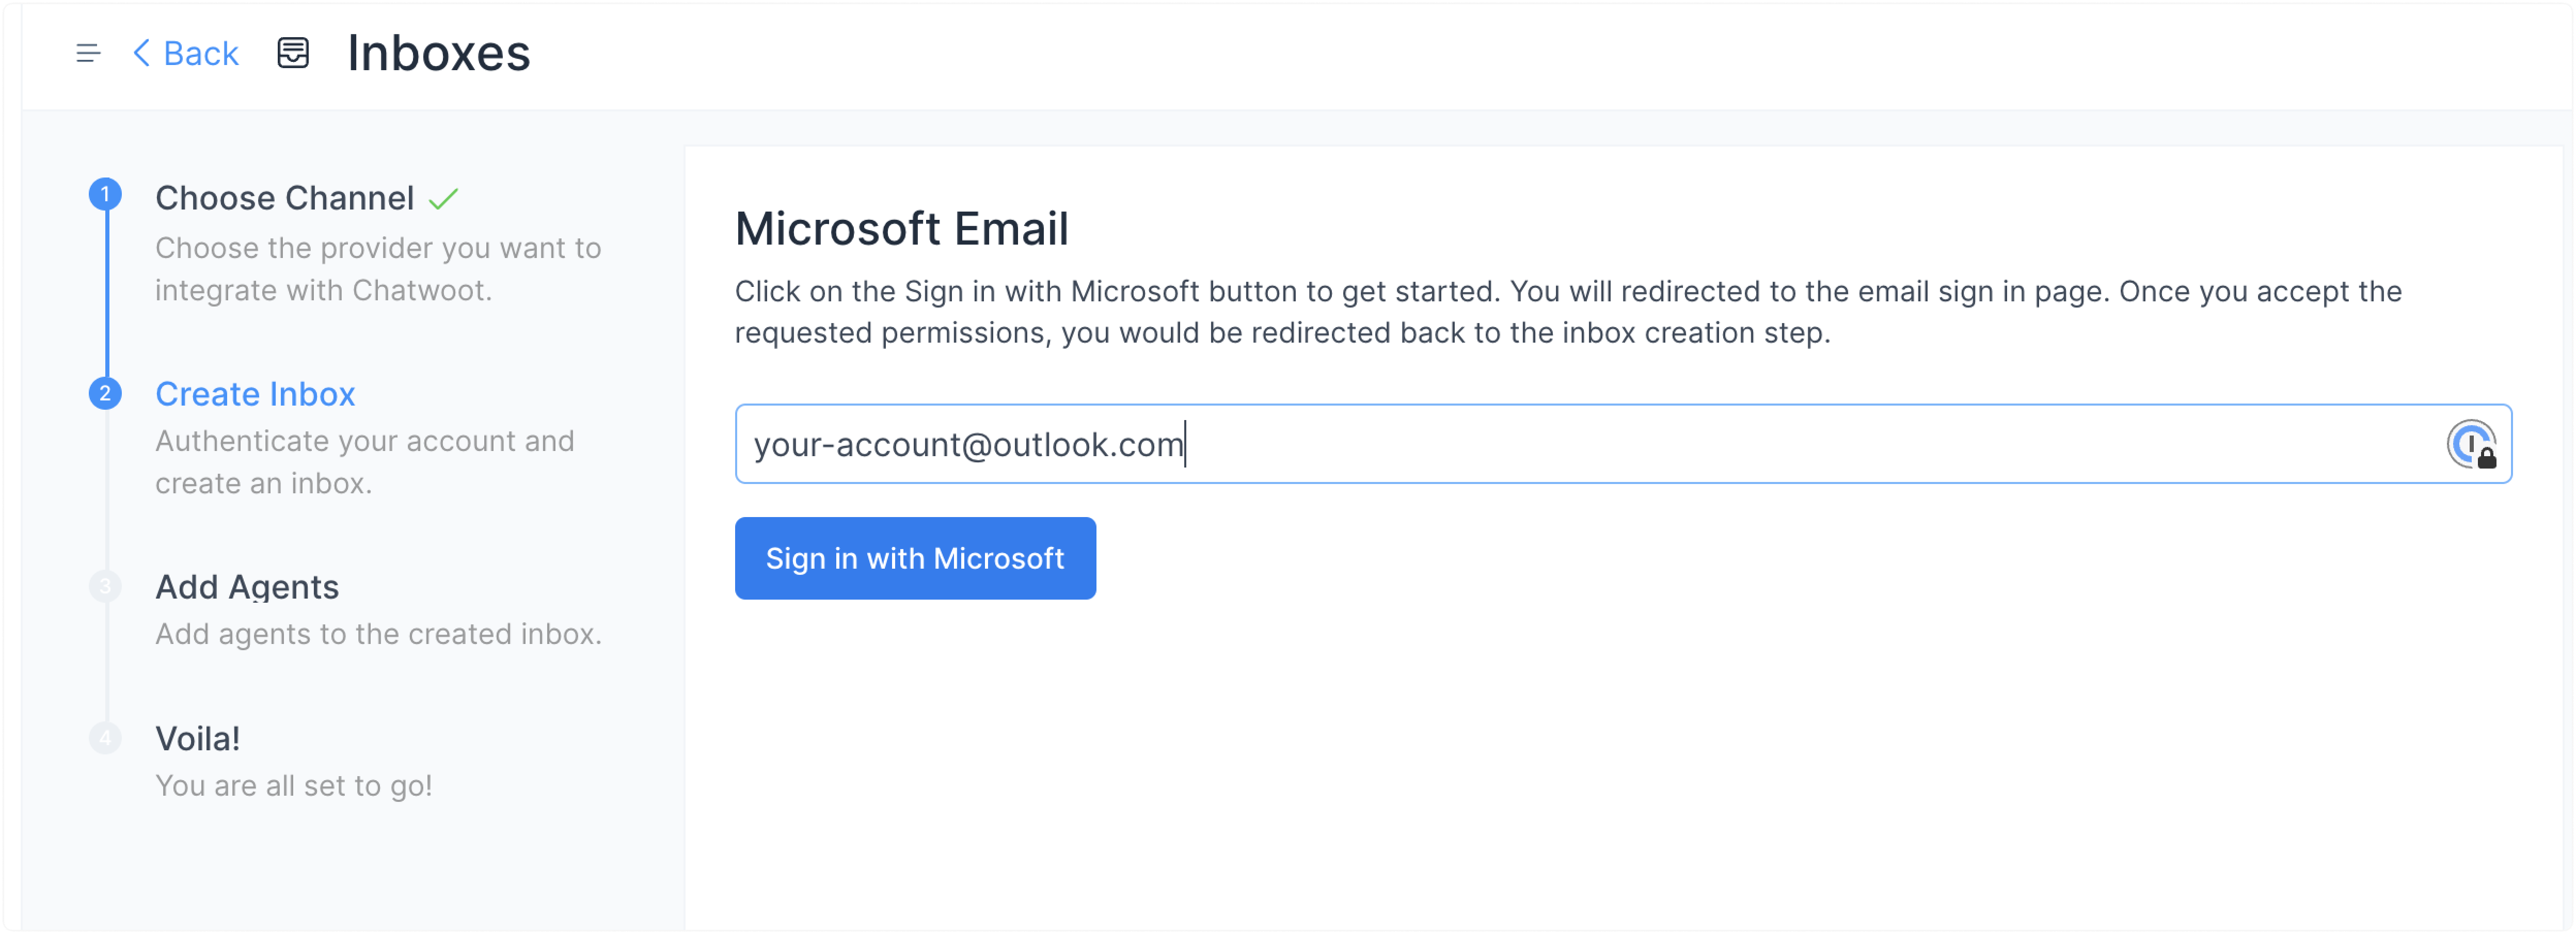
Step 4. Add your Outlook/Microsoft email.
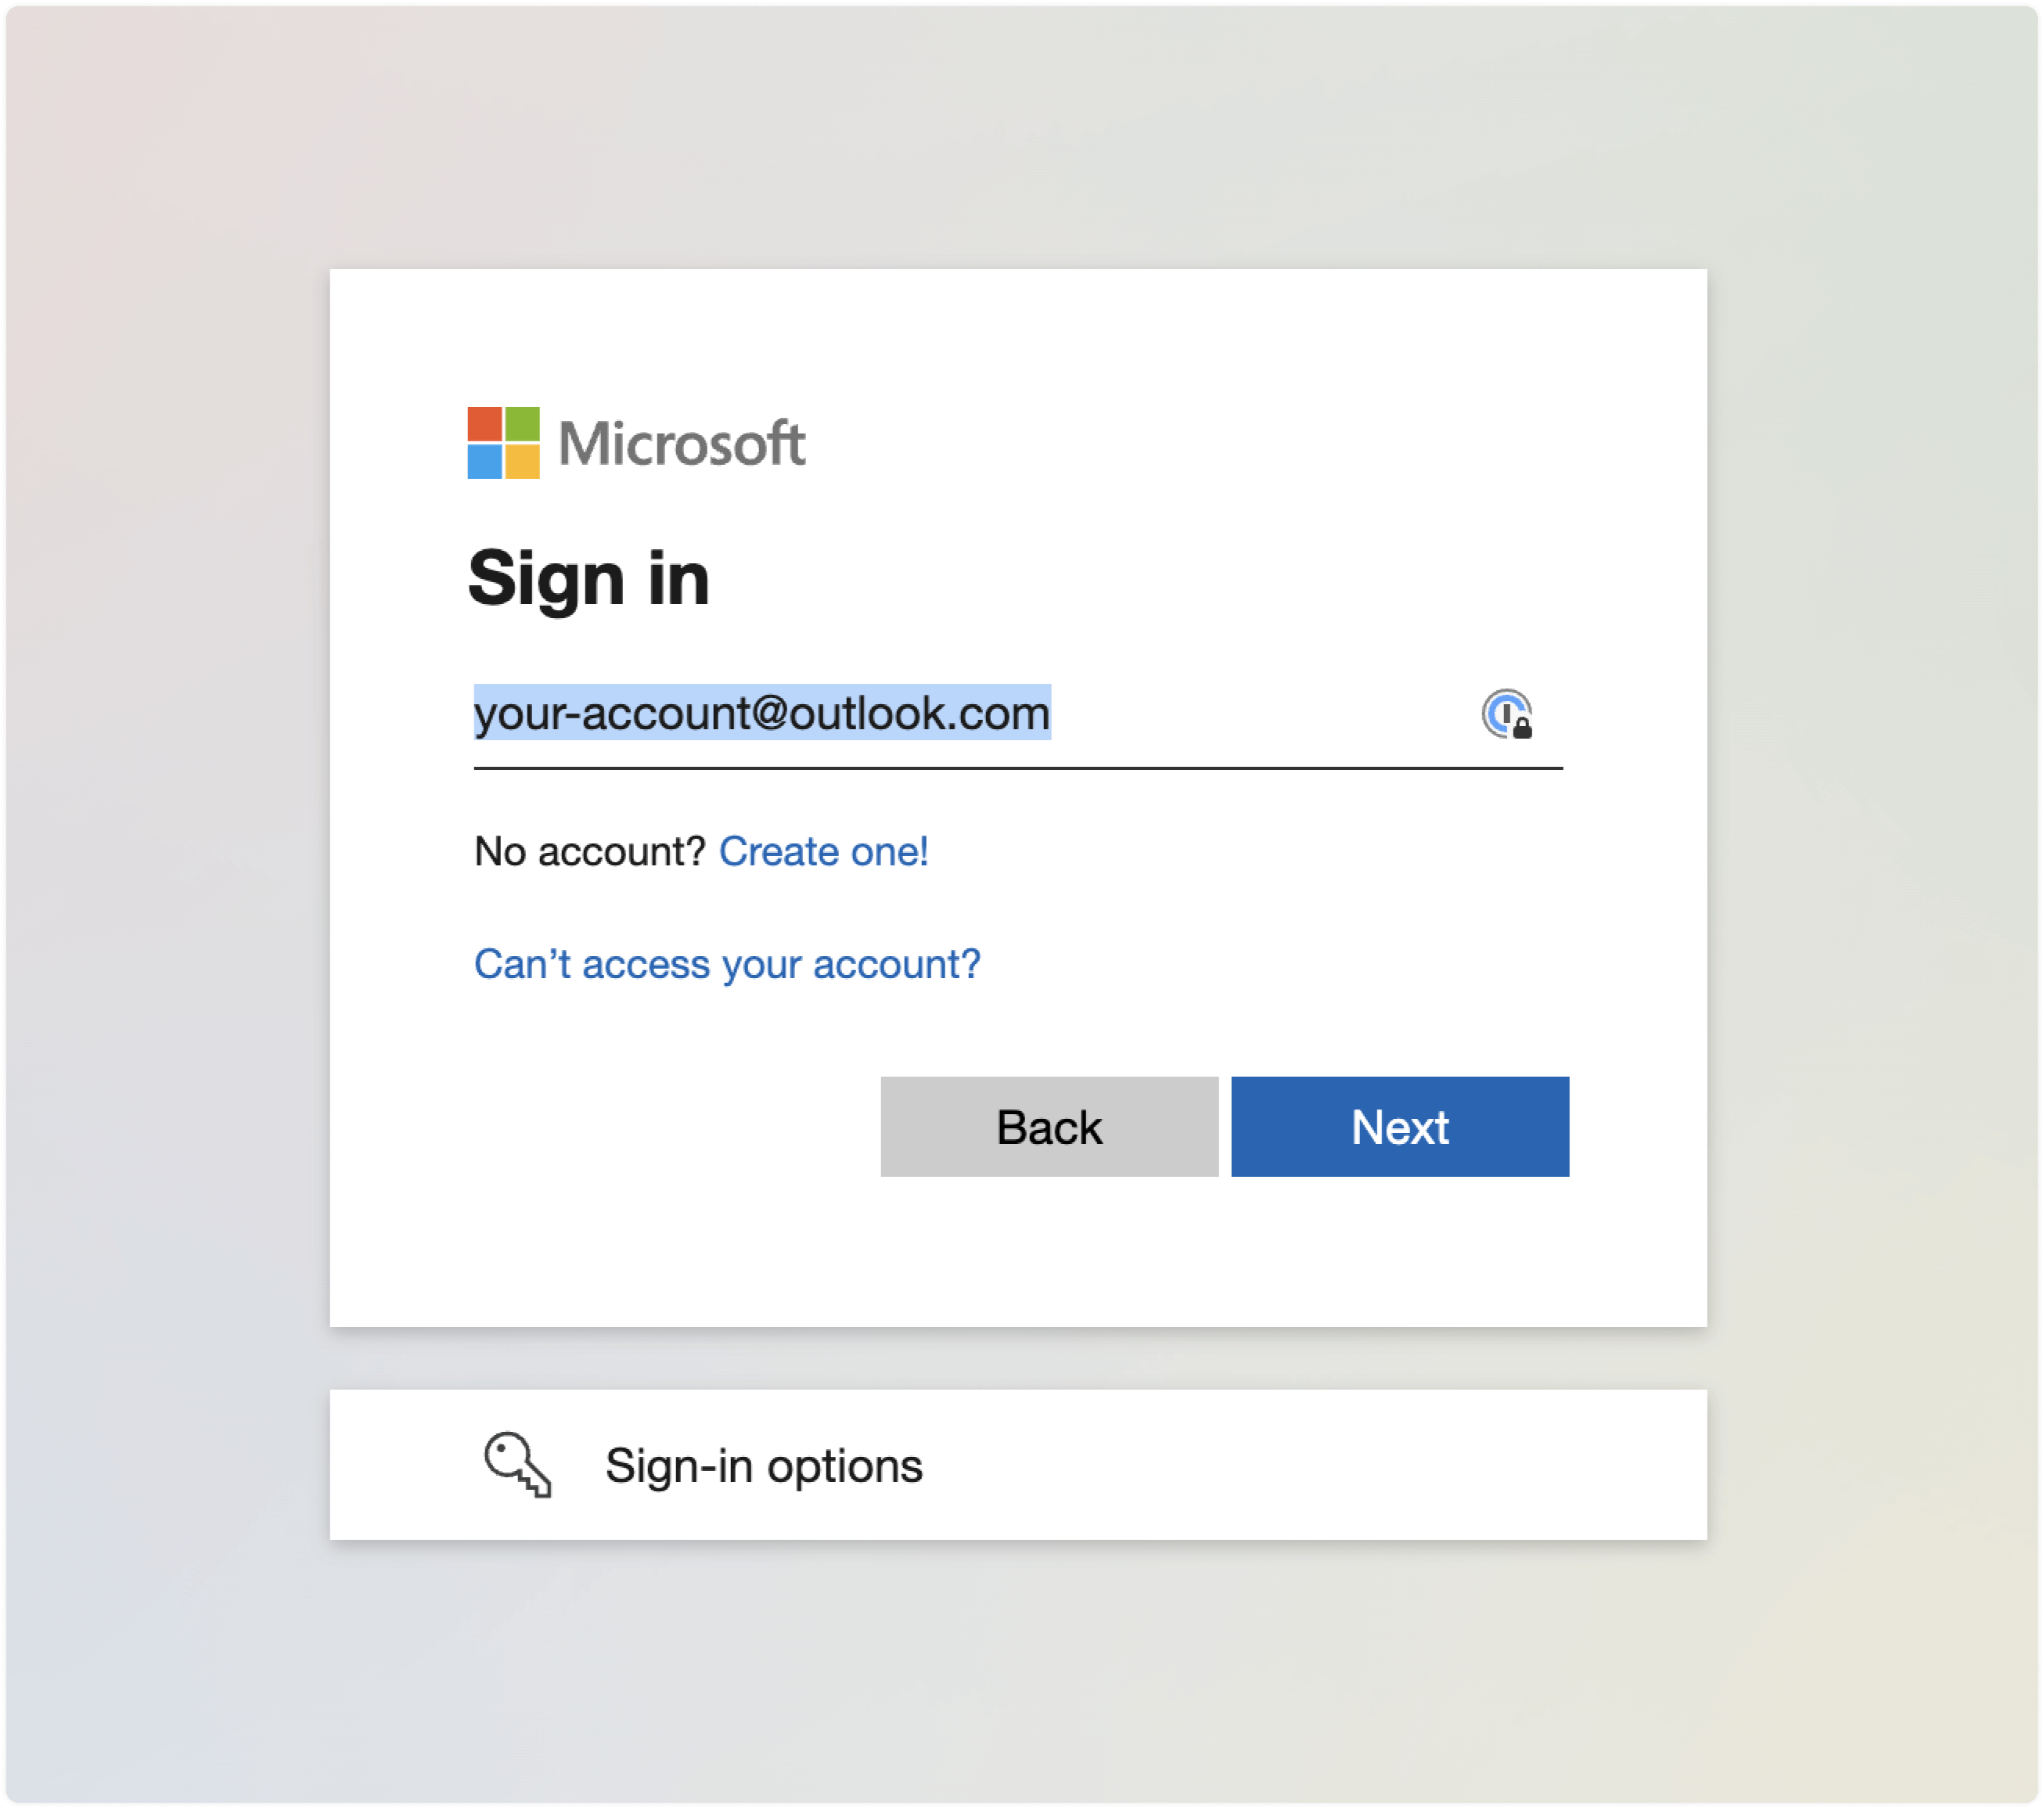
Step 5. Enter your Microsoft/Outlook credentials.
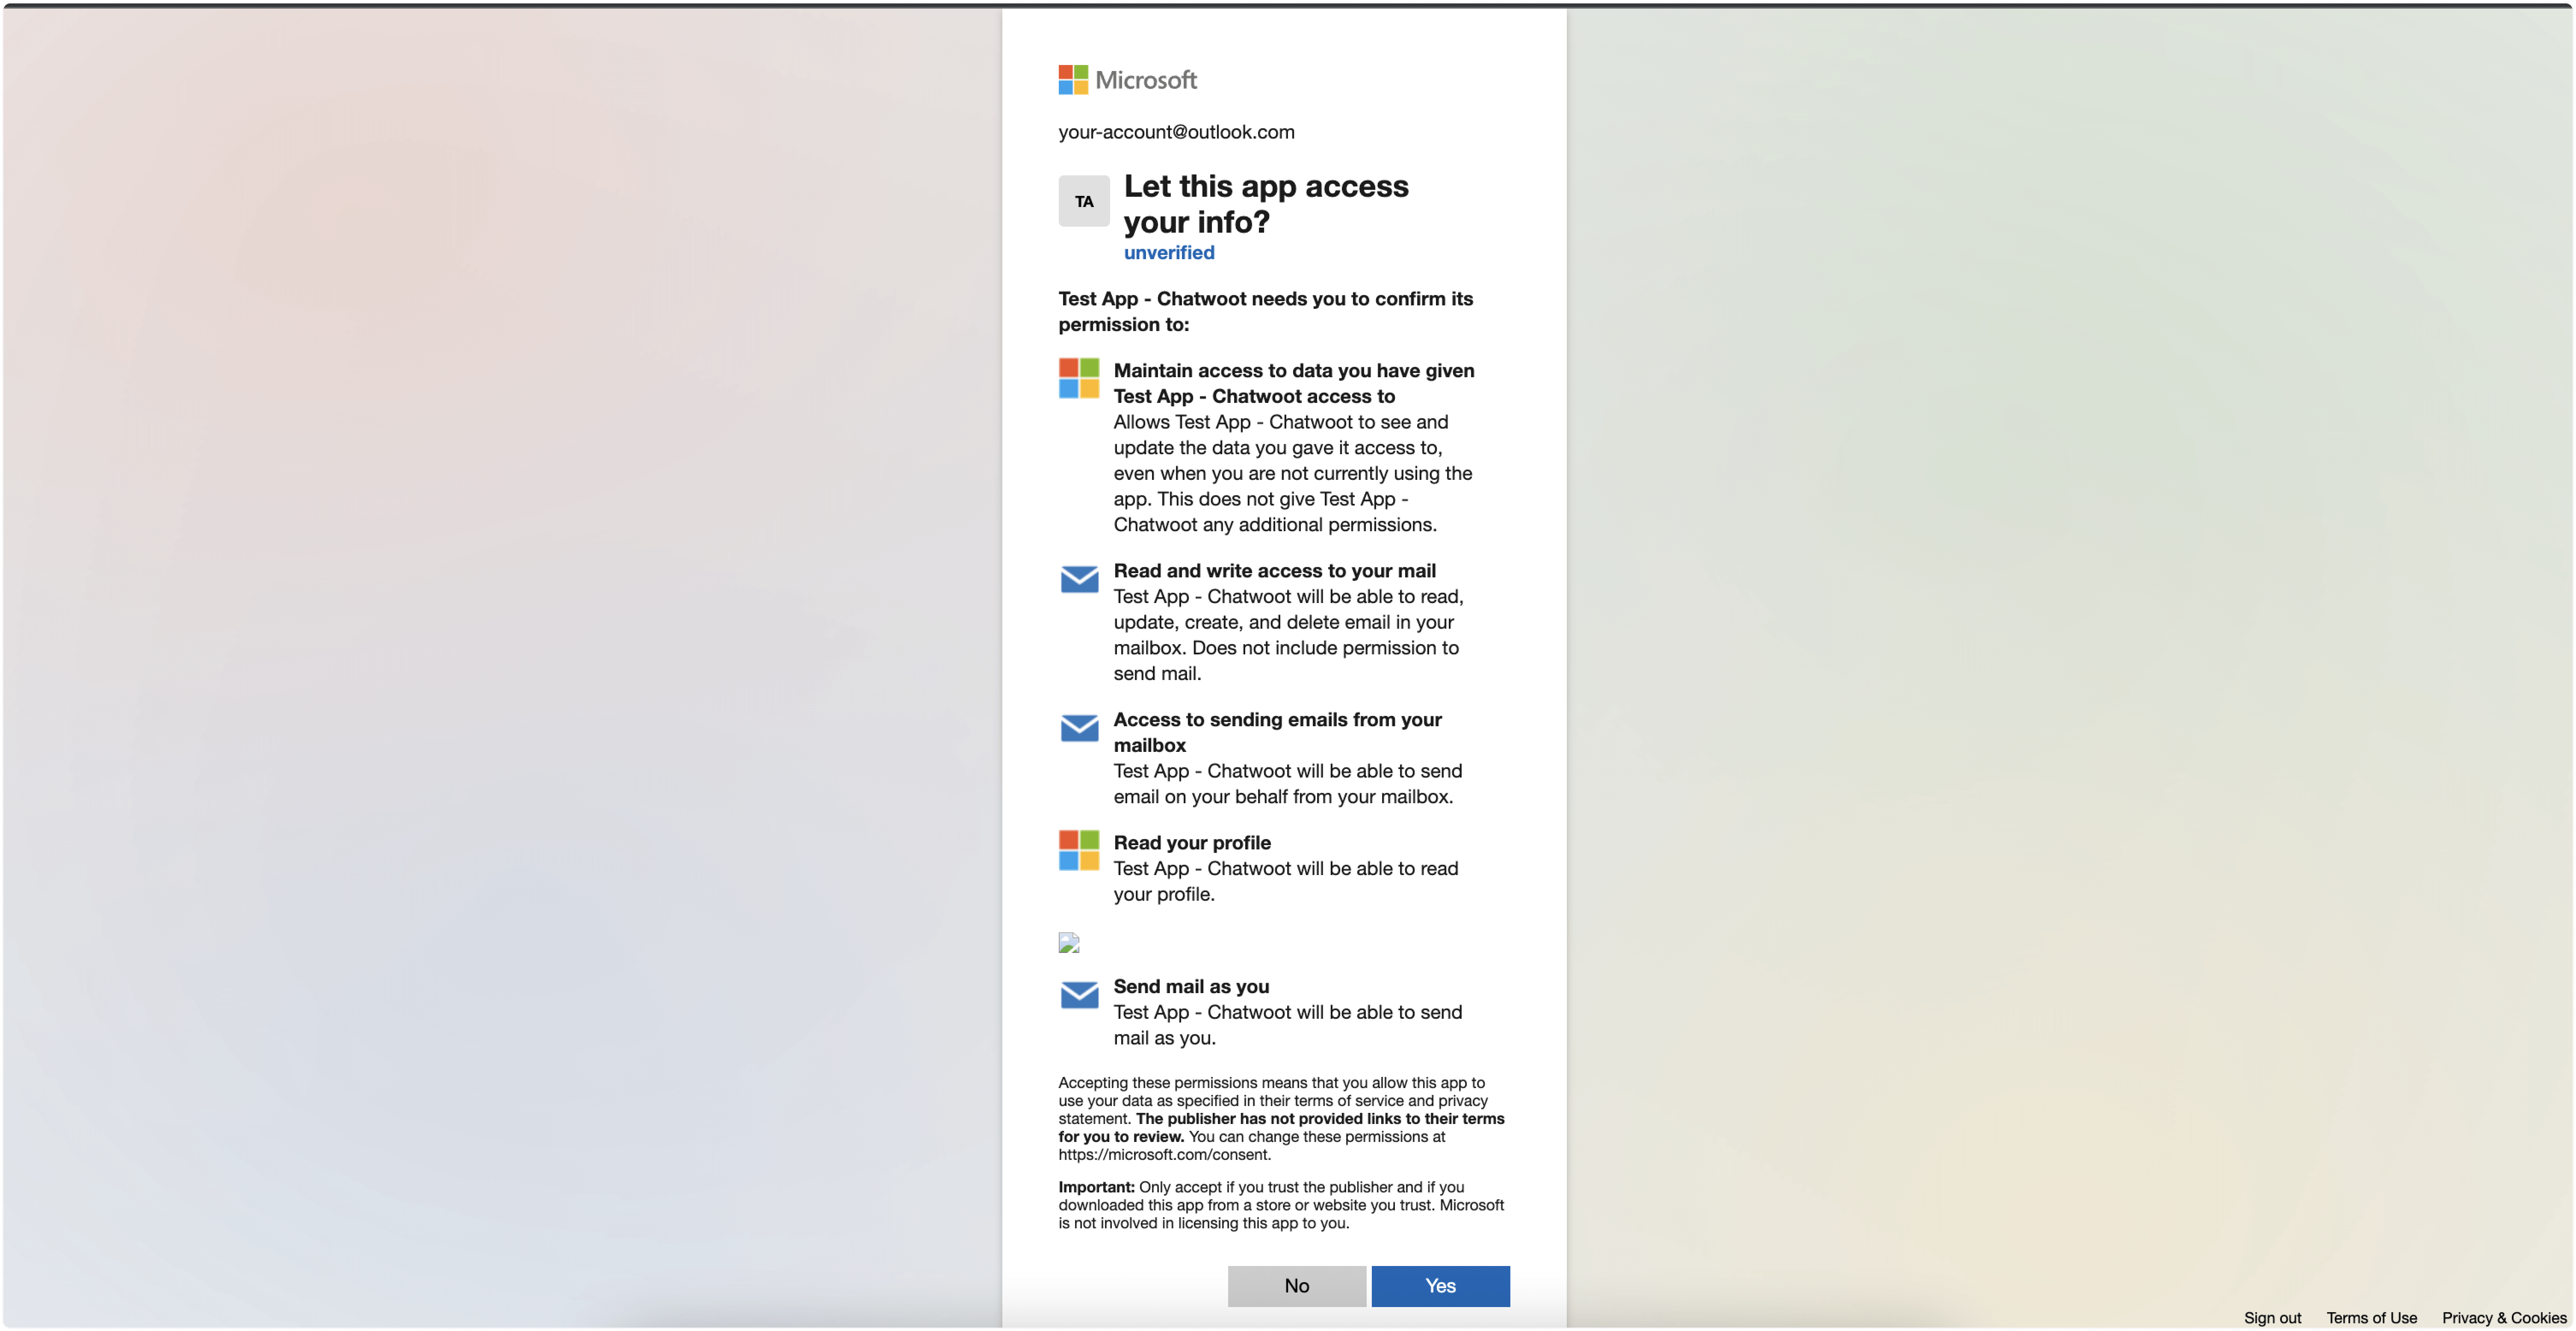
Step 6. Allow the "Chatwoot" app to read and reply to your email.
Step 7. "Add agents" to your email inbox.

You have successfully created a Microsoft email inbox.
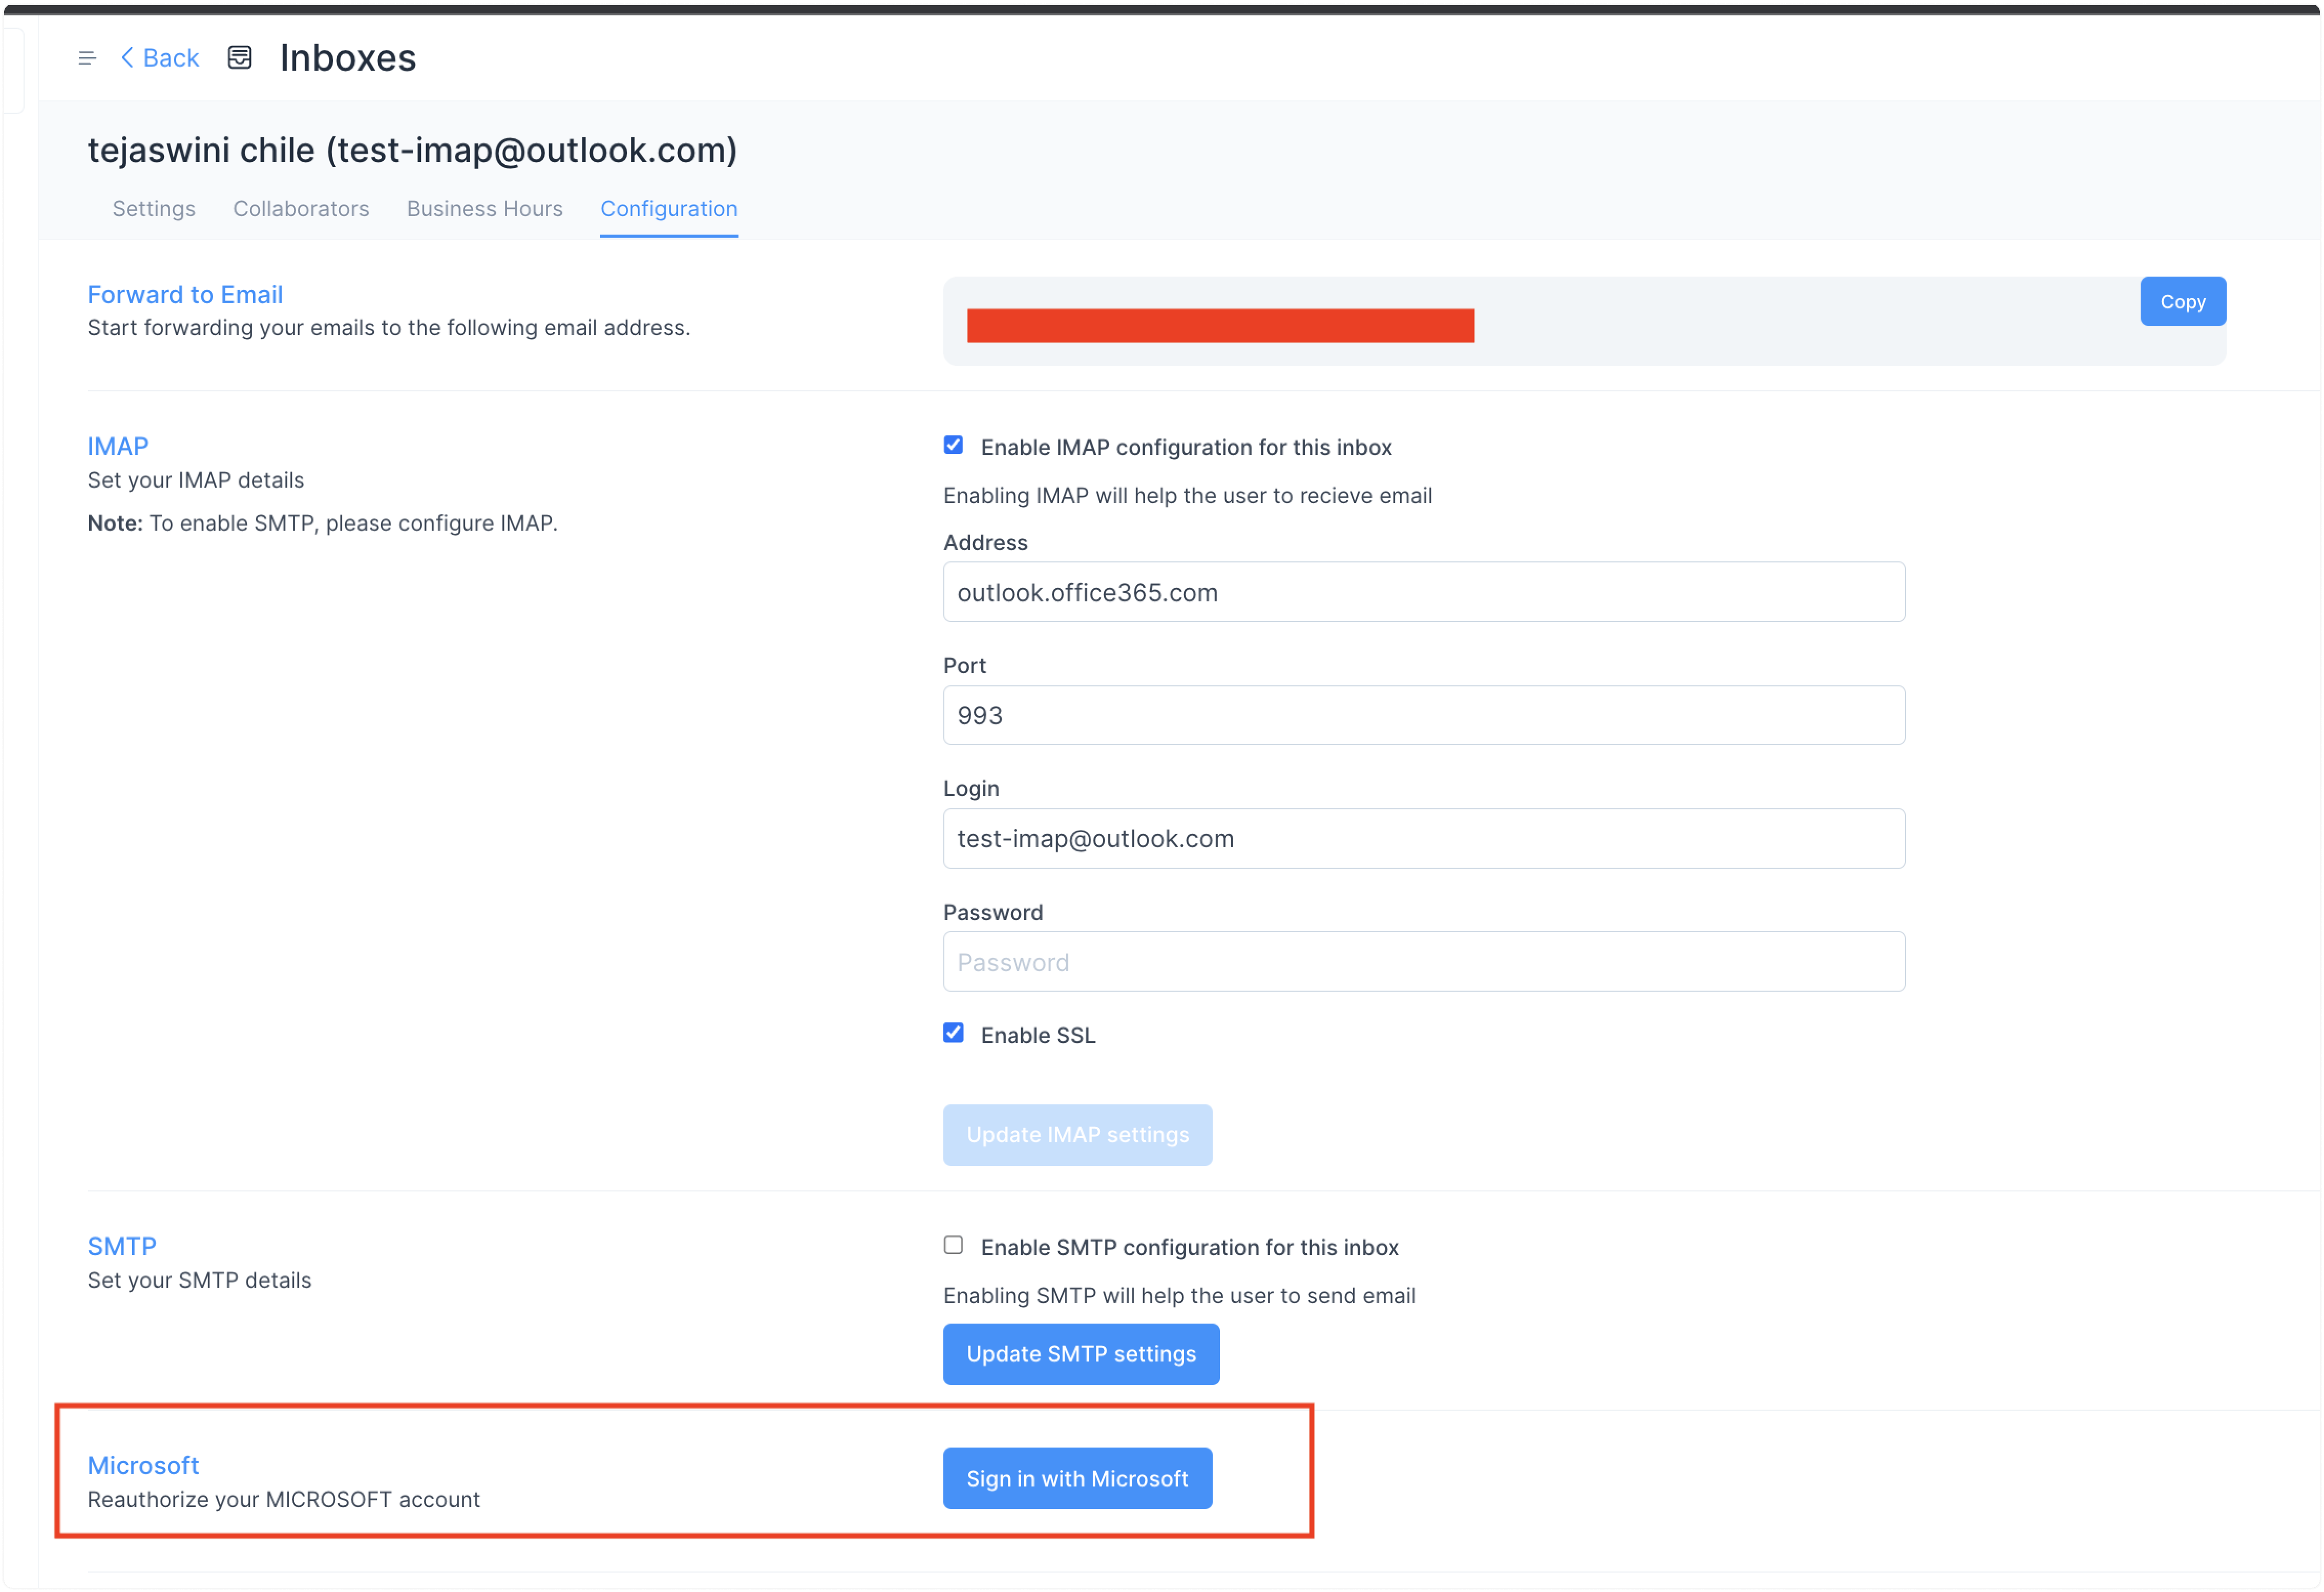
Step 5. Configure your email settings. Go to Settings → Inboxes → Email Inbox settings → Configuration tab.
Note: Please do not change anything in Settings for now, as we have used the default values for IMAP and SMTP. We will be making these fields non-editable soon for Outlook accounts.
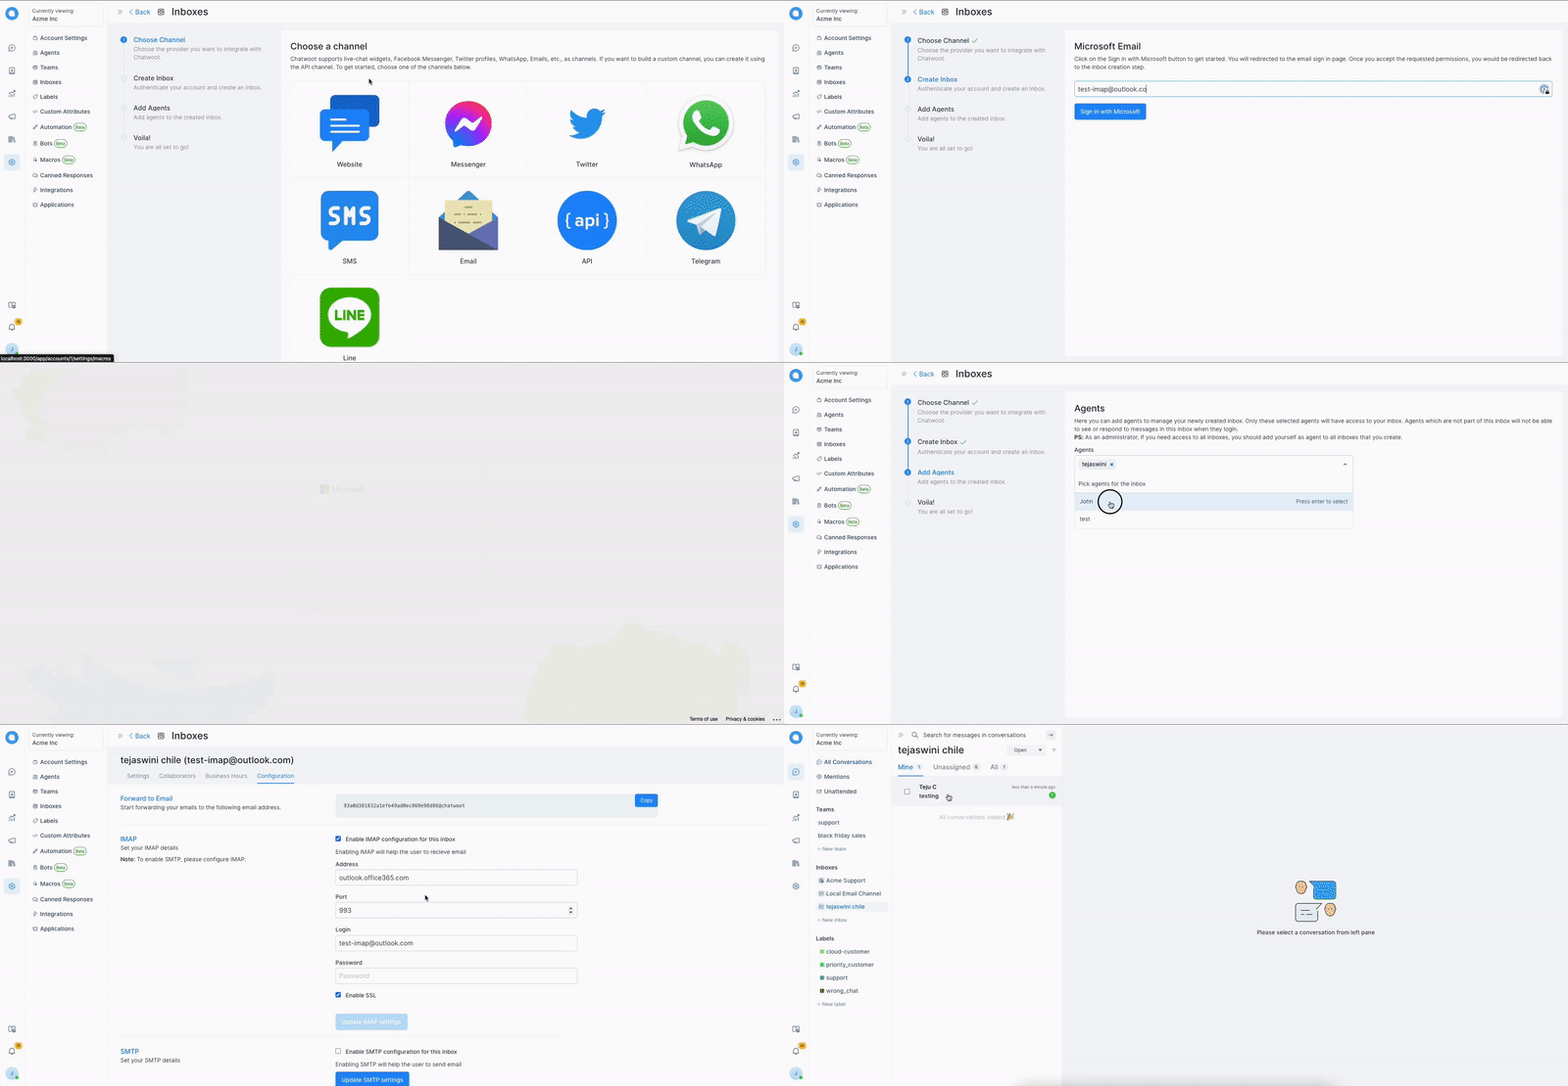
We use default IMAP settings to fetch emails and SMTP to send; you don't need to set anything through configuration.
Step 6. If your access token expires, you must re-authorize your Microsoft account by going to Settings -> Configuration.
