Teams let you organize your agents into groups based on their responsibilities. A user can be part of multiple teams. You can assign conversations to a team when you are working collaboratively.
To start adding teams, follow the steps described below.
Step 1. Go to Settings → Teams → Create new team.

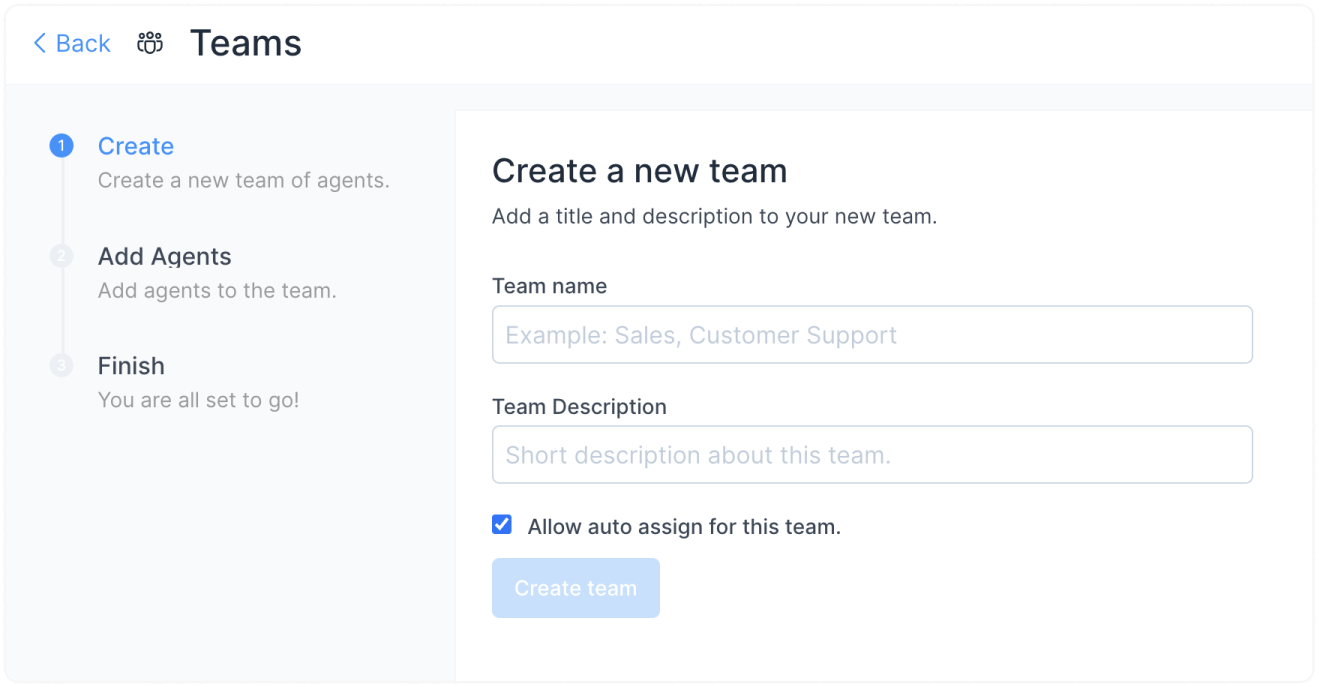
Step 2. You will see the screen shown below. Give your team a name and description as per your needs.

The fields are described here:
-
Team Name
Assign a name for the team. For e.g., Sales, Support, Engineering.
-
Team Description
Give a short description about the team. For e.g., Team to resolve queries related to sales of Hopkins products.
-
Auto assign check box
Tick this box if you would like to auto assign the conversations to this team. If this is not ticked, the conversation will remain as unassigned.
Click "Create Team".
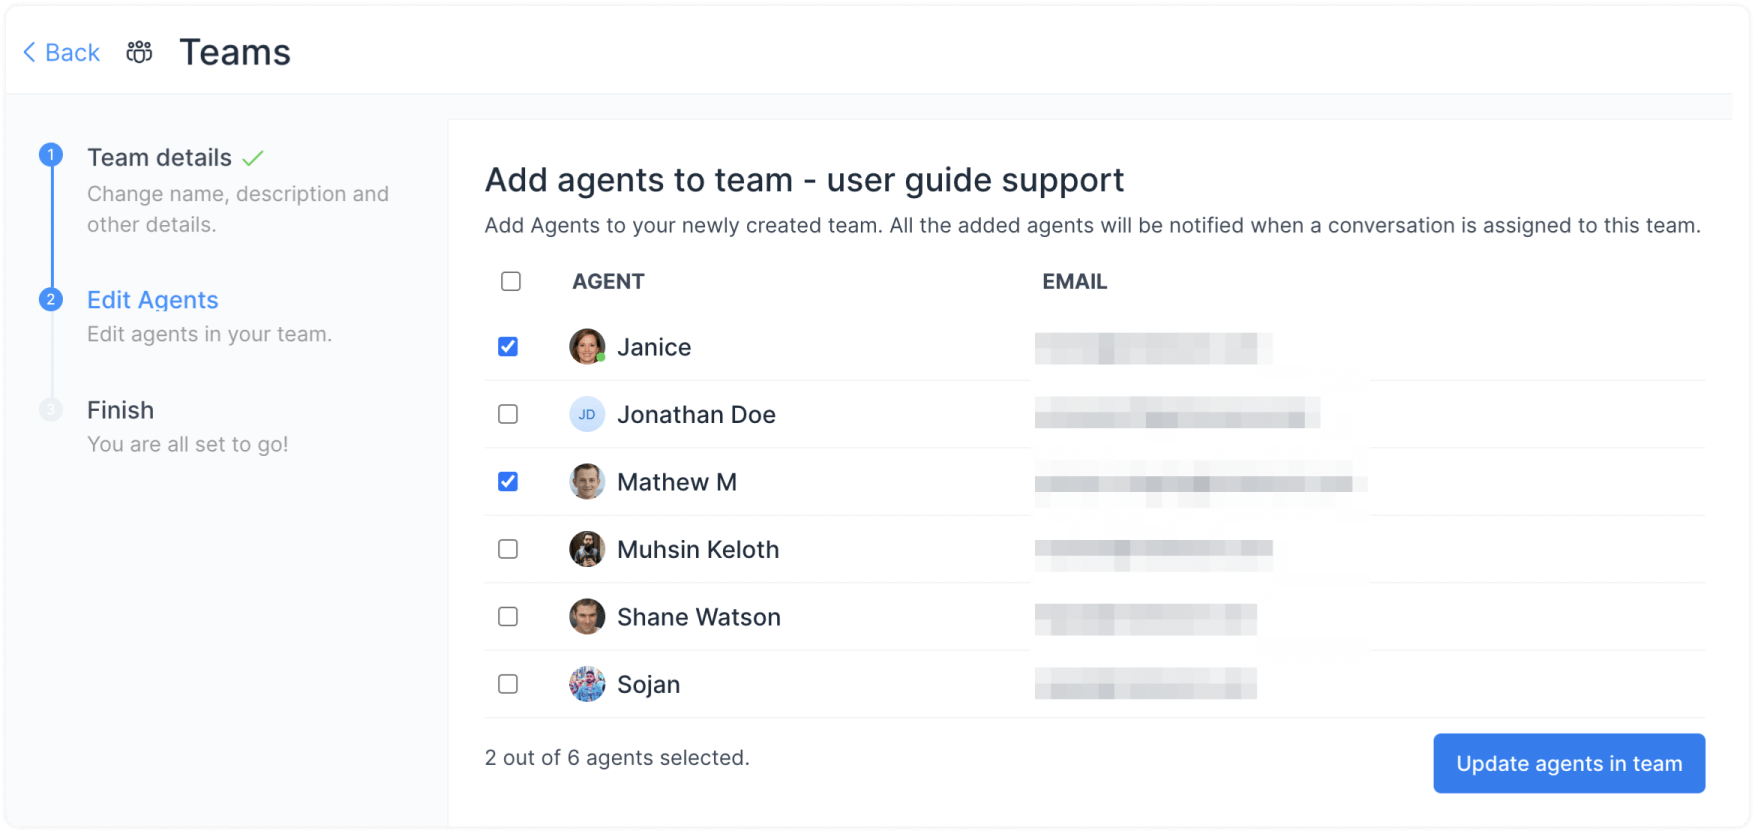
Step 3. Add agents to this team. Whenever a conversation is assigned to this team, all the added agents will be notified. Select the Checkboxes for Agents needed for this team.

Click on ‘Add Agents’. Only these agents will be able to see these teams on their screen.
Step 4. Click on 'Finish' on the next screen.
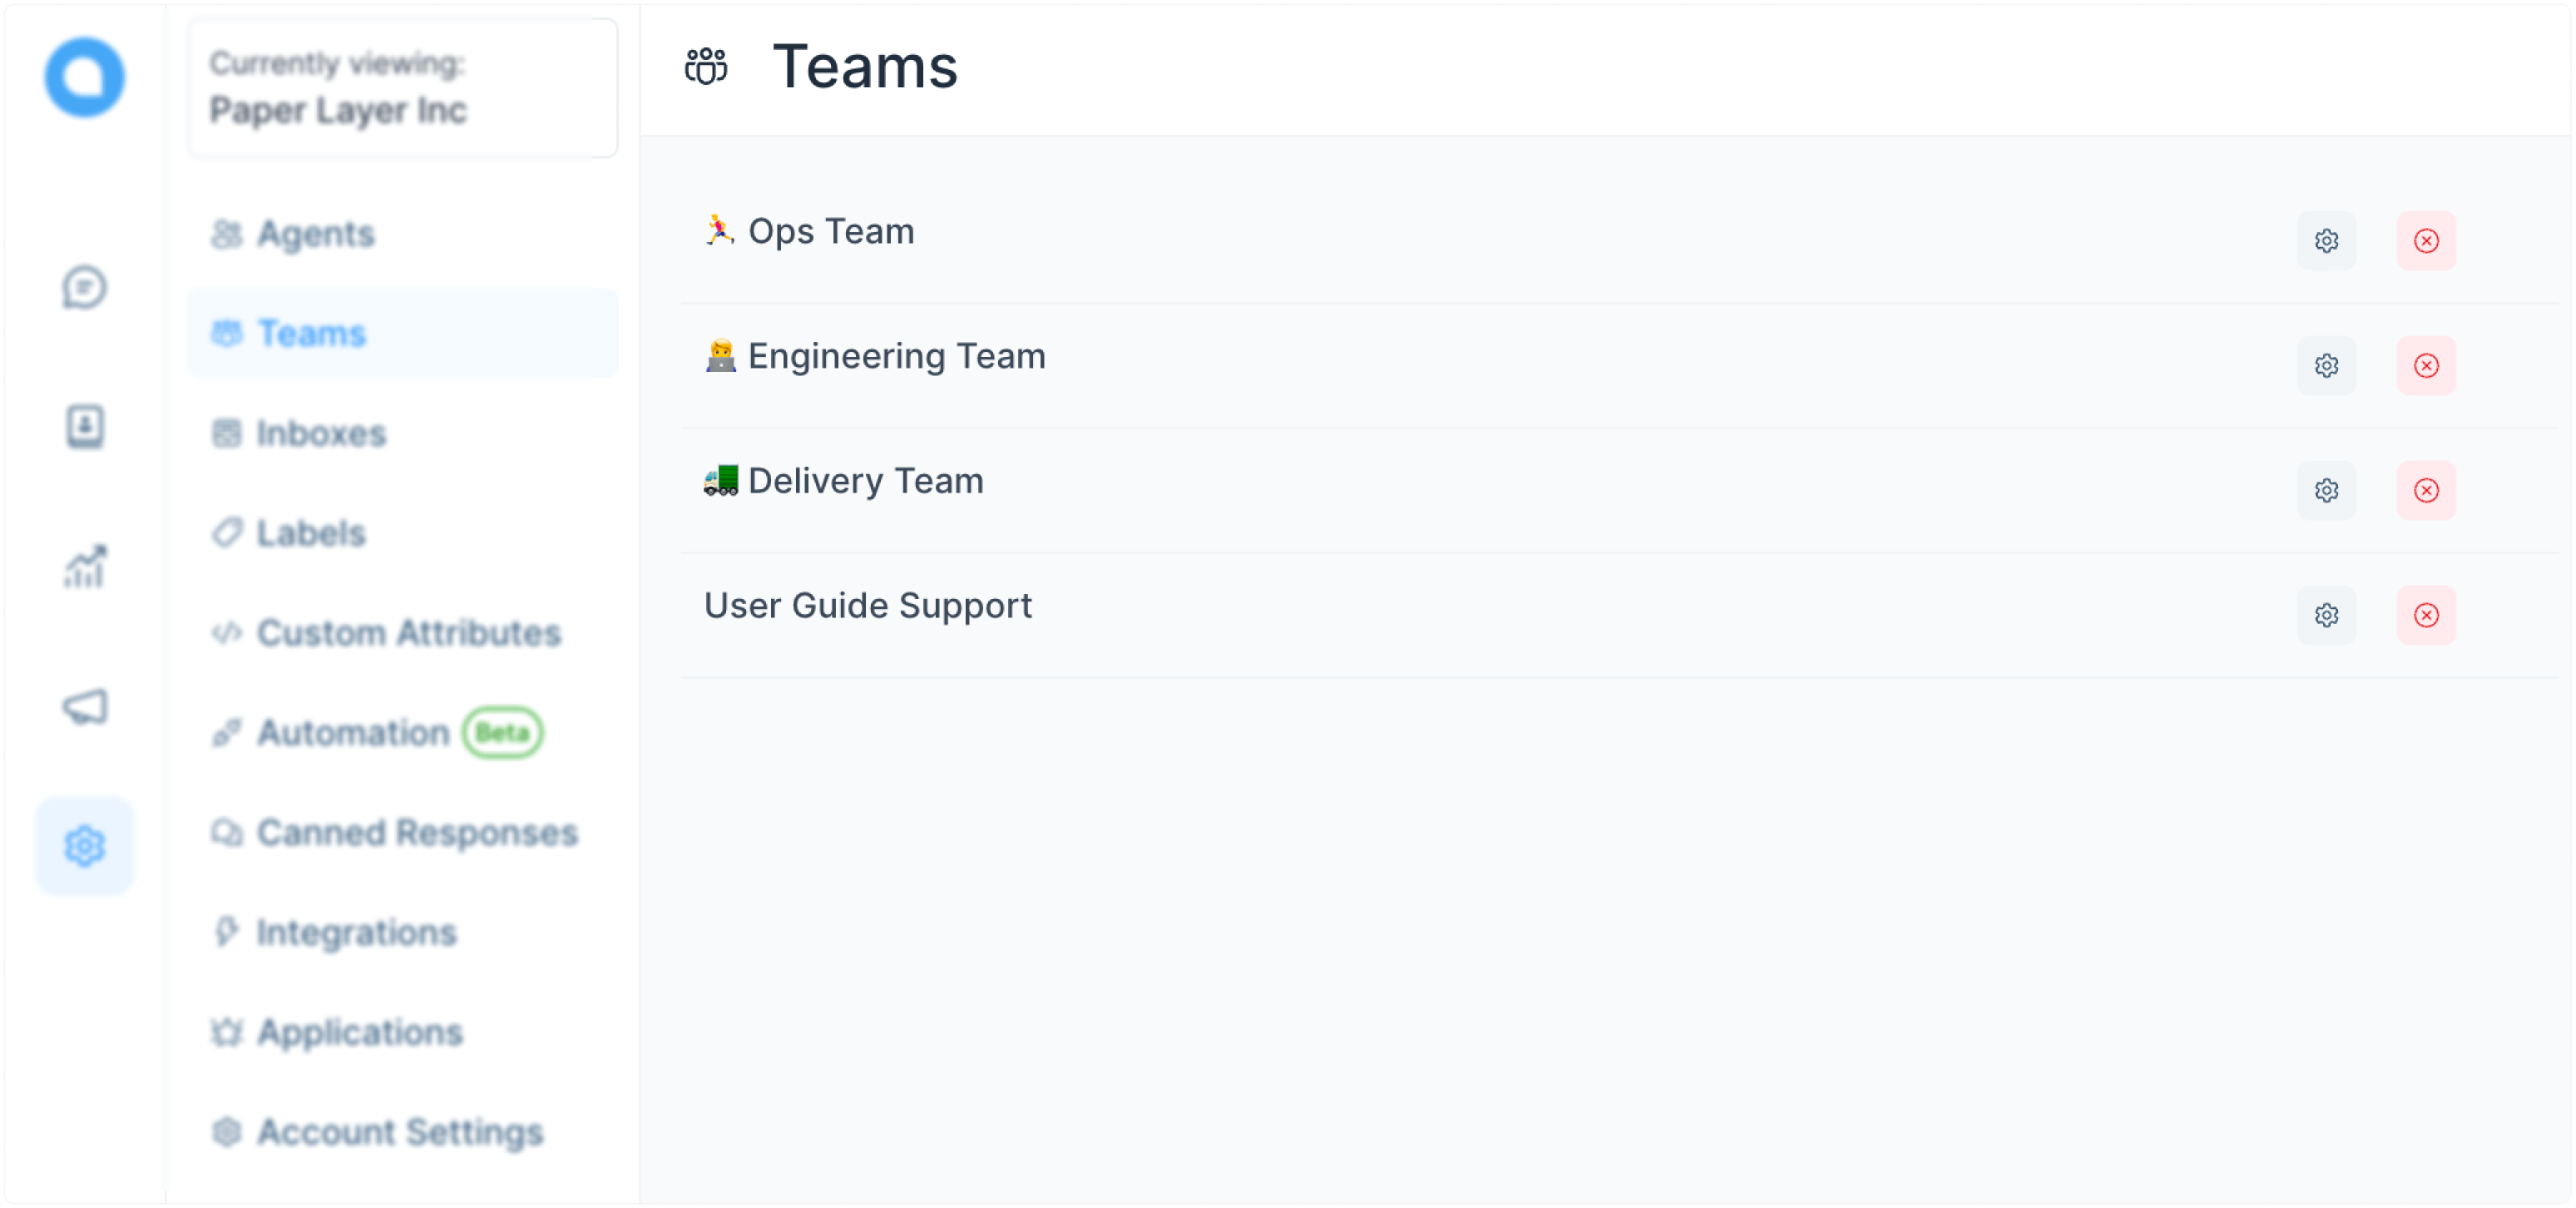
You will be able to see the team added to your list of teams.

How to modify or delete a team?
Step 1. Open the list of your teams from Settings → Teams. Locate the team you want to edit. Click the Edit button (pencil icon) if you want to edit it. Click the delete button (red cross icon) if you want to delete it.

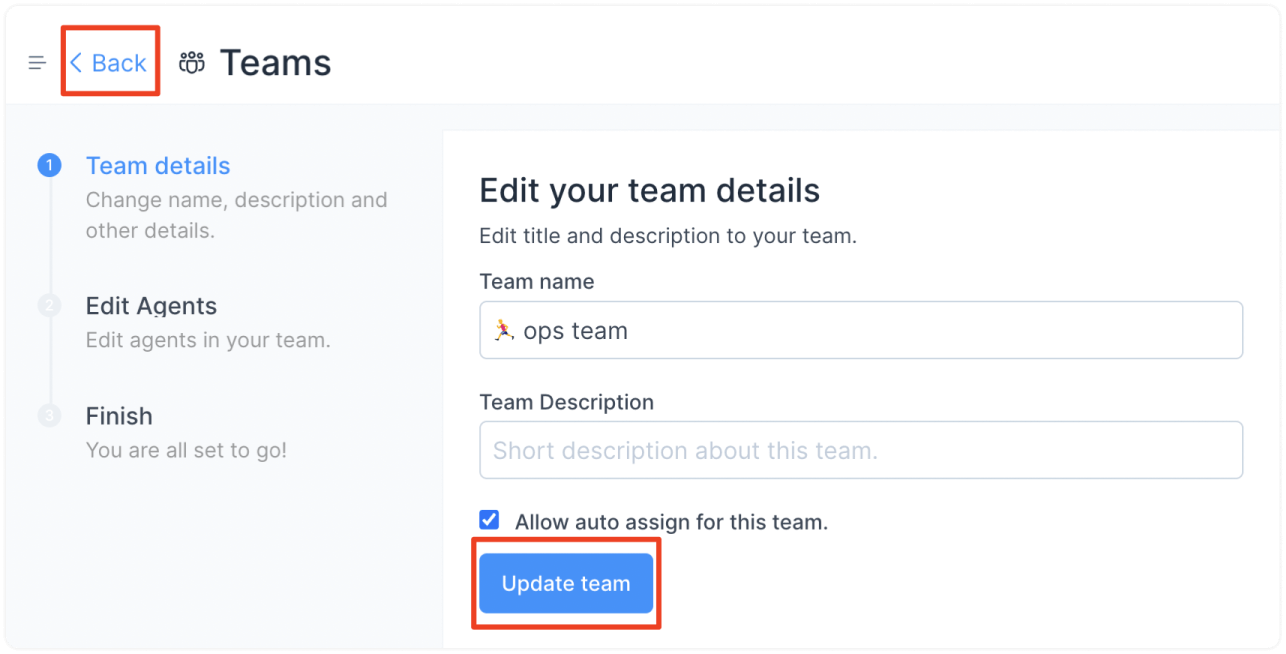
Step 2. If you are editing the team's info, you will be taken through the same steps while adding a team. Edit information as needed. Click on the update button. If you want to discard the changes, click the "Back" button from the top-left of screen.
